Mis Meta key with is ALT in windows or Linux, Option Key in Mac OSCis Control keySis shift keysis Super key i.e., Command key (⌘) in Mac, Window Key (❖) in Windows or LinuxHis Hyper key. This key can be configured if you fancy it. please checkout - http://ergoemacs.org/emacs/emacs_hyper_super_keys.html
| keys | Movements | |
|---|---|---|
| C-a | Move to beginning of line. | |
| M-m | Move to first non-whitespace character on the line. | |
| C-e | Move to end of line. | |
| C-f | Move forward one character. | |
| C-b | Move backward one character. | |
| M-f | Move forward one word (I use this a lot). | |
| M-b | Move backward one word (I use this a lot, too). | |
| C-s | Regex search for text in current buffer and move to it. Press C-s again to move to next match. | |
| C-r | Same as C-s, but search in reverse. | |
| M-< | Move to beginning of buffer. | |
| M-> | Move to end of buffer. | |
| M-g g | Go to line. | |
| C-n (n for Next) | Moving to the next line | |
| C-p (p for Previous) | Moving to the previous line | |
| C-f (f for Forward) | Moving one character forward | |
| C-b (b for Backward) | Moving one character backward | |
| M-f (f for Forward) | Moving one word forward | |
| M-b (b for Backward) | Moving one word backward | |
| C-a | Moving to the start of a line | |
| C-e (e for End) | Moving to the end of a line | |
| M-a | Moving to the start of a sentence | |
| M-e (e for End) | Moving to the end of a sentence | |
| C-v (or PgDn) | Moving one page down | |
| M-v (or PgUp) | Moving one page up | |
| M-< (Alt + Shift + “<”) | Moving to the beginning of the file | |
| M-> (Alt + Shift + “>”) | Moving to the end of the file | |
| C-u C-SPC | go to previous cursor position of the same buffer | |
| C-x C-SPC | go to previous cursor position between buffers |
| keys | description |
|---|---|
| C-SPC | set mark |
| Keys | Description |
|---|---|
| C-w | Kill region. |
| M-w | Copy region to kill ring. |
| C-y | Yank. |
| M-y | Cycle through kill ring after yanking. |
| M-d | Kill word. |
| C-k | Kill line. |
| C-u o w [In dired mode] | [In dired-mode] To copy the file name at point with path |
| w [In dired mode] | [In dired mode] to copy file name at point |
| Keys | Description |
|---|---|
| C-d | Delete a character |
| M-d | Delete a word forward |
| M-BackSpace | Delete a word backward |
| keys | Description |
|---|---|
| M-l | Convert following word to lower case (downcase-word). |
| M-u | Convert following word to upper case (upcase-word). |
| M-c | Capitalize the following word (capitalize-word). |
| C-x C-l | Convert region to lower case (downcase-region). |
| C-x C-u | Convert region to upper case (upcase-region). |
| Keys | Description |
|---|---|
| C-x 2 | split-window-below (vertically) |
| C-x 3 | split-window-right (horizontally) |
| C-x 0 | delete-window (this one) |
| C-x 1 | delete-other-windows |
| C-x o | other-window (moves foxus to the next window |
| Keys | Description |
|---|---|
| C-s | Start a forward search. |
| C-r | Start a reverse search. |
| M-% | Query-replace |
| Keys | Description |
|---|---|
| C-x u | Undo |
| C-_ | Undo |
| C-/ | Undo |
| C-S-/ | Redo |
| Keys | Description |
|---|---|
| C-c M-n | Switch to namespace of current buffer. |
| C-x C-e | Evaluate expression immediately preceding point. |
| C-c C-k | Compile current buffer. |
| C-c C-d C-d | Display documentation for symbol under point. |
| M-. and M-, | Navigate to source code for symbol under point and return to your original buffer |
| C-c C-d C-a | Apropros search; find arbitrary text across function names and documentation. |
| Keys | Des |
|---|---|
| C-up, C-down | Cycle through REPL history. |
| C-enter | Close parentheses and evaluate. |
| Keys | Description |
|---|---|
| C-right | Slurp; move closing parenthesis to the right to include nextexpression. |
| C-left | Barf; move closing parenthesis to the left to exclude lastexpression. |
| C-M-f | Move to the opening/closing parenthesis. |
| C-M-b | Move to the opening/closing parenthesis. |
| M-( | Surround expression after point in parentheses(paredit-wrap-round). |
| M-x paredit-mode | Toggle paredit mode |
| keys | Desc |
|---|---|
| // | when on remote, cd to remote root. |
| / C-j | select local root. |
| ~ | when on remote, cd to remote home. |
| / C-j ~ | when on remote, cd to local home. |
| M-o c | copy file |
| M-o d | dired |
| Keys | Desc |
|---|---|
| S-<right> | mark as TODO or DONE |
| C-c C-c | Tag the bulltes |
| M-x org-agenda | filter through tags and todo’s |
You might also be interested in the Magit Reference Card (pdf).
These commands are for navigation and to change the visibility of sections.
| Key | Description |
|---|---|
TAB | toggle body of current section |
C-<tab> | cycle visibility of current section and its children |
M-<tab> | cycle visibility of all diff sections |
s-<tab> | cycle visibility of all sections |
1, 2, 3, 4 | show surrounding sections up to level N, hide deeper levels |
M-1, M-2, M-3, M-4 | globally show sections up to level N, hide deeper levels |
^ | goto parent section |
p | goto beginning of section, from there to previous section |
n | goto next section |
M-p | goto beginning of section, from there to previous sibling section |
M-n | goto next sibling section |
| Key | Description |
|---|---|
g | refresh current buffer and status buffer, possibly revert file-visiting buffers |
G | refresh all Magit buffers and revert all file-visiting buffers in repository |
q | bury the current Magit buffer, restoring previous window configuration |
C-u q | kill the current Magit buffer, restoring previous window configuration |
| Key | Description |
|---|---|
SPC | scroll up (1) |
DEL | scroll down (1) |
RET | show the thing at point in another buffer (2) |
j | jump somewhere (3) |
$ | show output of recent calls to git |
- (1) In most Magit buffers this scrolls the current buffer. In log buffers this instead scrolls the diff buffer shown in another window.
- (2) What is being shown depends on the context.
- (3) Where this jumps to depends on the context.
| Key | Description |
|---|---|
i | add a gitignore rule globally |
I | add a gitignore rule locally |
x | reset using --mixed |
C-u x | reset using --hard |
You can use these when you’re in the magit-status buffer. The list below can also be accessed by pressing h, so there’s no need to memorize this wiki page. Commands will open popup buffers listing infix arguments and suffix commands.
| Key | Description |
|---|---|
A | cherry-pick |
b | branch |
B | bisect |
c | commit |
d | diff |
E | ediff |
f | fetch |
F | pull |
h, ? | show popup of popups |
l | log |
m | merge |
M | remote |
o | submodule |
P | push |
r | rebase |
t | tag |
T | note |
V | revert |
w | apply patches |
C-u y | list refs (1) |
z | stash |
! | run git or gui tool |
- (1) Actually
yis bound to a popup/prefix command, but it is one of the few popups which default to a suffix command and therefore has to be called with a prefix argument to actually show the popup buffer.
| Key | Description |
|---|---|
a | apply the change at point |
k | discard the change at point |
s | stage the change at point |
S | stage all unstaged changes |
u | unstage the change at point |
U | unstage all staged changes (1) |
v | reverse the change at point |
- (1) Actually this asks for a commit to reset the index too. If you
just press
RET, then what this equivalent to unstaging everything. If that is too confusing then just bind this key tomagit-unstage-all.
These commands show diffs or manipulate the diff arguments used to generate the diffs in the current buffer.
| Key | Description |
|---|---|
RET | (on commit) show commit |
RET | (on stash) show stash |
d | show diffing popup |
D | show popup for changing diff arguments |
e | use ediff to stage, compare, or stage (dwim) |
E | show ediffing popup (for when dwimming fails) |
+ | show more context lines |
- | show less context lines |
0 | show default amount of context lines (three) |
The following commands can be used from the magit-rebase-popup which is activated using r
| Key | Description |
|---|---|
i | Start an interactive rebase sequence. |
f | Combine squash and fixup commits with their intended targets. |
m | Edit a single older commit using rebase. |
w | Reword a single older commit using rebase. |
k | Remove a single older commit using rebase. |
Whilst performing a rebase the following editing sequences are available.
| Key | Description |
|---|---|
C-c C-c | Finish the current editing session by returning with exit code 0. Git then uses the rebase instructions it finds in the file. |
C-c C-k | Cancel the current editing session by returning with exit code 1. Git then forgoes starting the rebase sequence. |
RET | Show the commit on the current line in another buffer and select that buffer. |
SPC | Show the commit on the current line in another buffer without selecting that buffer. If the revision buffer is already visible in another window of the current frame, then instead scroll that window up. |
DEL | Show the commit on the current line in another buffer without selecting that buffer. If the revision buffer is already visible in another window of the current frame, then instead scroll that window down. |
p | Move to previous line. |
n | Move to next line. |
M-p | Move the current commit (or command) up. |
M-n | Move the current commit (or command) down. |
r | Edit message of commit on current line. |
e | Stop at the commit on the current line. |
s | Meld commit on current line into previous commit, and edit message. |
f | Meld commit on current line into previous commit, discarding the current commit’s message. |
k | Kill the current action line. |
c | Use commit on current line. |
x | Insert a shell command to be run after the proceeding commit. |
y | Read an arbitrary commit and insert it below current line. |
C-x u | Undo some previous changes. Like undo but works in read-only buffers. |
If a rebase is already in progress then magit-rebase-popup offers the following commands.
| Key | Description |
|---|---|
r | Restart the current rebasing operation. |
s | Skip the current commit and restart the current rebase operation. |
e | Edit the todo list of the current rebase operation. |
a | Abort the current rebase operation, restoring the original branch. |
[2020-06-07 Sun 11:28]
[[http://www.howardabrams.com][ ]]
]]
Babblings of an aging geek in love with the Absurd, his family, and his own hubris.... oh, and Lisp.
The following is a transcript of the slides and demonstration of EShell I gave to both the PDX and London Emacs User groups. Hopefully this page will be easier to copy/paste…
John Wiegley created EShell in 1998:
…as a way to provide a UNIX-like environment on a Windows NT machine.
Part of Emacs since v21.
Personally?
- Started with
ksh - Used a lot of shells…
- Tried
eshellsoon after its birth - Shelved it since it wasn’t shell-enough
- Rediscovered years later
- Finally got it…
Contents: What’s all this then?
- What EShell really is
- How to use it effectively
- Hacking
- Can be immensely powerful… at times
- Pipes and redirection are a staple
- Utilizing small, focused text-oriented executables
- Complex command re-invocation
- History okay … nothing like Emacs
- Commands? Like key sequences, only longer
- Needing completion to run commands?
- Loops? Not terrible
- Copy and pasting … with a mouse!? (at least use
M-x shell)
- Best part: extensibility!
- But what an awful language:
if [ $( echo "$IN" | cut -c 1-3 ) == 'abc' ]; then # ... fi - May be Turing complete, but so what.
But, but, but… we know the shell!
Seen Rich Hickey’s Simple Made Easy talk? The shell is easy because it is so close.
Python REPL with shell-like features.
- Understands a current directory
- Has some shell-like commands,
cat - Doesn’t easily execute programs:
system - Executes Python scripts:
run
Demonstrated the iPython approach by entering the following into an ipython REPL:
Python 2.7.12 (default, Nov 19 2016, 06:48:10)
Type "copyright", "credits" or "license" for more information.

IPython 2.4.1 -- An enhanced Interactive Python.
?         -> Introduction and overview of IPython's features.
%quickref -> Quick reference.
help      -> Python's own help system.
object?   -> Details about 'object', use 'object??' for extra details.

In [1]: 2 ** 60
Out[1]: 1152921504606846976

In [2]: cd /tmp/testing
/tmp/testing

In [3]: ls
pi.py  pi.rb  README  src/  tests/

In [4]: cat pi.py
import math

print(math.pi)
print(math.cos(math.pi))

In [5]: chmod a+x pi.py
  File "", line 1
    chmod a+x pi.py
          ^
SyntaxError: invalid syntax


In [6]: run pi
3.14159265359
-1.0

In [7]: system ruby pi.rb
Out[7]: ['-0.9999999999964793', '-3.141592653589793']

In [8]: cat README
Ciao, all you cool cats.
Oh, and hey to all my dawgs.

In [9]: def cat(arg=None):
   ...:     return 'Meow!'
   ...:

In [10]: cat
Out[10]:

In [11]: cat()
Out[11]: 'Meow!'

In [12]: cat README
  File "", line 1
    cat README
             ^
SyntaxError: invalid syntax
In answer to your question, I haven’t looked to see why we have an array when calling the system function.
If you want to see what shell-like functions iPython has, type % and hit the Tab key, which shows something like:
In [13]: %
Display all 122 possibilities? (y or n)
%%!                      %doctest_mode            %pfile
%%HTML                   %ed                      %pinfo
%%SVG                    %edit                    %pinfo2
%%bash                   %env                     %popd
%%capture                %gui                     %pprint
%%debug                  %hist                    %precision
%%file                   %history                 %profile
%%html                   %install_default_config  %prun
%%javascript             %install_ext             %psearch
%%latex                  %install_profiles        %psource
%%perl                   %killbgscripts           %pushd
%%prun                   %ldir                    %pwd
%%pypy                   %less                    %pycat
%%python                 %lf                      %pylab
%%python2                %lk                      %quickref
%%python3                %ll                      %recall
%%ruby                   %load                    %rehashx
%%script                 %load_ext                %reload_ext
%%sh                     %loadpy                  %rep
%%svg                    %logoff                  %rerun
%%sx                     %logon                   %reset
%%system                 %logstart                %reset_selective
%%time                   %logstate                %rm
%%timeit                 %logstop                 %rmdir
%%writefile              %ls                      %run
%alias                   %lsmagic                 %save
%alias_magic             %lx                      %sc
%autocall                %macro                   %store
%autoindent              %magic                   %sx
%automagic               %man                     %system
%bookmark                %matplotlib              %tb
%cat                     %mkdir                   %time
%cd                      %more                    %timeit
%clear                   %mv                      %unalias
%colors                  %notebook                %unload_ext
%config                  %page                    %who
%cp                      %paste                   %who_ls
%cpaste                  %pastebin                %whos
%debug                   %pdb                     %xdel
%dhist                   %pdef                    %xmode
%dirs                    %pdoc
- Most “interactive language” interfaces choose:
- Language-specific REPL, or
- Shell-focused program worker
- As a shell:
- Concept of a current directory
popd,pushd, anddirs- Globbing Expressions
- Quotes often optional
- Do you care about spaces?
- Double and single quotes are interchangeable
- Aliases:
alias ll 'ls -l'
- Emacs shell interaction:
M-n/M-pscroll through historyM-rselect from historyC-c C-pmove to previous promptsC-c C-llist history in buffer
- Tempted to think
eshellis likeshell
At this point, we start an eshell process, and demonstrate some of the shell-like features that we’d expect for something that ends with -shell:
$ cd /tmp/testing

$ pwd
/tmp/testing

$ ls
README  pi.py  pi.rb  src  tests

$ cat README
Ciao, all you cool cats.
Oh, and hey to all my dawgs.

$ ruby pi.rb
-0.9999999999964793
-3.141592653589793

$ python *.py
3.141592653589793
-1.0

$ echo "Hello"
Hello

$ echo 'Hello'
Hello

$ echo Hello
Hello

$ alias ee 'find-file-other-window $1'

$ ee pi.rb
#
This last example shows that ee opens a window in another window. Note, however, that the alias is actually calling an Emacs function, not another executable (although it could).
- Lisp expressions work within parens
- Unlike shell, EShell:
- Commands can be executables or Emacs functions
- Distinguishes strings, numbers, and lists
- EShell is marriage of two syntax parsers:
- Shell Expressions
- Lisp Expressions
- A single line can mix the two!
To demonstrate how eshell is a REPL, let’s type a simple Lisp expression:
$ (length "hi")
2

$ length "hi"      # ← Works since shell parser calls Lisp
2

$ length hi        # ← Works since shell reads as string
2

$ (+ 1 3)
4

$ + 1 3            # ← Works since shell reads as number
4

$ * 3 (+ 1 2)      # ← Shows both shell and lisp parsers
9

$ ls
README  pi.py  pi.rb  src  tests

$ length *        # Globs return a list
5

$ length *.py
1

$ touch 'and go.py'

$ ls *.py
and go.py  pi.py

$ echo *.py        # ← More clear that globs are lists
("and go.py" "pi.py")
- Lisp parser:
( ... )$( ... )… useful for string evaluation
- Shell parser:
- no parens … in other words, the default
{ ... }${ ... }… useful for string evaluation
- In shell parser, reference variables with
$
To drive home the differences between shell and lisp parsers, let’s enter the following in eshell buffer:
$ setq ANSWER 42   # ← Normal Emacs variable
42

$ numberp $ANSWER  # ← Use $ to get value.
t

$ setq UNANSWER "41"
41

$ stringp $UNANSWER
t

$ mod ANSWER 5    # ← Forgot the $ with shell parser
Wrong type argument: number-or-marker-p, "ANSWER"

$ mod $ANSWER 5   # ← Math without expr
2

$ (mod ANSWER 5)  # ← Lisp doesn't need $ for vars
2

$ (mod $ANSWER 5)
Symbol's value as variable is void: $ANSWER

$ echo $UNANSWER:$ANSWER
41:42

$ echo $UNANSWER:(mod ANSWER 5)   # ← Let's talk about predicate filters later in the show
Malformed modification time modifier `m'

$ echo $UNANSWER:$(mod ANSWER 5)
41:2

$ echo $ANSWER:${mod $ANSWER 5}
42:2
- Syntactic sugar around
loop. - Code following
inis a generate list - Use trailing
{ ... }for side-effects
See this page for more details.
Show off the for concept, by entering the following in an eshell buffer. Note that the do syntax for some shells doesn’t work. Loops look more like csh’s:
$ for F in *; do echo "I like $F"; done
Symbol's value as variable is void: do
done: command not found

$ for F in * { echo "I like $F" }
I like README
I like and go.py
I like pi.py
I like pi.rb
I like src/
I like tests/

# A list can be generated in any way, like with Lisp:
$ for N in (number-sequence 1 5) { % $ANSWER $N }
0
0
0
2
2

# Generate the list with eshell parser syntax:
$ for N in {number-sequence 1 5} { % $ANSWER $N }
0
0
0
2
2

# Note: Can't use Lisp as the loop's action:
$ for N in {number-sequence 1 5} (% ANSWER N)

# Unless you embed the Lisp in shell parser:
$ for N in {number-sequence 1 5} {(% ANSWER N)}
0
0
0
2
2
What about the executable find vs. Emacs’ find function?
Precedence Order:
- Eshell aliases
- Emacs functions that being with
eshell/prefix - Normal Emacs functions (don’t need to be
interactive) - Shell executables
Of course, this is customizable:
eshell-prefer-lisp-functionsprefer Lisp functions to external commandseshell-prefer-lisp-variablesprefer Lisp variables to environmentals
To demonstrate the precedence order for eshell commands, I created a script called foobar that simply contains:
# !/bin/ sh

echo  "Called: executable"
Without anything else, this will be called:
$ which foobar
/home/howard/bin/foobar

$ foobar
Called: executable
We now create a regular Emacs function in Lisp (notice that it isn’t interactive):
( defun  foobar  ()
  "Called: function" )
It now takes precedence over the executable:
$ which foobar
foobar is a Lisp function

$ foobar
Called: function
Create another Lisp function, this has the eshell/ prefix. Again, no need to make interactive:
( defun  eshell/foobar  ()
  "Called: eshell function" )
And this new function over-shadows the others:
$ which foobar
eshell/foobar is a Lisp function

$ foobar
Called: eshell function
Finally, we define an alias, and demonstrate that it over-shadows all the others:
$ alias foobar 'echo "Called: alias"'

$ which foobar
foobar is an alias, defined as "echo "Called: alias""

$ foobar
Called: alias
- The
*glob-thing has filters - Great if you can remember the syntax:
.for files/for directoriesrif readablewif writableLfiltering based on file sizemfiltering on modification time
- The filters can be stacked, e.g.
.L - Can’t remember?
C-c M-qOr:eshell-display-predicate-help
Using a directory for this purpose, we can demonstrate EShell’s predicate filter feature. First, list all files:
$ ls *(.)
README  and go.py  pi.py  pi.rb

$ ls *(^/)   # ← Inverse of directories are often files
README  and go.py  pi.py  pi.rb
Demonstrate combining modifiers by listing all files with more than 50 bytes to them:
$ ls *(.L+50)
README  pi.py
After creating three files (using the touch executable), we can list all empty files (that is, those that have less than 1 byte):
$ ls *(L-1)
and go.py  goo.py  grip.py  swam.py
Or those modified less than 40 seconds ago:
$ ls *(.ms-40)
README  and go.py  goo.py  grip.py  pi.py  pi.rb  src  swam.py  tests
Modified after we modified goo.py:
$ ls *(.m-'goo.py')
grip.py  swam.py
And before we modified goo.py:
$ ls *(.m+'goo.py')
README  and go.py  pi.py  pi.rb
I love this. I can get a list of my journal entries larger than 5000 bytes, and open dired showing only those files:
$ dired ~/journal/2017*(L+5000)
Syntactic sugar to convert strings and lists.
Can’t remember? C-c M-m Or: eshell-display-modifier-help
Eshell filters and modifiers remind me of regular expressions
Don’t know the eshell-way? Just drizzle Lisp.
Slide NotesConvert a string with a modifier:
$ echo "hello"(:U)
HELLO
Convert all files, as strings, in a list:
$ echo *(:U)
("README" "AND GO.PY" "GOO.PY" "GRIP.PY" "PI.PY" "PI.RB" "SRC/" "SWAM.PY" "TESTS/")
Modifiers can be combined with filters:
$ echo *(.L-1:U)
("AND GO.PY" "GOO.PY" "GRIP.PY" "SWAM.PY")
However, we often split these and use the for loop:
$ for F in *(.L-1) { mv $F $F(:U) }

$ ls
AND GO.PY  GOO.PY  GRIP.PY  README  SWAM.PY  pi.py  pi.rb  src  tests
Now, all empty files are in upper case.
You’d think you could reverse a list with:
$ echo ("hello" "cruel" "world")(:R)
No matches found: ("hello" "cruel" "world")
Since the shell parser doesn’t like that syntax, perhaps you could set the list to a variable and work with that?
$ setq BADDABING (list "hello" "cruel" "world")
("hello" "cruel" "world")

$ echo $BADDABING(:R)
("world" "cruel" "hello")
If you find this stuff too odd and confusing, you can always fall back to Lisp:
$ reverse (list "hello" "cruel" "world")
("world" "cruel" "hello")
While offering similar shell experience, Eshell is really hackable!
Here are some ideas…
- Functions for Eshell:
eshell/ - They do not need to be
interactive - Functions should assume
&restfor arguments:( defun eshell/do-work ( &rest args ) "Do some work in an optional directory." ( let ((some-dir ( if args ( pop args ) default-directory ))) (message "Work in %s" some-dir )))
Using &rest allows your functions to behave more like shell functions:
$ do-work
Work in /tmp/testing/

$ do-work /home/howard/bin
Work in /home/howard/bin
To have eshell work on a remote server:
( let  ((default-directory  "/ssh:your-host.com:public/" ))
  (eshell ))
My personal project:
- Connect to my hypervisor controller
- Download and store a list of virtual machines
- Use
ido-completing-readto select a host / ip - Generate a Tramp URL for
default-directory

Here is a simplified example that might be a helpful start:
( defvar  eshell-fav-hosts  (make-hash-table  :test 'equal )
  "Table of host aliases for IPs or other actual references." )

(puthash  "web-server"  "172.217.4.14" eshell-fav-hosts )
(puthash  "slc-jumpbox"  "10.93.254.176" eshell-fav-hosts )
;;  ...

( defun  eshell-favorite  (hostname  &optional root dir )
  "Start an shell experience on HOSTNAME, that can be an alias to
a virtual machine from my 'cloud' server. With prefix command,
opens the shell as the root user account."
  ( interactive
   (list
    (ido-completing-read  "Hostname: "
                         (hash-table-keys  (eshell-fav-hosts )))))

  ( when  (equal current-prefix-arg ' ( 4 ))
    ( setq root t ))
  ( when  (not dir )
    ( setq dir  "" ))

  ( let*  ((ipaddr  (gethash hostname eshell-fav-hosts hostname ))
         (trampy  ( if  (not root )
                     (format  "/ssh:%s:%s"       ipaddr dir )
                   (format  "/ssh:%s|sudo:%s:%s" ipaddr ipaddr dir )))
         (default-directory trampy ))
    (eshell )))
The User predicate (U) could have been written:
( defun  file-owned-current-uid-p  (file )
  ( when  (file-exists-p file )
      (=  (nth  2  (file-attributes file ))
         (user-uid ))))
Then add it:
(add-hook 'eshell-pred-load-hook  ( lambda  ()
  (add-to-list 'eshell-predicate-alist
          ' (?U . 'file-owned-current-uid-p ))))
My engineering notebook is a directory of files.
Most of my files have #+FILETAGS entries.
I can filter based on these tag entries.
I have to parse text following predicate key.
Slide NotesAssuming the pi.py script is owned by the root user, we can show which ones I own:
$ ls *(.U)
AND GO.PY  GOO.PY  GRIP.PY  README  SWAM.PY  pi.rb
And which ones I don’t:
$ ls *(^U)
pi.py
My engineering notes contains quite a few files:
$ length ~/technical/*(.)
598
For instance, one file in my engineering notebook starts with:
 #+TITLE:   Perfect Square
 #+AUTHOR:  Howard Abrams
 #+EMAIL:   [email protected]
 #+DATE:    2013 Jun 06
 #+FILETAGS:   programming clojure

Haitao posed a question: How do you write a function that determines
if a number is a   perfect square.  You know, 9 and 25 are both perfect
squares because their square roots are natural integers.

While I have a brute force approach with an imperative loop in my
head, I'm curious if I could do it with Lisp...
Notice the line that starts with #+FILETAGS: … I can get the files that contain a word on this line, with my new T predicate:
$ length ~/technical/*(.T'clojure')
45
Pipes for shell are flexible, but…
- Shell’s text processing is limited
- Need arsenal of tiny, cryptic programs
- Re-run many times since debug pipe steps
Emacs is pretty good at text processing
keep-lines/flush-linesinstead ofgrepreplace-string, et. al instead ofsed
In EShell, redirect output to Emacs buffer:
$ some-command > #
After editing the buffer, use it:
$ bargs # mv % /tmp/testing
Reference buffers as # with:
( setq eshell-buffer-shorthand t )
Or use keybinding, C-c M-b
To demonstrate this feature, I first put a string in a new buffer, fling:
$ echo hello > #
And displayed the buffer contents just to be sure.
Next, let’s overwrite the contents of that buffer:
$ ls -1 > #
Now I call keep-lines to choose only the python files, and flush-lines to remove all files that contain go.
To show that I can now get the remaining files, I pass them to echo with:
$ bargs # echo
("GRIP.PY" "SWAM.PY" "pi.py")
I might actually do something like this with the function (notice the % character will be substituted with the list of files):
$ mkdir oddities

$ bargs # mv % oddities

$ ls oddities
GRIP.PY  SWAM.PY  pi.py
Initial implementation of bargs:
( defun  eshell/-buffer-as-args  (buffer separator command )
  "Takes the contents of BUFFER, and splits it on SEPARATOR, and
runs the COMMAND with the contents as arguments. Use an argument
`%' to substitute the contents at a particular point, otherwise,
they are appended."
  ( let*  ((lines  ( with-current-buffer buffer
                  (split-string
                   (buffer-substring-no-properties  (point-min )  (point-max ))
                  separator )))
         (subcmd  ( if  (-contains? command  "%" )
                     (-flatten  (-replace  "%" lines command ))
                   (-concat command lines )))
         (cmd-str   (string-join subcmd  " " )))
    (message cmd-str )
    (eshell-command-result cmd-str )))

( defun  eshell/bargs  (buffer  &rest command )
  "Passes the lines from BUFFER as arguments to COMMAND."
  (eshell/-buffer-as-args buffer  "\n" command ))

( defun  eshell/sargs  (buffer  &rest command )
  "Passes the words from BUFFER as arguments to COMMAND."
  (eshell/-buffer-as-args buffer nil command ))
- Advantages:
- Similar shell experience between operating systems
- Much more extendable, hackable and funner
- Disadvantages:
- Pipes go through Emacs buffers… not efficient
- Programs that need special displays:
(add-to-list 'eshell-visual-commands "top" )For commands that have options that trigger curses/pager:
(add-to-list 'eshell-visual-options ' ( "git" "--help" ))If command has a ncurses/pager sub-commands, use:
(add-to-list 'eshell-visual-subcommands
  ' ( "git"  "log"  "diff"  "show" ))
Also set
eshell-destroy-buffer-when-process-dies.My goal was to inspire potential hackery…
- [[/formmail/mail?to=howardism][
 ]]
]] - [[/index.xml][
 ]]
]] - [[http://github.com/howardabrams][
 ]]
]] - [[http://www.linkedin.com/in/howardeabrams][
 ]]
]] - [[http://youtube.com/user/howardabrams][
 ]]
]] - [[http://twitter.com/howardabrams][
 ]]
]]


[2020-06-11 Thu 11:36]
Using universal ctags is as simple as:
- Run over a project ( =-R= is to walk the project recursively, and =-e= is to use Emacs-compatible syntax):
$ ctags -eRAlternatively if you like to only include files with certain extensions, you can use
-a(append, creates a file if doesn’t exist) option withfindutility, like:$ find -name "*.cpp" -print -or -name "*.h" -print -or -name "*.hxx" -print -or -name "*.cxx" -print | xargs ctags -ea - Run M- x visit-tags-table in Emacs, and navigate to the created TAGS file.
[2020-06-24 Wed 08:48]
- 1. How To Use This Document
- 2. License
- 3. Change History - What’s new
- 4. Getting Started
- 5. Tasks and States
- 6. Adding New Tasks Quickly with Org Capture
- 7. Refiling Tasks
- 8. Custom agenda views
- 9. Time Clocking
- 10. Time reporting and tracking
- 11. Tags
- 12. Handling Notes
- 13. Handling Phone Calls
- 14. GTD stuff
- 15. Archiving
- 16. Publishing and Exporting
- 17. Reminders
- 18. Productivity Tools
- 18.1. Abbrev-mode and Skeletons
- 18.2. Focus On Current Work
- 18.3. Tuning the Agenda Views
- 18.4. Checklist handling
- 18.5. Backups
- 18.6. Handling blocked tasks
- 18.7. Org Task structure and presentation
- 18.8. Attachments
- 18.9. Deadlines and Agenda Visibility
- 18.10. Exporting Tables to CSV
- 18.11. Minimize Emacs Frames
- 18.12. Logging stuff
- 18.13. Limiting time spent on tasks
- 18.14. Habit Tracking
- 18.15. Habits only log DONE state changes
- 18.16. Auto revert mode
- 18.17. Handling Encryption
- 18.18. Speed Commands
- 18.19. Org Protocol
- 18.20. Require a final newline when saving files
- 18.21. Insert inactive timestamps and exclude from export
- 18.22. Return follows links
- 18.23. Highlight clock when running overtime
- 18.24. Meeting Notes
- 18.25. Remove Highlights after changes
- 18.26. Getting up to date org-mode info documentation
- 18.27. Prefer future dates or not?
- 18.28. Automatically change list bullets
- 18.29. Remove indentation on agenda tags view
- 18.30. Fontify source blocks natively
- 18.31. Agenda persistent filters
- 18.32. Add tags for flagged entries
- 18.33. Mail links open compose-mail
- 18.34. Composing mail from org mode subtrees
- 18.35. Use smex for M-x ido-completion
- 18.36. Use Emacs bookmarks for fast navigation
- 18.37. Using org-mime to email
- 18.38. Remove multiple state change log details from the agenda
- 18.39. Drop old style references in tables
- 18.40. Use system settings for file-application selection
- 18.41. Use the current window for the agenda
- 18.42. Delete IDs when cloning
- 18.43. Cycling plain lists
- 18.44. Showing source block syntax highlighting
- 18.45. Inserting Structure Template Blocks
- 18.46. NEXT is for tasks
- 18.47. Startup in folded view
- 18.48. Allow alphabetical list entries
- 18.49. Using orgstruct mode for mail
- 18.50. Using flyspell mode to reduce spelling errors
- 18.51. Preserving source block indentation
- 18.52. Prevent editing invisible text
- 18.53. Use utf-8 as default coding system
- 18.54. Keep clock durations in hours
- 18.55. Create unique IDs for tasks when linking
- 19. Things I Don’t Use (Anymore)
- 20. Using Git for Automatic History, Backups, and Synchronization
Org-mode is a fabulous organizational tool originally built by Carsten Dominik that operates on plain text files. Org-mode is part of Emacs.
This document assumes you’ve had some exposure to org-mode already so concepts like the agenda, capture mode, etc. won’t be completely foreign to you. More information about org-mode can be found in the Org-Mode Manual and on the Worg Site.
I have been using org-mode as my personal information manager for years now. I started small with just the default TODO and DONE keywords. I added small changes to my workflow and over time it evolved into what is described by this document.
I still change my workflow and try new things regularly. This document describes mature workflows in my current org-mode setup. I tend to document changes to my workflow 30 days after implementing them (assuming they are still around at that point) so that the new workflow has a chance to mature.
Some of the customized Emacs settings described in this document are set at their default values. This explicitly shows the setting for important org-mode variables used in my workflow and to keep my workflow behaviour stable in the event that the default value changes in the future.
This document is available as an org file which you can load in Emacs and tangle with C-c C-v C-t which will create org-mode.el in the same directory as the org-mode.org file. This will extract all of the elisp examples in this document into a file you can include in your .emacs file.
Copyright (C)  2013  Bernt Hansen.
Permission is granted to copy, distribute and/or modify this document
under the terms of the GNU Free Documentation License, Version 1.3
or any later version published by the Free Software Foundation;
with no Invariant Sections, no Front-Cover Texts, and no Back-Cover Texts.

Code in this document is free software: you can redistribute it
and/or modify it under the terms of the GNU General Public
License as published by the Free Software Foundation, either
version 3 of the License, or (at your option) any later version.

This code is distributed in the hope that it will be useful,
but WITHOUT ANY WARRANTY; without even the implied warranty of
MERCHANTABILITY or FITNESS FOR A PARTICULAR PURPOSE.  See the
GNU General Public License for more details.
This document http://doc.norang.ca/org-mode.html (either in its HTML format or in its Org format) is licensed under the GNU Free Documentation License version 1.3 or later ( http://www.gnu.org/copyleft/fdl.html).
The code examples and CSS stylesheets are licensed under the GNU General Public License v3 or later ( http://www.gnu.org/licenses/gpl.html).
This is version 2015.06-5-gf5bb of this document. This document is created using the publishing features of org-mode git version release_8.2.10-42-g2e1bc42.
The source for this document can be found as a plain text org file. I try to update this document about once a month.
The change history for this document can be found at git://git.norang.ca/org-mode-doc.git.
Getting started with org-mode is really easy. You only need a few lines in your emacs startup to use the latest version of org-mode from the git repository.
I keep a copy of the org-mode git repository in ~/git/org-mode/. This clone was created with
 cd ~/git
git clone git://orgmode.org/org-mode.git
To update and get new commits from the org-mode developers you can use
 cd ~/git/org-mode
git pull
make uncompiled
I run uncompiled source files in my setup so the uncompiled make target is all you need.
I normally track the master branch in the org-mode repository.
The following setup in my .emacs enables org-mode for most buffers. org-mode is the default mode for .org, .org_archive, and .txt files.
 ;;;
 ;;;  Org Mode
 ;;;
(add-to-list 'load-path (expand-file-name  "~/git/org-mode/lisp"))
(add-to-list 'auto-mode-alist '( "\\. \\ ( org \\ | org_archive \\ | txt \\ ) $" . org-mode))
( require ' org)
 ;;
 ;;  Standard key bindings
(global-set-key  "\C-cl" 'org-store-link)
(global-set-key  "\C-ca" 'org-agenda)
(global-set-key  "\C-cb" 'org-iswitchb)
That’s all you need to get started using headlines and lists in org-mode.
The rest of this document describes customizations I use in my setup, how I structure org-mode files, and other changes to fit the way I want org-mode to work.
Tasks are separated into logical groupings or projects. Use separate org files for large task groupings and subdirectories for collections of files for multiple projects that belong together.
Here are sample files that I use.
The following org files collect non-work related tasks:
| Filename | Description |
|---|---|
| todo.org | Personal tasks and things to keep track of |
| gsoc2009.org | Google Summer of Code stuff for 2009 |
| farm.org | Farm related tasks |
| mark.org | Tasks related to my son Mark |
| org.org | Org-mode related tasks |
| git.org | Git related tasks |
The following org-file collects org capture notes and tasks:
| Filename | Description |
|---|---|
| refile.org | Capture task bucket |
The following work-related org-files keep my business notes (using fictitious client names)
| Filename | Description |
|---|---|
| norang.org | Norang tasks and notes |
| XYZ.org | XYZ Corp tasks and notes |
| ABC.org | ABC Ltd tasks |
| ABC-DEF.org | ABC Ltd tasks for their client DEF Corp |
| ABC-KKK.org | ABC Ltd tasks for their client KKK Inc |
| YYY.org | YYY Inc tasks |
Org-mode is great for dealing with multiple clients and client projects. An org file becomes the collection of projects, notes, etc. for a single client or client-project.
Client ABC Ltd. has multiple customer systems that I work on. Separating the tasks for each client-customer into separate org files helps keep things logically grouped and since clients come and go this allows entire org files to be added or dropped from my agenda to keep only what is important visible in agenda views.
Other org files are used for publishing only and do not contribute to the agenda. See Publishing and Exporting for more details.
Here is my current org-agenda-files setup.
(setq org-agenda-files (quote ( "~/git/org"
                                "~/git/org/client1"
                                "~/git/client2")))
org-mode manages the org-agenda-files variable automatically using C-c [ and C-c ] to add and remove files respectively. However, this replaces my directory list with a list of explicit filenames instead and is not what I want. If this occurs then adding a new org file to any of the above directories will not contribute to my agenda and I will probably miss something important.
I have disabled the C-c [ and C-c ] keys in org-mode-hook to prevent messing up my list of directories in the org-agenda-files variable. I just add and remove directories manually in my .emacs file. Changing the list of directories in org-agenda-files happens very rarely since new files in existing directories are automatically picked up.
I also disable the comment function C-c ; since I never use those. I kept accidentally hitting this key sequence when doing C-c singlequote for editing source blocks.
In the example above I have ~/git/client2 in a separate git repository from ~/git/org. This gives me the flexibility of leaving confidential information at the client site and having all of my personal information available everywhere I use org-mode. I synchronize my personal repositories on multiple machines and skip the confidential info on the non-client laptop I travel with. org-agenda-files on this laptop does not include the ~/git/client2 directory.
Most of my org files are set up with level 1 headings as main categories only. Tasks and projects normally start as level 2.
Here are some examples of my level 1 headings in
todo.org:
- Special Dates
Includes level 2 headings for
- Birthdays
- Anniversaries
- Holidays
- Finances
- Health and Recreation
- House Maintenance
- Lawn and Garden Maintenance
- Notes
- Tasks
- Vehicle Maintenance
- Passwords
norang.org:
- System Maintenance
- Payroll
- Accounting
- Finances
- Hardware Maintenance
- Tasks
- Research and Development
- Notes
- Purchase Order Tracking
- Passwords
Each of these level 1 tasks normally has a property drawer specifying the category for any tasks in that tree. Level 1 headings are set up like this:
* Health and Recreation
  :PROPERTIES:
  :CATEGORY: Health
  :END:
 ...
* House Maintenance
  :PROPERTIES:
  :CATEGORY: House
  :END:
I live in the agenda. To make getting to the agenda faster I mapped F12 to the sequence C-c a since I’m using it hundreds of times a day.
I have the following custom key bindings set up for my emacs (sorted by frequency).
| Key | For | Used |
|---|---|---|
| F12 | Agenda (1 key less than C-c a) | Very Often |
| C-c b | Switch to org file | Very Often |
| F11 | Goto currently clocked item | Very Often |
| C-c c | Capture a task | Very Often |
| C-F11 | Clock in a task (show menu with prefix) | Often |
| f9 g | Gnus - I check mail regularly | Often |
| f5 | Show todo items for this subtree | Often |
| S-f5 | Widen | Often |
| f9 b | Quick access to bbdb data | Often |
| f9 c | Calendar access | Often |
| C-S-f12 | Save buffers and publish current project | Often |
| C-c l | Store a link for retrieval with C-c C-l | Often |
| f8 | Go to next org file in org-agenda-files | Sometimes |
| f9 r | Boxquote selected region | Sometimes |
| f9 t | Insert inactive timestamp | Sometimes |
| f9 v | Toggle visible mode (for showing/editing links) | Sometimes |
| C-f9 | Previous buffer | Sometimes |
| C-f10 | Next buffer | Sometimes |
| C-x n r | Narrow to region | Sometimes |
| f9 f | Boxquote insert a file | Sometimes |
| f9 i | Info manual | Sometimes |
| f9 I | Punch Clock In | Sometimes |
| f9 O | Punch Clock Out | Sometimes |
| f9 o | Switch to org scratch buffer | Sometimes |
| f9 s | Switch to scratch buffer | Sometimes |
| f9 h | Hide other tasks | Rare |
| f7 | Toggle line truncation/wrap | Rare |
| f9 T | Toggle insert inactive timestamp | Rare |
| C-c a | Enter Agenda (minimal emacs testing) | Rare |
Here is the keybinding setup in lisp:
 ;;  Custom Key Bindings
(global-set-key (kbd  "") 'org-agenda)
(global-set-key (kbd  "") 'bh/org-todo)
(global-set-key (kbd  "") 'bh/widen)
(global-set-key (kbd  "") 'bh/set-truncate-lines)
(global-set-key (kbd  "") 'org-cycle-agenda-files)
(global-set-key (kbd  " ") 'bh/show-org-agenda)
(global-set-key (kbd  " b") 'bbdb)
(global-set-key (kbd  " c") 'calendar)
(global-set-key (kbd  " f") 'boxquote-insert-file)
(global-set-key (kbd  " g") 'gnus)
(global-set-key (kbd  " h") 'bh/hide-other)
(global-set-key (kbd  " n") 'bh/toggle-next-task-display)

(global-set-key (kbd  " I") 'bh/punch-in)
(global-set-key (kbd  " O") 'bh/punch-out)

(global-set-key (kbd  " o") 'bh/make-org-scratch)

(global-set-key (kbd  " r") 'boxquote-region)
(global-set-key (kbd  " s") 'bh/switch-to-scratch)

(global-set-key (kbd  " t") 'bh/insert-inactive-timestamp)
(global-set-key (kbd  " T") 'bh/toggle-insert-inactive-timestamp)

(global-set-key (kbd  " v") 'visible-mode)
(global-set-key (kbd  " l") 'org-toggle-link-display)
(global-set-key (kbd  " SPC") 'bh/clock-in-last-task)
(global-set-key (kbd  "C-") 'previous-buffer)
(global-set-key (kbd  "M-") 'org-toggle-inline-images)
(global-set-key (kbd  "C-x n r") 'narrow-to-region)
(global-set-key (kbd  "C-") 'next-buffer)
(global-set-key (kbd  "") 'org-clock-goto)
(global-set-key (kbd  "C-") 'org-clock-in)
(global-set-key (kbd  "C-s-") 'bh/save-then-publish)
(global-set-key (kbd  "C-c c") 'org-capture)

( defun  bh/hide-other ()
  (interactive)
  ( save-excursion
    (org-back-to-heading 'invisible-ok)
    (hide-other)
    (org-cycle)
    (org-cycle)
    (org-cycle)))

( defun  bh/set-truncate-lines ()
   "Toggle value of truncate-lines and refresh window display."
  (interactive)
  (setq truncate-lines (not truncate-lines))
   ;;  now refresh window display (an idiom from simple.el):
  ( save-excursion
    (set-window-start (selected-window)
                      (window-start (selected-window)))))

( defun  bh/make-org-scratch ()
  (interactive)
  (find-file  "/tmp/publish/scratch.org")
  (gnus-make-directory  "/tmp/publish"))

( defun  bh/switch-to-scratch ()
  (interactive)
  (switch-to-buffer  "*scratch*"))
The main reason I have special key bindings (like F11, and F12) is so that the keys work in any mode. If I’m in the Gnus summary buffer then C-u C-c C-x C-i doesn’t work, but the C-F11 key combination does and this saves me time since I don’t have to visit an org-mode buffer first just to clock in a recent task.
I use one set of TODO keywords for all of my org files. Org-mode lets you define TODO keywords per file but I find it’s easier to have a standard set of TODO keywords globally so I can use the same setup in any org file I’m working with.
The only exception to this is this document :) since I don’t want org-mode hiding the TODO keyword when it appears in headlines. I’ve set up a dummy #+SEQ_TODO: FIXME FIXED entry at the top of this file just to leave my TODO keyword untouched in this document.
I use a light colour theme in emacs. I find this easier to read on bright sunny days.
Here are my TODO state keywords and colour settings:
(setq org-todo-keywords
      (quote ((sequence  "TODO(t)"  "NEXT(n)"  "|"  "DONE(d)")
              (sequence  "WAITING(w@/!)"  "HOLD(h@/!)"  "|"  "CANCELLED(c@/!)"  "PHONE"  "MEETING"))))

(setq org-todo-keyword-faces
      (quote (( "TODO"  :foreground  "red"  :weight bold)
              ( "NEXT"  :foreground  "blue"  :weight bold)
              ( "DONE"  :foreground  "forest green"  :weight bold)
              ( "WAITING"  :foreground  "orange"  :weight bold)
              ( "HOLD"  :foreground  "magenta"  :weight bold)
              ( "CANCELLED"  :foreground  "forest green"  :weight bold)
              ( "MEETING"  :foreground  "forest green"  :weight bold)
              ( "PHONE"  :foreground  "forest green"  :weight bold))))
<<sec-5-1-1>> 5.1.1 Task States
Tasks go through the sequence TODO -> DONE.
The following diagram shows the possible state transitions for a task.

I use a lazy project definition. I don’t like to bother with manually stating ‘this is a project’ and ‘that is not a project’. For me a project definition is really simple. If a task has subtasks with a todo keyword then it’s a project. That’s it.
Projects can be defined at any level - just create a task with a todo state keyword that has at least one subtask also with a todo state keyword and you have a project. Projects use the same todo keywords as regular tasks. One subtask of a project needs to be marked NEXT so the project is not on the stuck projects list.
Telephone calls are special. They are created in a done state by a capture task. The time of the call is recorded for as long as the capture task is active. If I need to look up other details and want to close the capture task early I can just C-c C-c to close the capture task (stopping the clock) and then f9 SPC to resume the clock in the phone call while I do other things.

Meetings are special. They are created in a done state by a capture task. I use the MEETING capture template when someone interrupts what I’m doing with a question or discussion. This is handled similarly to phone calls where I clock the amount of time spent with whomever it is and record some notes of what was discussed (either during or after the meeting) depending on content, length, and complexity of the discussion.
The time of the meeting is recorded for as long as the capture task is active. If I need to look up other details and want to close the capture task early I can just C-c C-c to close the capture task (stopping the clock) and then f9 SPC to resume the clock in the meeting task while I do other things.

Fast todo selection allows changing from any task todo state to any other state directly by selecting the appropriate key from the fast todo selection key menu. This is a great feature!
(setq org-use-fast-todo-selection t)
Changing a task state is done with C-c C-t KEY
where KEY is the appropriate fast todo state selection key as defined in org-todo-keywords.
The setting
(setq org-treat-S-cursor-todo-selection-as-state-change nil)
allows changing todo states with S-left and S-right skipping all of the normal processing when entering or leaving a todo state. This cycles through the todo states but skips setting timestamps and entering notes which is very convenient when all you want to do is fix up the status of an entry.
I have a few triggers that automatically assign tags to tasks based on state changes. If a task moves to CANCELLED state then it gets a CANCELLED tag. Moving a CANCELLED task back to TODO removes the CANCELLED tag. These are used for filtering tasks in agenda views which I’ll talk about later.
The triggers break down to the following rules:
- Moving a task to
CANCELLEDadds aCANCELLEDtag - Moving a task to
WAITINGadds aWAITINGtag - Moving a task to
HOLDaddsWAITINGandHOLDtags - Moving a task to a done state removes
WAITINGandHOLDtags - Moving a task to
TODOremovesWAITING,CANCELLED, andHOLDtags - Moving a task to
NEXTremovesWAITING,CANCELLED, andHOLDtags - Moving a task to
DONEremovesWAITING,CANCELLED, andHOLDtags
The tags are used to filter tasks in the agenda views conveniently.
(setq org-todo-state-tags-triggers
      (quote (( "CANCELLED" ( "CANCELLED" . t))
              ( "WAITING" ( "WAITING" . t))
              ( "HOLD" ( "WAITING") ( "HOLD" . t))
              (done ( "WAITING") ( "HOLD"))
              ( "TODO" ( "WAITING") ( "CANCELLED") ( "HOLD"))
              ( "NEXT" ( "WAITING") ( "CANCELLED") ( "HOLD"))
              ( "DONE" ( "WAITING") ( "CANCELLED") ( "HOLD")))))
Org Capture mode replaces remember mode for capturing tasks and notes.
To add new tasks efficiently I use a minimal number of capture templates. I used to have lots of capture templates, one for each org-file. I’d start org-capture with C-c c and then pick a template that filed the task under * Tasks in the appropriate file.
I found I still needed to refile these capture tasks again to the correct location within the org-file so all of these different capture templates weren’t really helping at all. Since then I’ve changed my workflow to use a minimal number of capture templates – I create the new task quickly and refile it once. This also saves me from maintaining my org-capture templates when I add a new org file.
When a new task needs to be added I categorize it into one of a few things:
- A phone call (p)
- A meeting (m)
- An email I need to respond to (r)
- A new task (t)
- A new note (n)
- An interruption (j)
- A new habit (h)
and pick the appropriate capture task.
Here is my setup for org-capture
(setq org-directory  "~/git/org")
(setq org-default-notes-file  "~/git/org/refile.org")

 ;;  I use C-c c to start capture mode
(global-set-key (kbd  "C-c c") 'org-capture)

 ;;  Capture templates for: TODO tasks, Notes, appointments, phone calls, meetings, and org-protocol
(setq org-capture-templates
      (quote (( "t"  "todo" entry (file  "~/git/org/refile.org")
                "* TODO %?\n%U\n%a\n"  :clock-in t  :clock-resume t)
              ( "r"  "respond" entry (file  "~/git/org/refile.org")
                "* NEXT Respond to %:from on %:subject\nSCHEDULED: %t\n%U\n%a\n"  :clock-in t  :clock-resume t  :immediate-finish t)
              ( "n"  "note" entry (file  "~/git/org/refile.org")
                "* %? :NOTE:\n%U\n%a\n"  :clock-in t  :clock-resume t)
              ( "j"  "Journal" entry (file+datetree  "~/git/org/diary.org")
                "* %?\n%U\n"  :clock-in t  :clock-resume t)
              ( "w"  "org-protocol" entry (file  "~/git/org/refile.org")
                "* TODO Review %c\n%U\n"  :immediate-finish t)
              ( "m"  "Meeting" entry (file  "~/git/org/refile.org")
                "* MEETING with %? :MEETING:\n%U"  :clock-in t  :clock-resume t)
              ( "p"  "Phone call" entry (file  "~/git/org/refile.org")
                "* PHONE %? :PHONE:\n%U"  :clock-in t  :clock-resume t)
              ( "h"  "Habit" entry (file  "~/git/org/refile.org")
                "* NEXT %?\n%U\n%a\nSCHEDULED: %(format-time-string \"%<<%Y-%m-%d %a .+1d/3d>>\")\n:PROPERTIES:\n:STYLE: habit\n:REPEAT_TO_STATE: NEXT\n:END:\n"))))
Capture mode now handles automatically clocking in and out of a capture task. This all works out of the box now without special hooks. When I start a capture mode task the task is clocked in as specified by :clock-in t and when the task is filed with C-c C-c the clock resumes on the original clocking task.
The quick clocking in and out of capture mode tasks (often it takes less than a minute to capture some new task details) can leave empty clock drawers in my tasks which aren’t really useful. Since I remove clocking lines with 0:00 length I end up with a clock drawer like this:
*  TODO  New Capture Task
  :LOGBOOK:
  :END:
  [2010-05-08 Sat 13:53]
I have the following setup to remove these empty LOGBOOK drawers if they occur.
 ;;  Remove empty LOGBOOK drawers on clock out
( defun  bh/remove-empty-drawer-on-clock-out ()
  (interactive)
  ( save-excursion
    (beginning-of-line 0)
    (org-remove-empty-drawer-at  "LOGBOOK" (point))))

(add-hook 'org-clock-out-hook 'bh/remove-empty-drawer-on-clock-out 'append)
I have a single org file which is the target for my capture templates.
I store notes, tasks, phone calls, and org-protocol tasks in refile.org. I used to use multiple files but found that didn’t really have any advantage over a single file.
Normally this file is empty except for a single line at the top which creates a REFILE tag for anything in the file.
The file has a single permanent line at the top like this
#+FILETAGS: REFILE
Okay I’m in the middle of something and oh yeah - I have to remember to do that. I don’t stop what I’m doing. I’m probably clocking a project I’m working on and I don’t want to lose my focus on that but I can’t afford to forget this little thing that just came up.
So what do I do? Hit C-c c to start capture mode and select t since it’s a new task and I get a buffer like this:
*  TODO
  [2010-08-05 Thu 21:06]

   Capture Tasks is all about being FAST
Enter the details of the TODO item and C-c C-c to file it away in refile.org and go right back to what I’m really working on secure in the knowledge that that item isn’t going to get lost and I don’t have to think about it anymore at all now.
The amount of time I spend entering the captured note is clocked. The capture templates are set to automatically clock in and out of the capture task. This is great for interruptions and telephone calls too.
Refiling tasks is easy. After collecting a bunch of new tasks in my refile.org file using capture mode I need to move these to the correct org file and topic. All of my active org-files are in my org-agenda-files variable and contribute to the agenda.
I collect capture tasks in refile.org for up to a week. These now stand out daily on my block agenda and I usually refile them during the day. I like to keep my refile task list empty.
To refile tasks in org you need to tell it where you want to refile things.
In my setup I let any file in org-agenda-files and the current file contribute to the list of valid refile targets.
I’ve recently moved to using IDO to complete targets directly. I find this to be faster than my previous complete in steps setup. At first I didn’t like IDO but after reviewing the documentation again and learning about C-SPC to limit target searches I find it is much better than my previous complete-in-steps setup. Now when I want to refile something I do C-c C-w to start the refile process, then type something to get some matching targets, then C-SPC to restrict the matches to the current list, then continue searching with some other text to find the target I need. C-j also selects the current completion as the final target. I like this a lot. I show full outline paths in the targets so I can have the same heading in multiple subtrees or projects and still tell them apart while refiling.
I now exclude DONE state tasks as valid refile targets. This helps to keep the refile target list to a reasonable size.
Here is my refile configuration:
 ;  Targets include this file and any file contributing to the agenda - up to 9 levels deep
(setq org-refile-targets (quote ((nil  :maxlevel . 9)
                                 (org-agenda-files  :maxlevel . 9))))

 ;  Use full outline paths for refile targets - we file directly with IDO
(setq org-refile-use-outline-path t)

 ;  Targets complete directly with IDO
(setq org-outline-path-complete-in-steps nil)

 ;  Allow refile to create parent tasks with confirmation
(setq org-refile-allow-creating-parent-nodes (quote confirm))

 ;  Use IDO for both buffer and file completion and ido-everywhere to t
(setq org-completion-use-ido t)
(setq ido-everywhere t)
(setq ido-max-directory-size 100000)
(ido-mode (quote both))
 ;  Use the current window when visiting files and buffers with ido
(setq ido-default-file-method 'selected-window)
(setq ido-default-buffer-method 'selected-window)
 ;  Use the current window for indirect buffer display
(setq org-indirect-buffer-display 'current-window)

 ;;;;  Refile settings
 ;  Exclude DONE state tasks from refile targets
( defun  bh/verify-refile-target ()
   "Exclude todo keywords with a done state from refile targets"
  (not (member (nth 2 (org-heading-components)) org-done-keywords)))

(setq org-refile-target-verify-function 'bh/verify-refile-target)
To refile a task to my norang.org file under System Maintenance I just put the cursor on the task and hit C-c C-w and enter nor C-SPC sys RET and it’s done. IDO completion makes locating targets a snap.
Tasks to refile are in their own section of the block agenda. To find tasks to refile I run my agenda view with F12 SPC and scroll down to second section of the block agenda: Tasks to Refile. This view shows all tasks (even ones marked in a done state).
Bulk refiling in the agenda works very well for multiple tasks going to the same place. Just mark the tasks with m and then B r to refile all of them to a new location. Occasionally I’ll also refile tasks as subtasks of the current clocking task using C-2 C-c C-w from the refile.org file.
Refiling all of my tasks tends to take less than a minute so I normally do this a couple of times a day.
I keep a * Notes headline in most of my org-mode files. Notes have a NOTE tag which is created by the capture template for notes. This allows finding notes across multiple files easily using the agenda search functions.
Notes created by capture tasks go first to refile.org and are later refiled to the appropriate project file. Some notes that are project related get filed to the appropriate project instead of under the catchall * NOTES task. Generally these types of notes are specific to the project and not generally useful – so removing them from the notes list when the project is archived makes sense.
Phone calls and meetings are handled using capture mode. I time my calls and meetings using the capture mode template settings to clock in and out the capture task while the phone call or meeting is in progress.
Phone call and meeting tasks collect in refile.org and are later refiled to the appropriate location. Some phone calls are billable and we want these tracked in the appropriate category. I refile my phone call and meeting tasks under the appropriate project so time tracking and reports are as accurate as possible.
I now have one block agenda view that has everything on it. I also keep separate single view agenda commands for use on my slower Eee PC - since it takes prohibitively long to generate my block agenda on that slow machine. I’m striving to simplify my layout with everything at my fingertips in a single agenda on my workstation which is where I spend the bulk of my time.
Most of my old custom agenda views were rendered obsolete when filtering functionality was added to the agenda in newer versions of org-mode and now with block agenda functionality I can combine everything into a single view.
Custom agenda views are used for:
- Single block agenda shows the following
- overview of today
- Finding tasks to be refiled
- Finding stuck projects
- Finding NEXT tasks to work on
- Show all related tasks
- Reviewing projects
- Finding tasks waiting on something
- Findings tasks to be archived
- Finding notes
- Viewing habits
If I want just today’s calendar view then F12 a is still faster than generating the block agenda - especially if I want to view a week or month’s worth of information, or check my clocking data. In that case the extra detail on the block agenda view is never really needed and I don’t want to spend time waiting for it to be generated.
 ;;  Do not dim blocked tasks
(setq org-agenda-dim-blocked-tasks nil)

 ;;  Compact the block agenda view
(setq org-agenda-compact-blocks t)

 ;;  Custom agenda command definitions
(setq org-agenda-custom-commands
      (quote (( "N"  "Notes" tags  "NOTE"
               ((org-agenda-overriding-header  "Notes")
                (org-tags-match-list-sublevels t)))
              ( "h"  "Habits" tags-todo  "STYLE=\"habit\""
               ((org-agenda-overriding-header  "Habits")
                (org-agenda-sorting-strategy
                 '(todo-state-down effort-up category-keep))))
              ( " "  "Agenda"
               ((agenda  "" nil)
                (tags  "REFILE"
                      ((org-agenda-overriding-header  "Tasks to Refile")
                       (org-tags-match-list-sublevels nil)))
                (tags-todo  "-CANCELLED/!"
                           ((org-agenda-overriding-header  "Stuck Projects")
                            (org-agenda-skip-function 'bh/skip-non-stuck-projects)
                            (org-agenda-sorting-strategy
                             '(category-keep))))
                (tags-todo  "-HOLD-CANCELLED/!"
                           ((org-agenda-overriding-header  "Projects")
                            (org-agenda-skip-function 'bh/skip-non-projects)
                            (org-tags-match-list-sublevels 'indented)
                            (org-agenda-sorting-strategy
                             '(category-keep))))
                (tags-todo  "-CANCELLED/!NEXT"
                           ((org-agenda-overriding-header (concat  "Project Next Tasks"
                                                                  ( if bh/hide-scheduled-and-waiting-next-tasks
                                                                       ""
                                                                     " (including WAITING and SCHEDULED tasks)")))
                            (org-agenda-skip-function 'bh/skip-projects-and-habits-and-single-tasks)
                            (org-tags-match-list-sublevels t)
                            (org-agenda-todo-ignore-scheduled bh/hide-scheduled-and-waiting-next-tasks)
                            (org-agenda-todo-ignore-deadlines bh/hide-scheduled-and-waiting-next-tasks)
                            (org-agenda-todo-ignore-with-date bh/hide-scheduled-and-waiting-next-tasks)
                            (org-agenda-sorting-strategy
                             '(todo-state-down effort-up category-keep))))
                (tags-todo  "-REFILE-CANCELLED-WAITING-HOLD/!"
                           ((org-agenda-overriding-header (concat  "Project Subtasks"
                                                                  ( if bh/hide-scheduled-and-waiting-next-tasks
                                                                       ""
                                                                     " (including WAITING and SCHEDULED tasks)")))
                            (org-agenda-skip-function 'bh/skip-non-project-tasks)
                            (org-agenda-todo-ignore-scheduled bh/hide-scheduled-and-waiting-next-tasks)
                            (org-agenda-todo-ignore-deadlines bh/hide-scheduled-and-waiting-next-tasks)
                            (org-agenda-todo-ignore-with-date bh/hide-scheduled-and-waiting-next-tasks)
                            (org-agenda-sorting-strategy
                             '(category-keep))))
                (tags-todo  "-REFILE-CANCELLED-WAITING-HOLD/!"
                           ((org-agenda-overriding-header (concat  "Standalone Tasks"
                                                                  ( if bh/hide-scheduled-and-waiting-next-tasks
                                                                       ""
                                                                     " (including WAITING and SCHEDULED tasks)")))
                            (org-agenda-skip-function 'bh/skip-project-tasks)
                            (org-agenda-todo-ignore-scheduled bh/hide-scheduled-and-waiting-next-tasks)
                            (org-agenda-todo-ignore-deadlines bh/hide-scheduled-and-waiting-next-tasks)
                            (org-agenda-todo-ignore-with-date bh/hide-scheduled-and-waiting-next-tasks)
                            (org-agenda-sorting-strategy
                             '(category-keep))))
                (tags-todo  "-CANCELLED+WAITING|HOLD/!"
                           ((org-agenda-overriding-header (concat  "Waiting and Postponed Tasks"
                                                                  ( if bh/hide-scheduled-and-waiting-next-tasks
                                                                       ""
                                                                     " (including WAITING and SCHEDULED tasks)")))
                            (org-agenda-skip-function 'bh/skip-non-tasks)
                            (org-tags-match-list-sublevels nil)
                            (org-agenda-todo-ignore-scheduled bh/hide-scheduled-and-waiting-next-tasks)
                            (org-agenda-todo-ignore-deadlines bh/hide-scheduled-and-waiting-next-tasks)))
                (tags  "-REFILE/"
                      ((org-agenda-overriding-header  "Tasks to Archive")
                       (org-agenda-skip-function 'bh/skip-non-archivable-tasks)
                       (org-tags-match-list-sublevels nil))))
               nil))))
My block agenda view looks like this when not narrowed to a project. This shows top-level projects and NEXT tasks but hides the project details since we are not focused on any particular project.
NOTE: This agenda screen shot is out of date and does not currently match the agenda setup in this document. This will be fixed soon.

After selecting a project (with P on any task in the agenda) the block agenda changes to show the project and any subprojects in the Projects section. Tasks show project-related tasks that are hidden when not narrowed to a project.
This makes it easy to focus on the task at hand.
NOTE: This agenda screen shot is out of date and does not currently match the agenda setup in this document. This will be fixed soon.

I generally work top-down on the agenda. Things with deadlines and scheduled dates (planned to work on today or earlier) show up in the agenda at the top.
My day goes generally like this:
- Punch in (this starts the clock on the default task)
- Look at the agenda and make a mental note of anything important to deal with today
- Read email and news
- create notes, and tasks for things that need responses with org-capture
- Check refile tasks and respond to emails
- Look at my agenda and work on important tasks for today
- Clock it in
- Work on it until it is
DONEor it gets interrupted
- Work on tasks
- Make journal entries (
C-c c j) for interruptions - Punch out for lunch and punch back in after lunch
- work on more tasks
- Refile tasks to empty the list
- Tag tasks to be refiled with
mcollecting all tasks for the same target - Bulk refile the tasks to the target location with
B r - Repeat (or refile individually with
C-c C-w) until all refile tasks are gone
- Tag tasks to be refiled with
- Mark habits done today as DONE
- Punch out at the end of the work day
Start with deadlines and tasks scheduled today or earlier from the daily agenda view. Then move on to tasks in the Next Tasks list in the block agenda view. I tend to schedule current projects to ‘today’ when I start work on them and they sit on my daily agenda reminding me that they need to be completed. I normally only schedule one or two projects to the daily agenda and unschedule things that are no longer important and don’t deserve my attention today.
When I look for a new task to work on I generally hit F12 SPC to get the block agenda and follow this order:
- Pick something off today’s agenda
- deadline for today (do this first - it’s not late yet)
- deadline in the past (it’s already late)
- a scheduled task for today (it’s supposed to be done today)
- a scheduled task that is still on the agenda
- deadline that is coming up soon
- pick a NEXT task
- If you run out of items to work on look for a NEXT task in the current context pick a task from the Tasks list of the current project.
NEXT list?
I’ve moved to a more GTD way of doing things. Now I just use a NEXT list. Only projects get tasks with NEXT keywords since stuck projects initiate the need for marking or creating NEXT tasks. A NEXT task is something that is available to work on now, it is the next logical step in some project.
I used to have a special keyword ONGOING for things that I do a lot and want to clock but never really start/end. I had a special agenda view for ONGOING tasks that I would pull up to easily find the thing I want to clock.
Since then I’ve moved away from using the ONGOING todo keyword. Having an agenda view that shows NEXT tasks makes it easy to pick the thing to clock - and I don’t have to remember if I need to look in the ONGOING list or the NEXT list when looking for the task to clock-in. The NEXT list is basically ‘what is current’ - any task that moves a project forward. I want to find the thing to work on as fast as I can and actually do work on it - not spend time hunting through my org files for the task that needs to be clocked-in.
To drop a task off the NEXT list simply move it back to the TODO state.
When reading email, newsgroups, and conversations on IRC I just let the default task (normally ** Organization) clock the time I spend on these tasks. To read email I go to Gnus and read everything in my inboxes. If there are emails that require a response I use org-capture to create a new task with a heading of ‘Respond to ’ for each one. This automatically links to the email in the task and makes it easy to find later. Some emails are quick to respond to and some take research and a significant amount of time to complete. I clock each one in it’s own task just in case I need that clocked time later. The capture template for Repond To tasks is now scheduled for today so I can refile the task to the appropriate org file without losing the task for a week.
Next, I go to my newly created tasks to be refiled from the block agenda with F12 a and clock in an email task and deal with it. Repeat this until all of the ‘Respond to ’ tasks are marked DONE.
I read email and newgroups in Gnus so I don’t separate clocked time for quickly looking at things. If an article has a useful piece of information I want to remember I create a note for it with C-c c n and enter the topic and file it. This takes practically no time at all and I know the note is safely filed for later retrieval. The time I spend in the capture buffer is clocked with that capture note.
So many tasks, so little time. I have hundreds of tasks at any given time (373 right now). There is so much stuff to look at it can be daunting. This is where agenda filtering saves the day.
It’s 11:53AM and I’m in work mode just before lunch. I don’t want to see tasks that are not work related right now. I also don’t want to work on a big project just before lunch… so I need to find small tasks that I can knock off the list.
How do we do this? Get a list of NEXT tasks from the block agenda and then narrow it down with filtering. Tasks are ordered in the NEXT agenda view by estimated effort so the short tasks are first – just start at the top and work your way down. I can limit the displayed agenda tasks to those estimates of 10 minutes or less with / + 1 and I can pick something that fits the minutes I have left before I take off for lunch.
/ RET in the agenda is really useful. This awesome feature was added to org-mode by John Wiegley. It removes tasks automatically by filtering based on a user-provided function.
At work I have projects I’m working on which are assigned by my manager. Sometimes priorities changes and projects are delayed to sometime in the future. This means I need to stop working on these immediately. I put the project task on HOLD and work on something else. The / RET filter removes HOLD tasks and subtasks (because of tag inheritance).
At home I have some tasks tagged with farm since these need to be performed when I am physically at our family farm. Since I am there infrequently I have added farm to the list of auto-excluded tags on my system. I can always explicitly filter to just farm tasks with / TAB farm RET when I am physically there.
I have the following setup to allow / RET to filter tasks based on the description above.
( defun  bh/org-auto-exclude-function (tag)
   "Automatic task exclusion in the agenda with / RET"
  (and ( cond
        ((string= tag  "hold")
         t)
        ((string= tag  "farm")
         t))
       (concat  "-" tag)))

(setq org-agenda-auto-exclude-function 'bh/org-auto-exclude-function)
This lets me filter tasks with just / RET on the agenda which removes tasks I’m not supposed to be working on now from the list of returned results.
This helps to keep my agenda clutter-free.
Okay, I admit it. I’m a clocking fanatic.
I clock everything at work. Org-mode makes this really easy. I’d rather clock too much stuff than not enough so I find it’s easier to get in the habit of clocking everything.
This makes it possible to look back at the day and see where I’m spending too much time, or not enough time on specific projects. This also helps a lot when you need to estimate how long something is going to take to do – you can use your clocking data from similar tasks to help tune your estimates so they are more accurate.
Without clocking data it’s hard to tell how long something took to do after the fact.
I now use the concept of punching in and punching out at the start and end of my work day. I punch in when I arrive at work, punch out for lunch, punch in after lunch, and punch out at the end of the day. Every minute is clocked between punch-in and punch-out times.
Punching in defines a default task to clock time on whenever the clock would normally stop. I found that with the default org-mode setup I would lose clocked minutes during the day, a minute here, a minute there, and that all adds up. This is especially true if you write notes when moving to a DONE state - in this case the clock normally stops before you have composed the note – and good notes take a few minutes to write.
My clocking setup basically works like this:
- Punch in (start the clock)
- This clocks in a predefined task by
org-idthat is the default task to clock in whenever the clock normally stops
- This clocks in a predefined task by
- Clock in tasks normally, and let moving to a DONE state clock out
- clocking out automatically clocks time on a parent task or moves back to the predefined default task if no parent exists.
- Continue clocking whatever tasks you work on
- Punch out (stop the clock)
I’m free to change the default task multiple times during the day but with the clock moving up the project tree on clock out I no longer need to do this. I simply have a single task that gets clocked in when I punch-in.
If I punch-in with a prefix on a task in Project X then that task automatically becomes the default task and all clocked time goes on that project until I either punch out or punch in some other task.
My org files look like this:
todo.org:
 #+FILETAGS: PERSONAL
...
 * Tasks
 ** Organization
    :PROPERTIES:
    :CLOCK_MODELINE_TOTAL: today
    :ID:       eb155a82-92b2-4f25-a3c6-0304591af2f9
    :END:
   ...
If I am working on some task, then I simply clock in on the task. Clocking out moves the clock up to a parent task with a todo keyword (if any) which keeps the clock time in the same subtree. If there is no parent task with a todo keyword then the clock moves back to the default clocking task until I punch out or clock in some other task. When an interruption occurs I start a capture task which keeps clocked time on the interruption task until I close it with C-c C-c.
This works really well for me.
For example, consider the following org file:
*  TODO  Project A
**  NEXT  TASK 1
**  TODO  TASK 2
**  TODO  TASK 3
* Tasks
**  TODO  Some miscellaneous task
I’ll work on this file in the following sequence:
- I punch in with
F9-Iat the start of my dayThat clocks in the
Organizationtask by id in mytodo.orgfile. F12-SPCto review my block agendaPick ‘TODO Some miscellaneous task’ to work on next and clock that in with
IThe clock is now on ‘TODO Some miscellaneous task’- I complete that task and mark it done with
C-c C-t dThis stops the clock and moves it back to the
Organizationtask. - Now I want to work on
Project Aso I clock inTask 1I work on Task 1 and mark it
DONE. This clocks outTask 1and moves the clock toProject A. Now I work onTask 2and clock that in.
The entire time I’m working on and clocking some subtask of Project A all of the clock time in the interval is applied somewhere to the Project A tree. When I eventually mark Project A done then the clock will move back to the default organization task.
To get started we need to punch in which clocks in the default task and keeps the clock running. This is now simply a matter of punching in the clock with F9 I. You can do this anywhere. Clocking out will now clock in the parent task (if there is one with a todo keyword) or clock in the default task if not parent exists.
Keeping the clock running when moving a subtask to a DONE state means clocking continues to apply to the project task. I can pick the next task from the parent and clock that in without losing a minute or two while I’m deciding what to work on next.
I keep clock times, state changes, and other notes in the :LOGBOOK: drawer.
I have the following org-mode settings for clocking:
 ;;
 ;;  Resume clocking task when emacs is restarted
(org-clock-persistence-insinuate)
 ;;
 ;;  Show lot of clocking history so it's easy to pick items off the C-F11 list
(setq org-clock-history-length 23)
 ;;  Resume clocking task on clock-in if the clock is open
(setq org-clock-in-resume t)
 ;;  Change tasks to NEXT when clocking in
(setq org-clock-in-switch-to-state 'bh/clock-in-to-next)
 ;;  Separate drawers for clocking and logs
(setq org-drawers (quote ( "PROPERTIES"  "LOGBOOK")))
 ;;  Save clock data and state changes and notes in the LOGBOOK drawer
(setq org-clock-into-drawer t)
 ;;  Sometimes I change tasks I'm clocking quickly - this removes clocked tasks with 0:00 duration
(setq org-clock-out-remove-zero-time-clocks t)
 ;;  Clock out when moving task to a done state
(setq org-clock-out-when-done t)
 ;;  Save the running clock and all clock history when exiting Emacs, load it on startup
(setq org-clock-persist t)
 ;;  Do not prompt to resume an active clock
(setq org-clock-persist-query-resume nil)
 ;;  Enable auto clock resolution for finding open clocks
(setq org-clock-auto-clock-resolution (quote when-no-clock-is-running))
 ;;  Include current clocking task in clock reports
(setq org-clock-report-include-clocking-task t)

(setq bh/keep-clock-running nil)

( defun  bh/clock-in-to-next (kw)
   "Switch a task from TODO to NEXT when clocking in.
 Skips capture tasks, projects, and subprojects.
 Switch projects and subprojects from NEXT back to TODO"
  ( when (not (and (boundp 'org-capture-mode) org-capture-mode))
    ( cond
     ((and (member (org-get-todo-state) (list  "TODO"))
           (bh/is-task-p))
       "NEXT")
     ((and (member (org-get-todo-state) (list  "NEXT"))
           (bh/is-project-p))
       "TODO"))))

( defun  bh/find-project-task ()
   "Move point to the parent (project) task if any"
  ( save-restriction
    (widen)
    ( let ((parent-task ( save-excursion (org-back-to-heading 'invisible-ok) (point))))
      ( while (org-up-heading-safe)
        ( when (member (nth 2 (org-heading-components)) org-todo-keywords-1)
          (setq parent-task (point))))
      (goto-char parent-task)
      parent-task)))

( defun  bh/punch-in (arg)
   "Start continuous clocking and set the default task to the
 selected task.  If no task is selected set the Organization task
 as the default task."
  (interactive  "p")
  (setq bh/keep-clock-running t)
  ( if (equal major-mode 'org-agenda-mode)
       ;;
       ;;  We're in the agenda
       ;;
      ( let* ((marker (org-get-at-bol 'org-hd-marker))
             (tags (org-with-point-at marker (org-get-tags-at))))
        ( if (and (eq arg 4) tags)
            (org-agenda-clock-in '(16))
          (bh/clock-in-organization-task-as-default)))
     ;;
     ;;  We are not in the agenda
     ;;
    ( save-restriction
      (widen)
       ;  Find the tags on the current task
      ( if (and (equal major-mode 'org-mode) (not (org-before-first-heading-p)) (eq arg 4))
          (org-clock-in '(16))
        (bh/clock-in-organization-task-as-default)))))

( defun  bh/punch-out ()
  (interactive)
  (setq bh/keep-clock-running nil)
  ( when (org-clock-is-active)
    (org-clock-out))
  (org-agenda-remove-restriction-lock))

( defun  bh/clock-in-default-task ()
  ( save-excursion
    (org-with-point-at org-clock-default-task
      (org-clock-in))))

( defun  bh/clock-in-parent-task ()
   "Move point to the parent (project) task if any and clock in"
  ( let ((parent-task))
    ( save-excursion
      ( save-restriction
        (widen)
        ( while (and (not parent-task) (org-up-heading-safe))
          ( when (member (nth 2 (org-heading-components)) org-todo-keywords-1)
            (setq parent-task (point))))
        ( if parent-task
            (org-with-point-at parent-task
              (org-clock-in))
          ( when bh/keep-clock-running
            (bh/clock-in-default-task)))))))

( defvar  bh/organization-task-id  "eb155a82-92b2-4f25-a3c6-0304591af2f9")

( defun  bh/clock-in-organization-task-as-default ()
  (interactive)
  (org-with-point-at (org-id-find bh/organization-task-id 'marker)
    (org-clock-in '(16))))

( defun  bh/clock-out-maybe ()
  ( when (and bh/keep-clock-running
             (not org-clock-clocking-in)
             (marker-buffer org-clock-default-task)
             (not org-clock-resolving-clocks-due-to-idleness))
    (bh/clock-in-parent-task)))

(add-hook 'org-clock-out-hook 'bh/clock-out-maybe 'append)
I used to clock in tasks by ID using the following function but with the new punch-in and punch-out I don’t need these as much anymore. f9-SPC calls bh/clock-in-last-task which switches the clock back to the previously clocked task.
( require ' org-id)
( defun  bh/clock-in-task-by-id (id)
   "Clock in a task by id"
  (org-with-point-at (org-id-find id 'marker)
    (org-clock-in nil)))

( defun  bh/clock-in-last-task (arg)
   "Clock in the interrupted task if there is one
 Skip the default task and get the next one.
 A prefix arg forces clock in of the default task."
  (interactive  "p")
  ( let ((clock-in-to-task
         ( cond
          ((eq arg 4) org-clock-default-task)
          ((and (org-clock-is-active)
                (equal org-clock-default-task (cadr org-clock-history)))
           (caddr org-clock-history))
          ((org-clock-is-active) (cadr org-clock-history))
          ((equal org-clock-default-task (car org-clock-history)) (cadr org-clock-history))
          (t (car org-clock-history)))))
    (widen)
    (org-with-point-at clock-in-to-task
      (org-clock-in nil))))
When I start or continue working on a task I clock it in with any of the following:
C-c C-x C-iIin the agendaIspeed key on the first character of the heading linef9 Iwhile on the task in the agendaf9 Iwhile in the task in an org file
I have a default ** Organization task in my todo.org file that I tend to put miscellaneous clock time on. This is the task I clock in on when I punch in at the start of my work day with F9-I. While reorganizing my org-files, reading email, clearing my inbox, and doing other planning work that isn’t for a specific project I’ll clock in this task. Punching-in anywhere clocks in this Organization task as the default task.
If I want to change the default clocking task I just visit the new task in any org buffer and clock it in with C-u C-u C-c C-x C-i. Now this new task that collects miscellaneous clock minutes when the clock would normally stop.
You can quickly clock in the default clocking task with C-u C-c C-x C-i d. Another option is to repeatedly clock out so the clock moves up the project tree until you clock out the top-level task and the clock moves to the default task.
You can use the clock history to restart clocks on old tasks you’ve clocked or to jump directly to a task you have clocked previously. I use this mainly to clock in whatever got interrupted by something.
Consider the following scenario:
- You are working on and clocking
Task A(Organization) - You get interrupted and switch to
Task B(Document my use of org-mode) - You complete
Task B(Document my use of org-mode) - Now you want to go back to
Task A(Organization) again to continue
This is easy to deal with.
- Clock in
Task A, work on it - Go to
Task B(or create a new task) and clock it in - When you are finished with
Task BhitC-u C-c C-x C-i i
This displays a clock history selection window like the following and selects the interrupted [i] entry.
Clock history selection buffer for C-u C-c C-x C-i
Default Task
[d] norang          Organization                          <-- Task B
The task interrupted by starting the last one
[i] norang          Organization                          <-- Task B
Current Clocking Task
[c] org             NEXT Document my use of org-mode      <-- Task A
Recent Tasks
[1] org             NEXT Document my use of org-mode      <-- Task A
[2] norang          Organization                          <-- Task B
...
[Z] org             DONE Fix default section links        <-- 35 clock task entries ago
In order to clock everything you need a task for everything. That’s fine for planned projects but interruptions inevitably occur and you need some place to record whatever time you spend on that interruption.
To deal with this we create a new capture task to record the thing we are about to do. The workflow goes something like this:
- You are clocking some task and an interruption occurs
- Create a quick capture task journal entry
C-c c j - Type the heading
- go do that thing (eat lunch, whatever)
- file it
C-c C-c, this restores the clock back to the previous clocking task - clock something else in or continue with the current clocking task
This means you can ignore the details like where this task really belongs in your org file layout and just get on with completing the thing. Refiling a bunch of tasks later in a group when it is convenient to refile the tasks saves time in the long run.
If it’s a one-shot uninteresting task (like a coffee break) I create a capture journal entry for it that goes to the diary.org date tree. If it’s a task that actually needs to be tracked and marked done, and applied to some project then I create a capture task instead which files it in refile.org.
To find a task to work on I use one of the following options (generally listed most frequently used first)
- Use the clock history C-u C-c C-x C-i Go back to something I was clocking that is not finished
- Pick something off today’s block agenda
SCHEDULEDorDEADLINEitems that need to be done soon - Pick something off the
NEXTtasks agenda view Work on some unfinished task to move to completion - Pick something off the other task list
- Use an agenda view with filtering to pick something to work on
Punching in on the task you select will restrict the agenda view to that project so you can focus on just that thing for some period of time.
Sometimes it is necessary to edit clock entries so they reflect reality. I find I do this for maybe 2-3 entries in a week.
Occassionally I cannot clock in a task on time because I’m away from my computer. In this case the previous clocked task is still running and counts time for both tasks which is wrong.
I make a note of the time and then when I get back to my computer I clock in the right task and edit the start and end times to correct the clock history.
To visit the clock line for an entry quickly use the agenda log mode. F12 a l shows all clock lines for today. I use this to navigate to the appropriate clock lines quickly. F11 goes to the current clocked task but the agenda log mode is better for finding and visiting older clock entries.
Use F12 a l to open the agenda in log mode and show only logged clock times. Move the cursor down to the clock line you need to edit and hit TAB and you’re there.
To edit a clock entry just put the cursor on the part of the date you want to edit (use the keyboard not the mouse - since the clicking on the timestamp with the mouse goes back to the agenda for that day) and hit the S- or S- keys to change the time.
The following setting makes time editing use discrete minute intervals (no rounding) increments:
(setq org-time-stamp-rounding-minutes (quote (1 1)))
Editing the time with the shift arrow combination also updates the total for the clock line which is a nice convenience.
I always check that I haven’t created task overlaps when fixing time clock entries by viewing them with log mode on in the agenda. There is a new view in the agenda for this – just hit v c in the daily agenda and clock gaps and overlaps are identified.
I want my clock entries to be as accurate as possible.
The following setting shows 1 minute clocking gaps.
(setq org-agenda-clock-consistency-checks
      (quote ( :max-duration  "4:00"
               :min-duration 0
               :max-gap 0
               :gap-ok-around ( "4:00"))))
At the beginning of the month I invoice my clients for work done last month. This is where I review my clocking data for correctness before billing for the clocked time.
Billing for clocked time basically boils down to the following steps:
- Verify that the clock data is complete and correct
- Use clock reports to summarize time spent
- Create an invoice based on the clock data
I currently create invoices in an external software package based on the org-mode clock data.
- Archive complete tasks so they are out of the way.
See Archiving for more details.
Since I change tasks often (sometimes more than once in a minute) I use the following setting to remove clock entries with a zero duration.
 ;;  Sometimes I change tasks I'm clocking quickly - this removes clocked tasks with 0:00 duration
(setq org-clock-out-remove-zero-time-clocks t)
This setting just keeps my clocked log entries clean - only keeping clock entries that contribute to the clock report.
Before invoicing for clocked time it is important to make sure your clocked time data is correct. If you have a clocked time with an entry that is not closed (ie. it has no end time) then that is a hole in your clocked day and it gets counted as zero (0) for time spent on the task when generating clock reports. Counting it as zero is almost certainly wrong.
To check for unclosed clock times I use the agenda-view clock check ( v c in the agenda). This view shows clocking gaps and overlaps in the agenda.
To check the last month’s clock data I use F12 a v m b v c which shows a full month in the agenda, moves to the previous month, and shows the clocked times only. It’s important to remove any agenda restriction locks and filters when checking the logs for gaps and overlaps.
The clocked-time only display in the agenda makes it easy to quickly scan down the list to see if an entry is missing an end time. If an entry is not closed you can manually fix the clock entry based on other clock info around that time.
<<sec-10-1-2>> 10.1.2 Using clock reports to summarize time spentBillable time for clients are kept in separate org files.
To get a report of time spent on tasks for XYZ.org you simply visit the XYZ.org file and run an agenda clock report for the last month with F12 < a v m b R. This limits the agenda to this one file, shows the agenda for a full month, moves to last month, and generates a clock report.
My agenda org clock report settings show 5 levels of detail with links to the tasks. I like wider reports than the default compact setting so I override the :narrow value.
 ;;  Agenda clock report parameters
(setq org-agenda-clockreport-parameter-plist
      (quote ( :link t  :maxlevel 5  :fileskip0 t  :compact t  :narrow 80)))
I used to have a monthly clock report dynamic block in each project org file and manually updated them at the end of my billing cycle. I used this as the basis for billing my clients for time spent on their projects. I found updating the dynamic blocks fairly tedious when you have more than a couple of files for the month.
I have since moved to using agenda clock reports shortly after that feature was added. I find this much more convenient. The data isn’t normally for consumption by anyone else so the format of the agenda clock report format is great for my use-case.
Estimating how long tasks take to complete is a difficult skill to master. Org-mode makes it easy to practice creating estimates for tasks and then clock the actual time it takes to complete.
By repeatedly estimating tasks and reviewing how your estimate relates to the actual time clocked you can tune your estimating skills.
<<sec-10-2-1>> 10.2.1 Creating a task estimate with column modeI use properties and column view to do project estimates.
I set up column view globally with the following headlines
 ;  Set default column view headings: Task Effort Clock_Summary
(setq org-columns-default-format  "%80ITEM(Task) %10Effort(Effort){:} %10CLOCKSUM")
This makes column view show estimated task effort and clocked times side-by-side which is great for reviewing your project estimates.
A property called Effort records the estimated amount of time a given task will take to complete. The estimate times I use are one of:
- 10 minutes
- 30 minutes
- 1 hour
- 2 hours
- 3 hours
- 4 hours
- 5 hours
- 6 hours
- 7 hours
- 8 hours
These are stored for easy use in column mode in the global property Effort_ALL.
 ;  global Effort estimate values
 ;  global STYLE property values for completion
(setq org-global-properties (quote (( "Effort_ALL" .  "0:15 0:30 0:45 1:00 2:00 3:00 4:00 5:00 6:00 0:00")
                                    ( "STYLE_ALL" .  "habit"))))
To create an estimate for a task or subtree start column mode with C-c C-x C-c and collapse the tree with c. This shows a table overlayed on top of the headlines with the task name, effort estimate, and clocked time in columns.
With the cursor in the Effort column for a task you can easily set the estimated effort value with the quick keys 1 through 9.
After setting the effort values exit column mode with q.
For fixed price jobs where you provide your estimate to a client, then work to complete the project it is useful to save the original estimate that is provided to the client.
Save your original estimate by creating a dynamic clock report table at the top of your estimated project subtree. Entering C-c C-x i RET inserts a clock table report with your estimated values and any clocked time to date.
Original Estimate
 #+BEGIN: columnview :hlines 1 :id local
 | Task                        | Estimated Effort | CLOCKSUM |
 |-----------------------------+------------------+----------|
 | ** TODO Project to estimate |             5:40 |          |
 | *** TODO Step 1             |             0:10 |          |
 | *** TODO Step 2             |             0:10 |          |
 | *** TODO Step 3             |             5:10 |          |
 | **** TODO Step 3.1          |             2:00 |          |
 | **** TODO Step 3.2          |             3:00 |          |
 | **** TODO Step 3.3          |             0:10 |          |
 | *** TODO Step 4             |             0:10 |          |
 #+END:
I normally delete the #+BEGIN: and #+END: lines from the original table after providing the estimate to the client to ensure I don’t accidentally update the table by hitting C-c C-c on the #+BEGIN: line.
Saving the original estimate data makes it possible to refine the project tasks into subtasks as you work on the project without losing the original estimate data.
<<sec-10-2-3>> 10.2.3 Reviewing your estimateColumn view is great for reviewing your estimate. This shows your estimated time value and the total clock time for the project side-by-side.
Creating a dynamic clock table with C-c C-x i RET is a great way to save this project review if you need to make it available to other applications.
C-c C-x C-d also provides a quick summary of clocked time for the current org file.
When someone wants details of what I’ve done recently I simple generate a log report in the agenda with tasks I’ve completed and state changes combined with a clock report for the appropriate time period.
The following setting shows closed tasks and state changes in the agenda. Combined with the agenda clock report (‘R’) I can quickly generate all of the details required.
 ;;  Agenda log mode items to display (closed and state changes by default)
(setq org-agenda-log-mode-items (quote (closed state)))
To generate the report I pull up the agenda for the appropriate time frame (today, yesterday, this week, or last week) and hit the key sequence l R to add the log report (without clocking data lines) and the agenda clock report at the end.
Then it’s simply a matter of exporting the resulting agenda in some useful format to provide to other people. C-x C-w /tmp/agenda.html RET exports to HTML and C-x C-w /tmp/agenda.txt RET exports to plain text. Other formats are available but I use these two the most.
Combining this export with tag filters and C-u R can limit the report to exactly the tags that people are interested in.
Tasks can have any number of arbitrary tags. Tags are used for:
- filtering todo lists and agenda views
- providing context for tasks
- tagging notes
- tagging phone calls
- tagging meetings
- tagging tasks to be refiled
- tagging tasks in a WAITING state because a parent task is WAITING
- tagging cancelled tasks because a parent task is CANCELLED
- preventing export of some subtrees when publishing
I use tags mostly for filtering in the agenda. This means you can find tasks with a specific tag easily across your large number of org-mode files.
Some tags are mutually exclusive. These are defined in a group so that only one of the tags can be applied to a task at a time (disregarding tag inheritance). I use these types for tags for applying context to a task. (Work tasks have an @office tag, and are done at the office, Farm tasks have an @farm tag and are done at the farm – I can’t change the oil on the tractor if I’m not at the farm… so I hide these and other tasks by filtering my agenda view to only @office tasks when I’m at the office.)
Tasks are grouped together in org-files and a #+FILETAGS: entry applies a tag to all tasks in the file. I use this to apply a tag to all tasks in the file. My norang.org file creates a NORANG file tag so I can filter tasks in the agenda in the norang.org file easily.
Here are my tag definitions with associated keys for filtering in the agenda views.
The startgroup - endgroup ( @XXX) tags are mutually exclusive - selecting one removes a similar tag already on the task. These are the context tags - you can’t be in two places at once so if a task is marked with @farm and you add @office then the @farm tag is removed automagically.
The other tags WAITING .. FLAGGED are not mutually exclusive and multiple tags can appear on a single task. Some of those tags are created by todo state change triggers. The shortcut key is used to add or remove the tag using C-c C-q or to apply the task for filtering on the agenda.
I have both FARM and @farm tags. FARM is set by a FILETAGS entry and just gives me a way to filter anything farm related. The @farm tag signifies that the task as to be done at the farm. If I have to call someone about something that would have a FARM tag but I can do that at home on my lunch break. I don’t physically have to be at the farm to make the call.
 ;  Tags with fast selection keys
(setq org-tag-alist (quote (( :startgroup)
                            ( "@errand" . ?e)
                            ( "@office" . ?o)
                            ( "@home" . ?H)
                            ( "@farm" . ?f)
                            ( :endgroup)
                            ( "WAITING" . ?w)
                            ( "HOLD" . ?h)
                            ( "PERSONAL" . ?P)
                            ( "WORK" . ?W)
                            ( "FARM" . ?F)
                            ( "ORG" . ?O)
                            ( "NORANG" . ?N)
                            ( "crypt" . ?E)
                            ( "NOTE" . ?n)
                            ( "CANCELLED" . ?c)
                            ( "FLAGGED" . ??))))

 ;  Allow setting single tags without the menu
(setq org-fast-tag-selection-single-key (quote expert))

 ;  For tag searches ignore tasks with scheduled and deadline dates
(setq org-agenda-tags-todo-honor-ignore-options t)
Filetags are a convenient way to apply one or more tags to all of the headings in a file.
Filetags look like this:
#+FILETAGS: NORANG @office
I have the following #+FILETAGS: entries in my org-mode files:
| File | Tags |
|---|---|
| todo.org | PERSONAL |
| gsoc2009.org | GSOC PERSONAL |
| git.org | GIT WORK |
| org.org | ORG WORK |
| mark.org | MARK PERSONAL |
| farm.org | FARM PERSONAL |
| File | Tags |
|---|---|
| norang.org | NORANG @office |
| ABC.org | ABC @office |
| XYZ.org | XYZ @office |
| ABC-DEF.org | ABC DEF @office |
| ABC-KKK.org | ABC KKK @office |
| YYY.org | YYY @office |
| File | Tags |
|---|---|
| refile.org | REFILE |
The following tags are automatically added or removed by todo state triggers described previously in ToDo state triggers
WAITINGCANCELLED
Notes are little gems of knowledge that you come across during your day. They are just like tasks except there is nothing to do (except learn and memorize the gem of knowledge). Unfortunately there are way too many gems to remember and my head explodes just thinking about it.
org-mode to the rescue!
Often I’ll find some cool feature or thing I want to remember while reading the org-mode and git mailing lists in Gnus. To create a note I use my note capture template C-c c n, type a heading for the note and C-c C-c to save it. The only other thing to do is to refile it (later) to the appropriate project file.
I have an agenda view just to find notes. Notes are refiled to an appropriate project file and task. If there is no specific task it belongs to it goes to the catchall * Notes task. I generally have a catchall notes task in every project file. Notes are created with a NOTE tag already applied by the capture template so I’m free to refile the note anywhere. As long as the note is in a project file that contributes to my agenda (ie. in org-agenda-files) then I can find the note back easily with my notes agenda view by hitting the key combination F12 N. I’m free to limit the agenda view of notes using standard agenda tag filtering.
Short notes with a meaningful headline are a great way to remember technical details without the need to actually remember anything - other than how to find them back when you need them using F12 N.
Notes that are project related and not generally useful can be archived with the project and removed from the agenda when the project is removed.
So my org notes go in org.org and my git notes go in git.org both under the * Notes task. I’ll forever be able to find those. A note about some work project detail I want to remember with the project is filed to the project task under the appropriate work org-mode file and eventually gets removed from the agenda when the project is complete and archived.
Phone calls are interruptions and I use capture mode to deal with these (like all interruptions). Most of the heavy lifting for phone calls is done by capture mode. I use a special capture template for phone calls combined with a custom function that replaces text with information from my bbdb addressbook database.
C-c c p starts a capture task normally and I’m free to enter notes from the call in the template immediately. The cursor starts in the template normally where the name of the caller would be inserted. I can use a bbdb lookup function to insert the name with f9-p or I can just type in whatever is appropriate. If a bbdb entry needs to be created for the caller I can do that and replace the caller details with f9-p anytime that is convenient for me. I found that automatically calling the bbdb lookup function would interrupt my workflow during the call in cases where the information about the caller was not readily available. Sometimes I want to make notes first and get the caller details later during the call.
The phone call capture template starts the clock as soon as the phone rings and I’m free to lookup and replace the caller in bbdb anytime during or after the call. Capture mode starts the clock using the :clock-in t setting in the template.
When the phone call ends I simple do C-c C-c to close the capture buffer and stop the clock. If I have to close it early and look up other information during the call I just do C-c C-c F9-SPC to close the capture buffer (which stops the clock) and then immediately switch back to the last clocked item to continue the clock in the phone call task. When the phone call ends I clock out which normally clocks in my default task again (if any).
Here is my set up for phone calls. I would like to thank Gregory
- Grubbs for the original bbdb lookup functions which this version
is based on.
Below is the partial capture template showing the phone call template followed by the phone-call related lookup functions.
 ;;  Capture templates for: TODO tasks, Notes, appointments, phone calls, and org-protocol
(setq org-capture-templates
      (quote (...
              ( "p"  "Phone call" entry (file  "~/git/org/refile.org")
                "* PHONE %? :PHONE:\n%U"  :clock-in t  :clock-resume t)
              ...)))
( require ' bbdb)
( require ' bbdb-com)

(global-set-key (kbd  " p") 'bh/phone-call)

 ;;
 ;;  Phone capture template handling with BBDB lookup
 ;;  Adapted from code by Gregory J. Grubbs
( defun  bh/phone-call ()
   "Return name and company info for caller from bbdb lookup"
  (interactive)
  ( let* (name rec caller)
    (setq name (completing-read  "Who is calling? "
                                (bbdb-hashtable)
                                'bbdb-completion-predicate
                                'confirm))
    ( when (> (length name) 0)
       ;  Something was supplied - look it up in bbdb
      (setq rec
            (or (first
                 (or (bbdb-search (bbdb-records) name nil nil)
                     (bbdb-search (bbdb-records) nil name nil)))
                name)))

     ;  Build the bbdb link if we have a bbdb record, otherwise just return the name
    (setq caller ( cond ((and rec (vectorp rec))
                        ( let ((name (bbdb-record-name rec))
                              (company (bbdb-record-company rec)))
                          (concat  "[[bbdb:"
                                  name  "]["
                                  name  "]]"
                                  ( when company
                                    (concat  " - " company)))))
                       (rec)
                       (t  "NameOfCaller")))
    (insert caller)))
Most of my day is deadline/schedule driven. I work off of the agenda first and then pick items from the todo lists as outlined in What do I work on next?
The first day of the week (usually Monday) I do my weekly review. I keep a list like this one to remind me what needs to be done.
To keep the agenda fast I set
(setq org-agenda-span 'day)
so only today’s date is shown by default. I only need the weekly view during my weekly review and this keeps my agenda generation fast.
I have a recurring task which keeps my weekly review checklist handy. This pops up as a reminder on Monday’s. This week I’m doing my weekly review on Tuesday since Monday was a holiday.
*  NEXT  Weekly Review  [0/6]
  SCHEDULED:  <2009-05-18 Mon ++1w>
 :LOGBOOK:...
 :PROPERTIES:...

 What to review:

  -  [ ] Check follow-up folder
  -  [ ] Review weekly agenda  =F12 a w //=
  -  [ ] Check clocking data for past week  =v c=
  -  [ ] Review clock report for past week  =R=
    - Check where we spent time (too much or too little) and rectify this week
  -  [ ] Look at entire agenda for today   =F12 SPC=
  -  [ ] Review projects  =F12 SPC //= and  =V= repeatedly to view each project

  - start work
    - daily agenda first - knock off items
    - then work on NEXT tasks
The first item [ ] Check follow-up folder makes me pull out the paper file I dump stuff into all week long - things I need to take care of but are in no particular hurry to deal with. Stuff I get in the mail etc. that I don’t want to deal with now. I just toss it in my Follow-Up folder in the filing cabinet and forget about it until the weekly review.
I go through the folder and weed out anything that needs to be dealt with. After that everything else is in org-mode. I tend to schedule tasks onto the agenda for the coming week so that I don’t spend lots of time trying to find what needs to be worked on next.
This works for me. Your mileage may vary ;)
I’m using a new lazy project definition to mark tasks as projects. This requires zero effort from me. Any task with a subtask using a todo keyword is a project. Period.
Projects are ‘stuck’ if they have no subtask with a NEXT todo keyword task defined.
The org-mode stuck projects agenda view lists projects that have no NEXT task defined. Stuck projects show up on my block agenda and I tend to assign a NEXT task so the list remains empty. This helps to keep projects moving forward.
I disable the default org-mode stuck projects agenda view with the following setting.
(setq org-stuck-projects (quote ( "" nil nil "")))
This prevents org-mode from trying to show incorrect data if I select the default stuck project view with F12 # from the agenda menu. My customized stuck projects view is part of my block agenda displayed with F12 SPC.
Projects can have subprojects - and these subprojects can also be stuck. Any project that is stuck shows up on the stuck projects list so I can indicate or create a NEXT task to move that project forward.
In the following example Stuck Project A is stuck because it has no subtask which is NEXT. Project C is not stuck because it has NEXT tasks SubTask G and Task I. Stuck Sub Project D is stuck because SubTask E is not NEXT and there are no other tasks available in this project.
* Category
**  TODO  Stuck Project A
***  TODO  Task B
**  TODO  Project C
***  TODO  Stuck Sub Project D
****  TODO  SubTask E
***  TODO  Sub Project F
****  NEXT  SubTask G
****  TODO  SubTask H
***  NEXT  Task I
***  TODO  Task J
All of the stuck projects and subprojects show up in the stuck projects list and that is my indication to assign or create NEXT tasks until the stuck projects list is empty. Occasionally some subtask is WAITING for something and the project is stuck until that condition is satisfied. In this case I leave it on the stuck project list and just work on something else. This stuck project ‘bugs’ me regularly when I see it on the block agenda and this prompts me to follow up on the thing that I’m waiting for.
I have the following helper functions defined for projects which are used by agenda views.
( defun  bh/is-project-p ()
   "Any task with a todo keyword subtask"
  ( save-restriction
    (widen)
    ( let ((has-subtask)
          (subtree-end ( save-excursion (org-end-of-subtree t)))
          (is-a-task (member (nth 2 (org-heading-components)) org-todo-keywords-1)))
      ( save-excursion
        (forward-line 1)
        ( while (and (not has-subtask)
                    (< (point) subtree-end)
                    (re-search-forward  "^\*+ " subtree-end t))
          ( when (member (org-get-todo-state) org-todo-keywords-1)
            (setq has-subtask t))))
      (and is-a-task has-subtask))))

( defun  bh/is-project-subtree-p ()
   "Any task with a todo keyword that is in a project subtree.
 Callers of this function already widen the buffer view."
  ( let ((task ( save-excursion (org-back-to-heading 'invisible-ok)
                              (point))))
    ( save-excursion
      (bh/find-project-task)
      ( if (equal (point) task)
          nil
        t))))

( defun  bh/is-task-p ()
   "Any task with a todo keyword and no subtask"
  ( save-restriction
    (widen)
    ( let ((has-subtask)
          (subtree-end ( save-excursion (org-end-of-subtree t)))
          (is-a-task (member (nth 2 (org-heading-components)) org-todo-keywords-1)))
      ( save-excursion
        (forward-line 1)
        ( while (and (not has-subtask)
                    (< (point) subtree-end)
                    (re-search-forward  "^\*+ " subtree-end t))
          ( when (member (org-get-todo-state) org-todo-keywords-1)
            (setq has-subtask t))))
      (and is-a-task (not has-subtask)))))

( defun  bh/is-subproject-p ()
   "Any task which is a subtask of another project"
  ( let ((is-subproject)
        (is-a-task (member (nth 2 (org-heading-components)) org-todo-keywords-1)))
    ( save-excursion
      ( while (and (not is-subproject) (org-up-heading-safe))
        ( when (member (nth 2 (org-heading-components)) org-todo-keywords-1)
          (setq is-subproject t))))
    (and is-a-task is-subproject)))

( defun  bh/list-sublevels-for-projects-indented ()
   "Set org-tags-match-list-sublevels so when restricted to a subtree we list all subtasks.
   This is normally used by skipping functions where this variable is already local to the agenda."
  ( if (marker-buffer org-agenda-restrict-begin)
      (setq org-tags-match-list-sublevels 'indented)
    (setq org-tags-match-list-sublevels nil))
  nil)

( defun  bh/list-sublevels-for-projects ()
   "Set org-tags-match-list-sublevels so when restricted to a subtree we list all subtasks.
   This is normally used by skipping functions where this variable is already local to the agenda."
  ( if (marker-buffer org-agenda-restrict-begin)
      (setq org-tags-match-list-sublevels t)
    (setq org-tags-match-list-sublevels nil))
  nil)

( defvar  bh/hide-scheduled-and-waiting-next-tasks t)

( defun  bh/toggle-next-task-display ()
  (interactive)
  (setq bh/hide-scheduled-and-waiting-next-tasks (not bh/hide-scheduled-and-waiting-next-tasks))
  ( when  (equal major-mode 'org-agenda-mode)
    (org-agenda-redo))
  (message  "%s WAITING and SCHEDULED NEXT Tasks" ( if bh/hide-scheduled-and-waiting-next-tasks  "Hide"  "Show")))

( defun  bh/skip-stuck-projects ()
   "Skip trees that are not stuck projects"
  ( save-restriction
    (widen)
    ( let ((next-headline ( save-excursion (or (outline-next-heading) (point-max)))))
      ( if (bh/is-project-p)
          ( let* ((subtree-end ( save-excursion (org-end-of-subtree t)))
                 (has-next ))
            ( save-excursion
              (forward-line 1)
              ( while (and (not has-next) (< (point) subtree-end) (re-search-forward  "^\\*+ NEXT " subtree-end t))
                ( unless (member  "WAITING" (org-get-tags-at))
                  (setq has-next t))))
            ( if has-next
                nil
              next-headline))  ;  a stuck project, has subtasks but no next task
        nil))))

( defun  bh/skip-non-stuck-projects ()
   "Skip trees that are not stuck projects"
   ;;  (bh/list-sublevels-for-projects-indented)
  ( save-restriction
    (widen)
    ( let ((next-headline ( save-excursion (or (outline-next-heading) (point-max)))))
      ( if (bh/is-project-p)
          ( let* ((subtree-end ( save-excursion (org-end-of-subtree t)))
                 (has-next ))
            ( save-excursion
              (forward-line 1)
              ( while (and (not has-next) (< (point) subtree-end) (re-search-forward  "^\\*+ NEXT " subtree-end t))
                ( unless (member  "WAITING" (org-get-tags-at))
                  (setq has-next t))))
            ( if has-next
                next-headline
              nil))  ;  a stuck project, has subtasks but no next task
        next-headline))))

( defun  bh/skip-non-projects ()
   "Skip trees that are not projects"
   ;;  (bh/list-sublevels-for-projects-indented)
  ( if ( save-excursion (bh/skip-non-stuck-projects))
      ( save-restriction
        (widen)
        ( let ((subtree-end ( save-excursion (org-end-of-subtree t))))
          ( cond
           ((bh/is-project-p)
            nil)
           ((and (bh/is-project-subtree-p) (not (bh/is-task-p)))
            nil)
           (t
            subtree-end))))
    ( save-excursion (org-end-of-subtree t))))

( defun  bh/skip-non-tasks ()
   "Show non-project tasks.
 Skip project and sub-project tasks, habits, and project related tasks."
  ( save-restriction
    (widen)
    ( let ((next-headline ( save-excursion (or (outline-next-heading) (point-max)))))
      ( cond
       ((bh/is-task-p)
        nil)
       (t
        next-headline)))))

( defun  bh/skip-project-trees-and-habits ()
   "Skip trees that are projects"
  ( save-restriction
    (widen)
    ( let ((subtree-end ( save-excursion (org-end-of-subtree t))))
      ( cond
       ((bh/is-project-p)
        subtree-end)
       ((org-is-habit-p)
        subtree-end)
       (t
        nil)))))

( defun  bh/skip-projects-and-habits-and-single-tasks ()
   "Skip trees that are projects, tasks that are habits, single non-project tasks"
  ( save-restriction
    (widen)
    ( let ((next-headline ( save-excursion (or (outline-next-heading) (point-max)))))
      ( cond
       ((org-is-habit-p)
        next-headline)
       ((and bh/hide-scheduled-and-waiting-next-tasks
             (member  "WAITING" (org-get-tags-at)))
        next-headline)
       ((bh/is-project-p)
        next-headline)
       ((and (bh/is-task-p) (not (bh/is-project-subtree-p)))
        next-headline)
       (t
        nil)))))

( defun  bh/skip-project-tasks-maybe ()
   "Show tasks related to the current restriction.
 When restricted to a project, skip project and sub project tasks, habits, NEXT tasks, and loose tasks.
 When not restricted, skip project and sub-project tasks, habits, and project related tasks."
  ( save-restriction
    (widen)
    ( let* ((subtree-end ( save-excursion (org-end-of-subtree t)))
           (next-headline ( save-excursion (or (outline-next-heading) (point-max))))
           (limit-to-project (marker-buffer org-agenda-restrict-begin)))
      ( cond
       ((bh/is-project-p)
        next-headline)
       ((org-is-habit-p)
        subtree-end)
       ((and (not limit-to-project)
             (bh/is-project-subtree-p))
        subtree-end)
       ((and limit-to-project
             (bh/is-project-subtree-p)
             (member (org-get-todo-state) (list  "NEXT")))
        subtree-end)
       (t
        nil)))))

( defun  bh/skip-project-tasks ()
   "Show non-project tasks.
 Skip project and sub-project tasks, habits, and project related tasks."
  ( save-restriction
    (widen)
    ( let* ((subtree-end ( save-excursion (org-end-of-subtree t))))
      ( cond
       ((bh/is-project-p)
        subtree-end)
       ((org-is-habit-p)
        subtree-end)
       ((bh/is-project-subtree-p)
        subtree-end)
       (t
        nil)))))

( defun  bh/skip-non-project-tasks ()
   "Show project tasks.
 Skip project and sub-project tasks, habits, and loose non-project tasks."
  ( save-restriction
    (widen)
    ( let* ((subtree-end ( save-excursion (org-end-of-subtree t)))
           (next-headline ( save-excursion (or (outline-next-heading) (point-max)))))
      ( cond
       ((bh/is-project-p)
        next-headline)
       ((org-is-habit-p)
        subtree-end)
       ((and (bh/is-project-subtree-p)
             (member (org-get-todo-state) (list  "NEXT")))
        subtree-end)
       ((not (bh/is-project-subtree-p))
        subtree-end)
       (t
        nil)))))

( defun  bh/skip-projects-and-habits ()
   "Skip trees that are projects and tasks that are habits"
  ( save-restriction
    (widen)
    ( let ((subtree-end ( save-excursion (org-end-of-subtree t))))
      ( cond
       ((bh/is-project-p)
        subtree-end)
       ((org-is-habit-p)
        subtree-end)
       (t
        nil)))))

( defun  bh/skip-non-subprojects ()
   "Skip trees that are not projects"
  ( let ((next-headline ( save-excursion (outline-next-heading))))
    ( if (bh/is-subproject-p)
        nil
      next-headline)))
My archiving procedure has changed. I used to move entire subtrees to a separate archive file for the project. Task subtrees in FILE.org get archived to FILE.org_archive using the a y command in the agenda.
I still archive to the same archive file as before but now I archive any done state todo task that is old enough to archive. Tasks to archive are listed automatically at the end of my block agenda and these are guaranteed to be old enough that I’ve already billed any time associated with these tasks. This cleans up my project trees and removes the old tasks that are no longer interesting. The archived tasks get extra property data created during the archive procedure so that it is possible to reconstruct exactly where the archived entry came from in the rare case where you want to unarchive something.
My archive files are huge but so far I haven’t found a need to split them by year (or decade) :)
Archivable tasks show up in the last section of my block agenda when a new month starts. Any tasks that are done but have no timestamps this month or last month (ie. they are over 30 days old) are available to archive. Timestamps include closed dates, notes, clock data, etc - any active or inactive timestamp in the task.
Archiving is trivial. Just mark all of the entries in the block agenda using the m key and then archive them all to the appropriate place with B $. This normally takes less than 5 minutes once a month.
I no longer use an ARCHIVE property in my subtrees. Tasks can just archive normally to the Archived Tasks heading in the archive file.
The following setting ensures that task states are untouched when they are archived. This makes it possible to archive tasks that are not marked DONE. By default tasks are archived under the heading * Archived Tasks in the archive file.
This archiving function does not keep your project trees intact. It archives done state tasks after they are old enough to they are removed from the main org file. It should be possible to reconstruct the original tree from the archive detail properties but I’ve never needed to do this yet. The archived detail is very useful the few times a year I actually need to look for some archived data but most of the time I just move it out of the way and keep it for historical purposes.
(setq org-archive-mark-done nil)
(setq org-archive-location  "%s_archive::* Archived Tasks")
( defun  bh/skip-non-archivable-tasks ()
   "Skip trees that are not available for archiving"
  ( save-restriction
    (widen)
     ;;  Consider only tasks with done todo headings as archivable candidates
    ( let ((next-headline ( save-excursion (or (outline-next-heading) (point-max))))
          (subtree-end ( save-excursion (org-end-of-subtree t))))
      ( if (member (org-get-todo-state) org-todo-keywords-1)
          ( if (member (org-get-todo-state) org-done-keywords)
              ( let* ((daynr (string-to-int (format-time-string  "%d" (current-time))))
                     (a-month-ago (* 60 60 24 (+ daynr 1)))
                     (last-month (format-time-string  "%Y-%m-" (time-subtract (current-time) (seconds-to-time a-month-ago))))
                     (this-month (format-time-string  "%Y-%m-" (current-time)))
                     (subtree-is-current ( save-excursion
                                           (forward-line 1)
                                           (and (< (point) subtree-end)
                                                (re-search-forward (concat last-month  " \\ | " this-month) subtree-end t)))))
                ( if subtree-is-current
                    subtree-end  ;  Has a date in this month or last month, skip it
                  nil))   ;  available to archive
            (or subtree-end (point-max)))
        next-headline))))
The only time I set the ARCHIVE tag on a task is to prevent it from opening by default because it has tons of information I don’t really need to look at on a regular basis. I can open the task with C-TAB if I need to see the gory details (like a huge table of data related to the task) but normally I don’t need that information displayed.
Archiving monthly works well for me. I keep completed tasks around for at least 30 days before archiving them. This keeps current clocking information for the last 30 days out of the archives. This keeps my files that contribute to the agenda fairly current (this month, and last month, and anything that is unfinished). I only rarely visit tasks in the archive when I need to pull up ancient history for something.
Archiving keeps my main working files clutter-free. If I ever need the detail for the archived tasks they are available in the appropriate archive file.
I don’t do a lot of publishing for other people but I do keep a set of private client system documentation online. Most of this documentation is a collection of notes exported to HTML.
Everything at http://doc.norang.ca/ is generated by publishing org-files. This includes the index pages on this site.
Org-mode can export to a variety of publishing formats including (but not limited to)
- ASCII (plain text - but not the original org-mode file)
- HTML
- LaTeX
- Docbook which enables getting to lots of other formats like ODF, XML, etc
- PDF via LaTeX or Docbook
- iCal
I haven’t begun the scratch the surface of what org-mode is capable of doing. My main use case for org-mode publishing is just to create HTML documents for viewing online conveniently. Someday I’ll get time to try out the other formats when I need them for something.
The new exporter created by Nicolas Goaziou was introduced in org 8.0.
I have the following setup for the exporters I use.
Alphabetical listing options need to be set before the exporters are loaded for filling to work correctly.
(setq org-alphabetical-lists t)

 ;;  Explicitly load required exporters
( require ' ox-html)
( require ' ox-latex)
( require ' ox-ascii)
16.1.1 Conversion from the old exporter to the new exporter
Here is the list of changes I made to move from the old exporter (pre org 8.0) to the new exporter.
- Explicitly require exporters
- Add
ox-html - Add
ox-latex - Add
ox-ascii
- Add
- Rename variables
org-export-html-style-extratoorg-html-head-extraorg-export-html-validation-linktoorg-html-validation-linkorg-export-html-inline-imagestoorg-html-inline-imagesorg-export-html-style-include-defaulttoorg-html-head-include-default-styleorg-export-html-xml-declarationtoorg-html-xml-declarationorg-export-latex-listingstoorg-latex-listingsorg-export-html-style-include-scriptstoorg-html-head-include-scripts
- Publishing changes
- Rename
:publishing-functionorg-publish-org-to-htmltoorg-html-publish-to-htmlorg-publish-org-to-orgtoorg-org-publish-to-org
- Change
:styleto:html-head
- Rename
- Change
bh/is-late-deadlineto handle modified deadline string in agenda - Reverse agenda sorting for late deadlines
These are no longer reported with negative values on the agenda
- Add a blank line after my inactive timestamps following headings to prevent them from being exported.
Org-babel makes it easy to generate decent graphics using external packages like ditaa, graphviz, PlantUML, and others.
The setup is really easy. ditaa is provided with the org-mode source. You’ll have to install the graphviz and PlantUML packages on your system.
(setq org-ditaa-jar-path  "~/git/org-mode/contrib/scripts/ditaa.jar")
(setq org-plantuml-jar-path  "~/java/plantuml.jar")

(add-hook 'org-babel-after-execute-hook 'bh/display-inline-images 'append)

 ;  Make babel results blocks lowercase
(setq org-babel-results-keyword  "results")

( defun  bh/display-inline-images ()
  ( condition-case nil
      (org-display-inline-images)
    ( error nil)))

(org-babel-do-load-languages
 (quote org-babel-load-languages)
 (quote ((emacs-lisp . t)
         (dot . t)
         (ditaa . t)
         (R . t)
         (python . t)
         (ruby . t)
         (gnuplot . t)
         (clojure . t)
         (sh . t)
         (ledger . t)
         (org . t)
         (plantuml . t)
         (latex . t))))

 ;  Do not prompt to confirm evaluation
 ;  This may be dangerous - make sure you understand the consequences
 ;  of setting this -- see the docstring for details
(setq org-confirm-babel-evaluate nil)

 ;  Use fundamental mode when editing plantuml blocks with C-c '
(add-to-list 'org-src-lang-modes (quote ( "plantuml" . fundamental)))
Now you just create a begin-src block for the appropriate tool, edit the text, and build the pictures with C-c C-c. After evaluating the block results are displayed. You can toggle display of inline images with C-c C-x C-v
I disable startup with inline images because when I access my org-files from an SSH session without X this breaks (say from my Android phone) it fails when trying to display the images on a non-X session. It’s much more important for me to be able to access my org files from my Android phone remotely than it is to see images on startup.
 ;;  Don't enable this because it breaks access to emacs from my Android phone
(setq org-startup-with-inline-images nil)
ditaa is a great tool for quickly generating graphics to convey ideas and ditaa is distributed with org-mode! All of the graphics in this document are automatically generated by org-mode using plain text source.
Artist mode makes it easy to create boxes and lines for ditaa graphics.
The source for a ditaa graphic looks like this in org-mode:
Here’s an example without the #+begin_src and #+end_src lines.
    +-----------+        +---------+
    |    PLC    |        |         |
    |  Network  +<------>+   PLC   +<---=---------+
    |    cRED   |        |  c707   |              |
    +-----------+        +----+----+              |
                              ^                   |
                              |                   |
                              |  +----------------|-----------------+
                              |  |                |                 |
                              v  v                v                 v
      +----------+       +----+--+--+      +-------+---+      +-----+-----+       Windows clients
      |          |       |          |      |           |      |           |      +----+      +----+
      | Database +<----->+  Shared  +<---->+ Executive +<-=-->+ Operator  +<---->|cYEL| . . .|cYEL|
      |   c707   |       |  Memory  |      |   c707    |      | Server    |      |    |      |    |
      +--+----+--+       |{d} cGRE  |      +------+----+      |   c707    |      +----+      +----+
         ^    ^          +----------+             ^           +-------+---+
         |    |                                   |
         |    +--------=--------------------------+
         v
+--------+--------+
|                 |
| Millwide System |            -------- Data ---------
| cBLU            |            --=----- Signals ---=--
+-----------------+

Graphviz is another great tool for creating graphics in your documents.
The source for a graphviz graphic looks like this in org-mode:
digraph G {
  size= "8,6"
  ratio=expand
  edge [dir=both]
  plcnet [shape=box, label= "PLC Network"]
  subgraph cluster_wrapline {
    label= "Wrapline Control System"
    color=purple
    subgraph {
    rank=same
    exec
    sharedmem [style=filled, fillcolor=lightgrey, shape=box]
    }
    edge[style=dotted, dir=none]
    exec -> opserver
    exec -> db
    plc -> exec
    edge [style=line, dir=both]
    exec -> sharedmem
    sharedmem -> db
    plc -> sharedmem
    sharedmem -> opserver
  }
  plcnet -> plc [constraint=false]
  millwide [shape=box, label= "Millwide System"]
  db -> millwide

  subgraph cluster_opclients {
    color=blue
    label= "Operator Clients"
    rankdir=LR
    labelloc=b
    node[label=client]
    opserver -> client1
    opserver -> client2
    opserver -> client3
  }
}

The -Kdot is optional (defaults to dot) but you can substitute other graphviz types instead here (ie. twopi, neato, circo, etc).
I have just started using PlantUML which is built on top of Graphviz. I’m still experimenting with this but so far I like it a lot. The todo state change diagrams in this document are created with PlantUML.
The source for a PlantUML graphic looks like this in org-mode:
<<sec-16-5-1>> 16.5.1 Sequence Diagramtitle Example Sequence Diagram activate Client Client -> Server: Session Initiation note right: Client requests new session activate Server Client <-- Server: Authorization Request note left: Server requires authentication Client -> Server: Authorization Response note right: Client provides authentication details Server --> Client: Session Token note left: Session established deactivate Server Client -> Client: Saves token deactivate Client

title Example Activity Diagram
note right: Example Function
(*)-->  "Step 1"
-->  "Step 2"
->  "Step 3"
-->  "Step 4"
--> === STARTLOOP ===
note top: For each element in the array
if  "Are we done?" then
  -> [no]  "Do this"
  ->  "Do that"
  note bottom: Important note\ngoes here
  -up->  "Increment counters"
  --> === STARTLOOP ===
else
  --> [yes] === ENDLOOP ===
endif
-->  "Last Step"
--> (*)

LabUser --> (Runs Simulation)
LabUser --> (Analyses Results)

Object1 <|-- Object2
Object1: someVar
Object1: execute()
Object2: getState()
Object2: setState()
Object2: state

[*] --> Start
Start -> State2
State2 -> State3
note right of State3: Notes can be\nattached to states
State2 --> State4
State4 -> Finish
State3 --> Finish
Finish --> [*]

Org-mode exports the current file to one of the standard formats by invoking an export function. The standard key binding for this is C-c C-e followed by the key for the type of export you want.
This works great for single files or parts of files – if you narrow the buffer to only part of the org-mode file then you only get the narrowed detail in the export.
I mainly use publishing for publishing multiple files or projects. I don’t want to remember where the created export file needs to move to and org-mode projects are a great solution to this.
The http://doc.norang.ca website (and a bunch of other files that are not publicly available) are all created by editing org-mode files and publishing the project the file is contained in. This is great for people like me who want to figure out the details once and forget about it. I love stuff that Just Works(tm).
I have 5 main projects I use org-mode publishing for currently:
- norang (website)
- doc.norang.ca (website, published documents)
- doc.norang.ca/private (website, non-published documents)
- www.norang.ca/tmp (temporary publishing site for testing org-mode stuff)
- org files (which are selectively included by other websites)
Here’s my publishing setup:
 ;  experimenting with docbook exports - not finished
(setq org-export-docbook-xsl-fo-proc-command  "fop %s %s")
(setq org-export-docbook-xslt-proc-command  "xsltproc --output %s /usr/share/xml/docbook/stylesheet/nwalsh/fo/docbook.xsl %s")
 ;
 ;  Inline images in HTML instead of producting links to the image
(setq org-html-inline-images t)
 ;  Do not use sub or superscripts - I currently don't need this functionality in my documents
(setq org-export-with-sub-superscripts nil)
 ;  Use org.css from the norang website for export document stylesheets
(setq org-html-head-extra  "")
(setq org-html-head-include-default-style nil)
 ;  Do not generate internal css formatting for HTML exports
(setq org-export-htmlize-output-type (quote css))
 ;  Export with LaTeX fragments
(setq org-export-with-LaTeX-fragments t)
 ;  Increase default number of headings to export
(setq org-export-headline-levels 6)

 ;  List of projects
 ;  norang       - http://www.norang.ca/
 ;  doc          - http://doc.norang.ca/
 ;  org-mode-doc - http://doc.norang.ca/org-mode.html and associated files
 ;  org          - miscellaneous todo lists for publishing
(setq org-publish-project-alist
       ;
       ;  http://www.norang.ca/  (norang website)
       ;  norang-org are the org-files that generate the content
       ;  norang-extra are images and css files that need to be included
       ;  norang is the top-level project that gets published
      (quote (( "norang-org"
                :base-directory  "~/git/www.norang.ca"
                :publishing-directory  "/ssh:www-data@www:~/www.norang.ca/htdocs"
                :recursive t
                :table-of-contents nil
                :base-extension  "org"
                :publishing-function org-html-publish-to-html
                :style-include-default nil
                :section-numbers nil
                :table-of-contents nil
                :html-head  ""
                :author-info nil
                :creator-info nil)
              ( "norang-extra"
                :base-directory  "~/git/www.norang.ca/"
                :publishing-directory  "/ssh:www-data@www:~/www.norang.ca/htdocs"
                :base-extension  "css \\ | pdf \\ | png \\ | jpg \\ | gif"
                :publishing-function org-publish-attachment
                :recursive t
                :author nil)
              ( "norang"
                :components ( "norang-org"  "norang-extra"))
               ;
               ;  http://doc.norang.ca/  (norang website)
               ;  doc-org are the org-files that generate the content
               ;  doc-extra are images and css files that need to be included
               ;  doc is the top-level project that gets published
              ( "doc-org"
                :base-directory  "~/git/doc.norang.ca/"
                :publishing-directory  "/ssh:www-data@www:~/doc.norang.ca/htdocs"
                :recursive nil
                :section-numbers nil
                :table-of-contents nil
                :base-extension  "org"
                :publishing-function (org-html-publish-to-html org-org-publish-to-org)
                :style-include-default nil
                :html-head  ""
                :author-info nil
                :creator-info nil)
              ( "doc-extra"
                :base-directory  "~/git/doc.norang.ca/"
                :publishing-directory  "/ssh:www-data@www:~/doc.norang.ca/htdocs"
                :base-extension  "css \\ | pdf \\ | png \\ | jpg \\ | gif"
                :publishing-function org-publish-attachment
                :recursive nil
                :author nil)
              ( "doc"
                :components ( "doc-org"  "doc-extra"))
              ( "doc-private-org"
                :base-directory  "~/git/doc.norang.ca/private"
                :publishing-directory  "/ssh:www-data@www:~/doc.norang.ca/htdocs/private"
                :recursive nil
                :section-numbers nil
                :table-of-contents nil
                :base-extension  "org"
                :publishing-function (org-html-publish-to-html org-org-publish-to-org)
                :style-include-default nil
                :html-head  ""
                :auto-sitemap t
                :sitemap-filename  "index.html"
                :sitemap-title  "Norang Private Documents"
                :sitemap-style  "tree"
                :author-info nil
                :creator-info nil)
              ( "doc-private-extra"
                :base-directory  "~/git/doc.norang.ca/private"
                :publishing-directory  "/ssh:www-data@www:~/doc.norang.ca/htdocs/private"
                :base-extension  "css \\ | pdf \\ | png \\ | jpg \\ | gif"
                :publishing-function org-publish-attachment
                :recursive nil
                :author nil)
              ( "doc-private"
                :components ( "doc-private-org"  "doc-private-extra"))
               ;
               ;  Miscellaneous pages for other websites
               ;  org are the org-files that generate the content
              ( "org-org"
                :base-directory  "~/git/org/"
                :publishing-directory  "/ssh:www-data@www:~/org"
                :recursive t
                :section-numbers nil
                :table-of-contents nil
                :base-extension  "org"
                :publishing-function org-html-publish-to-html
                :style-include-default nil
                :html-head  ""
                :author-info nil
                :creator-info nil)
               ;
               ;  http://doc.norang.ca/  (norang website)
               ;  org-mode-doc-org this document
               ;  org-mode-doc-extra are images and css files that need to be included
               ;  org-mode-doc is the top-level project that gets published
               ;  This uses the same target directory as the 'doc' project
              ( "org-mode-doc-org"
                :base-directory  "~/git/org-mode-doc/"
                :publishing-directory  "/ssh:www-data@www:~/doc.norang.ca/htdocs"
                :recursive t
                :section-numbers nil
                :table-of-contents nil
                :base-extension  "org"
                :publishing-function (org-html-publish-to-html)
                :plain-source t
                :htmlized-source t
                :style-include-default nil
                :html-head  ""
                :author-info nil
                :creator-info nil)
              ( "org-mode-doc-extra"
                :base-directory  "~/git/org-mode-doc/"
                :publishing-directory  "/ssh:www-data@www:~/doc.norang.ca/htdocs"
                :base-extension  "css \\ | pdf \\ | png \\ | jpg \\ | gif \\ | org"
                :publishing-function org-publish-attachment
                :recursive t
                :author nil)
              ( "org-mode-doc"
                :components ( "org-mode-doc-org"  "org-mode-doc-extra"))
               ;
               ;  http://doc.norang.ca/  (norang website)
               ;  org-mode-doc-org this document
               ;  org-mode-doc-extra are images and css files that need to be included
               ;  org-mode-doc is the top-level project that gets published
               ;  This uses the same target directory as the 'doc' project
              ( "tmp-org"
                :base-directory  "/tmp/publish/"
                :publishing-directory  "/ssh:www-data@www:~/www.norang.ca/htdocs/tmp"
                :recursive t
                :section-numbers nil
                :table-of-contents nil
                :base-extension  "org"
                :publishing-function (org-html-publish-to-html org-org-publish-to-org)
                :html-head  ""
                :plain-source t
                :htmlized-source t
                :style-include-default nil
                :auto-sitemap t
                :sitemap-filename  "index.html"
                :sitemap-title  "Test Publishing Area"
                :sitemap-style  "tree"
                :author-info t
                :creator-info t)
              ( "tmp-extra"
                :base-directory  "/tmp/publish/"
                :publishing-directory  "/ssh:www-data@www:~/www.norang.ca/htdocs/tmp"
                :base-extension  "css \\ | pdf \\ | png \\ | jpg \\ | gif"
                :publishing-function org-publish-attachment
                :recursive t
                :author nil)
              ( "tmp"
                :components ( "tmp-org"  "tmp-extra")))))

 ;  I'm lazy and don't want to remember the name of the project to publish when I modify
 ;  a file that is part of a project.  So this function saves the file, and publishes
 ;  the project that includes this file
 ;
 ;  It's bound to C-S-F12 so I just edit and hit C-S-F12 when I'm done and move on to the next thing
( defun  bh/save-then-publish ( &optional force)
  (interactive  "P")
  (save-buffer)
  (org-save-all-org-buffers)
  ( let ((org-html-head-extra)
        (org-html-validation-link  "Validate XHTML 1.0"))
    (org-publish-current-project force)))

(global-set-key (kbd  "C-s-") 'bh/save-then-publish)
The main projects are norang, doc, doc-private, org-mode-doc, and tmp. These projects publish directly to the webserver directory on a remote web server that serves the site. Publishing one of these projects exports all modified pages, generates images, and copies the resulting files to the webserver so that they are immediately available for viewing.
The http://doc.norang.ca/ site contains subdirectories with client and private documentation that are restricted by using Apache Basic authentication. I don’t create links to these sites from the publicly viewable pages. http://doc.norang.ca/someclient/ would show the index for any org files under ~/git/doc.norang.ca/someclient/ if that is set up as a viewable website. I use most of the information myself but give access to clients if they are interested in the information/notes that I keep about their systems.
This works great for me - I know where my notes are and I can access them from anywhere on the internet. I’m also free to share notes with other people by simply giving them the link to the appropriate site.
All I need to remember to do is edit the appropriate org file and publish it with C-S-F12 – not exactly hard :)
I added a temporary publishing site for testing exports and validation. This is the tmp site which takes files from /tmp/publish and exports those files to a website publishing directory. This makes it easy to try new throw-away things on a live server.
This is a collection of export and publishing related settings that I use.
<<sec-16-8-1>> 16.8.1 Fontify Latex listings for source blocksFor export to latex I use the following setting to get fontified listings from source blocks:
(setq org-latex-listings t)<<sec-16-8-2>> 16.8.2 Export HTML without XML header
I use the following setting to remove the xml header line for HTML exports. This xml line was confusing Open Office when opening the HTML to convert to ODT.
(setq org-html-xml-declaration (quote (( "html" .  "")
                                       ( "was-html" .  "")
                                       ( "php" .  "\"; ?>"))))
<<sec-16-8-3>> 16.8.3 Allow binding variables on export without confirmation
The following setting allows #+BIND: variables to be set on export without confirmation. In rare situations where I want to override some org-mode variable for export this allows exporting the document without a prompt.
(setq org-export-allow-BIND t)
I use appt for reminders. It’s simple and unobtrusive – putting pending appointments in the status bar and beeping as 12, 9, 6, 3, and 0 minutes before the appointment is due.
Everytime the agenda is displayed (and that’s lots for me) the appointment list is erased and rebuilt from the current agenda details for today. This means everytime I reschedule something, add or remove tasks that are time related the appointment list is automatically updated the next time I look at the agenda.
 ;  Erase all reminders and rebuilt reminders for today from the agenda
( defun  bh/org-agenda-to-appt ()
  (interactive)
  (setq appt-time-msg-list nil)
  (org-agenda-to-appt))

 ;  Rebuild the reminders everytime the agenda is displayed
(add-hook 'org-agenda-finalize-hook 'bh/org-agenda-to-appt 'append)

 ;  This is at the end of my .emacs - so appointments are set up when Emacs starts
(bh/org-agenda-to-appt)

 ;  Activate appointments so we get notifications
(appt-activate t)

 ;  If we leave Emacs running overnight - reset the appointments one minute after midnight
(run-at-time  "24:01" nil 'bh/org-agenda-to-appt)
This section is a miscellaneous collection of Emacs customizations that I use with org-mode so that it Works-For-Me(tm).
I use skeletons with abbrev-mode to quickly add preconfigured blocks to my Emacs edit buffers.
I have blocks for creating:
- generic blocks in org-mode
- plantuml blocks in org-mode
- plantuml activity diagram block in org-mode
- plantuml sequence diagram block in org-mode
- graphviz dot blocks in org-mode
- ditaa blocks in org-mode
- elisp source blocks in org-mode
I still use < e TAB and < s TAB for creating example blocks and simple shell script blocks that need no further parameters.
Here’s my current setup for org-mode related skeletons. Each one defines an abbrev-mode shortcut so I can type splantumlRET to create a Plantuml block. This prompts for the filename (without extension) for the generated image file.
At work I add a :tangle header to the skeleton and explicitly include the @startuml and @enduml marker lines in the skeleton so I can tangle the source file and share it with my colleagues. This makes the tangled source useable in Notepad and the PlantUML jar file running standalone.
I have put the s (src) prefix on the shortcuts to prevent abbrev-mode from trying to expand PlantUML when I’m typing it in a sentence.
For convenience in activity diagrams I added sif and sfor and just change the labels for the synchronization bars.
 ;;  Enable abbrev-mode
(add-hook 'org-mode-hook ( lambda () (abbrev-mode 1)))

 ;;  Skeletons
 ;;
 ;;  sblk - Generic block #+begin_FOO .. #+end_FOO
( define-skeleton  skel-org-block
   "Insert an org block, querying for type."
   "Type: "
   "#+begin_" str  "\n"
  _ - \n
   "#+end_" str  "\n")

(define-abbrev org-mode-abbrev-table  "sblk"  "" 'skel-org-block)

 ;;  splantuml - PlantUML Source block
( define-skeleton  skel-org-block-plantuml
   "Insert a org plantuml block, querying for filename."
   "File (no extension): "
   "#+begin_src plantuml :file " str  ".png :cache yes\n"
  _ - \n
   "#+end_src\n")

(define-abbrev org-mode-abbrev-table  "splantuml"  "" 'skel-org-block-plantuml)

( define-skeleton  skel-org-block-plantuml-activity
   "Insert a org plantuml block, querying for filename."
   "File (no extension): "
   "#+begin_src plantuml :file " str  "-act.png :cache yes :tangle " str  "-act.txt\n"
  (bh/plantuml-reset-counters)
   "@startuml\n"
   "skinparam activity {\n"
   "BackgroundColor<> Cyan\n"
   "}\n\n"
   "title " str  " - \n"
   "note left: " str  "\n"
   "(*) --> \"" str  "\"\n"
   "--> (*)\n"
  _ - \n
   "@enduml\n"
   "#+end_src\n")

( defvar  bh/plantuml-if-count 0)

( defun  bh/plantuml-if ()
  (incf bh/plantuml-if-count)
  (number-to-string bh/plantuml-if-count))

( defvar  bh/plantuml-loop-count 0)

( defun  bh/plantuml-loop ()
  (incf bh/plantuml-loop-count)
  (number-to-string bh/plantuml-loop-count))

( defun  bh/plantuml-reset-counters ()
  (setq bh/plantuml-if-count 0
        bh/plantuml-loop-count 0)
   "")

(define-abbrev org-mode-abbrev-table  "sact"  "" 'skel-org-block-plantuml-activity)

( define-skeleton  skel-org-block-plantuml-activity-if
   "Insert a org plantuml block activity if statement"
   ""
   "if \"\" then\n"
   "  -> [condition] ==IF" (setq ifn (bh/plantuml-if))  "==\n"
   "  --> ==IF" ifn  "M1==\n"
   "  -left-> ==IF" ifn  "M2==\n"
   "else\n"
   "end if\n"
   "--> ==IF" ifn  "M2==")

(define-abbrev org-mode-abbrev-table  "sif"  "" 'skel-org-block-plantuml-activity-if)

( define-skeleton  skel-org-block-plantuml-activity-for
   "Insert a org plantuml block activity for statement"
   "Loop for each: "
   "--> ==LOOP" (setq loopn (bh/plantuml-loop))  "==\n"
   "note left: Loop" loopn  ": For each " str  "\n"
   "--> ==ENDLOOP" loopn  "==\n"
   "note left: Loop" loopn  ": End for each " str  "\n" )

(define-abbrev org-mode-abbrev-table  "sfor"  "" 'skel-org-block-plantuml-activity-for)

( define-skeleton  skel-org-block-plantuml-sequence
   "Insert a org plantuml activity diagram block, querying for filename."
   "File appends (no extension): "
   "#+begin_src plantuml :file " str  "-seq.png :cache yes :tangle " str  "-seq.txt\n"
   "@startuml\n"
   "title " str  " - \n"
   "actor CSR as \"Customer Service Representative\"\n"
   "participant CSMO as \"CSM Online\"\n"
   "participant CSMU as \"CSM Unix\"\n"
   "participant NRIS\n"
   "actor Customer"
  _ - \n
   "@enduml\n"
   "#+end_src\n")

(define-abbrev org-mode-abbrev-table  "sseq"  "" 'skel-org-block-plantuml-sequence)

 ;;  sdot - Graphviz DOT block
( define-skeleton  skel-org-block-dot
   "Insert a org graphviz dot block, querying for filename."
   "File (no extension): "
   "#+begin_src dot :file " str  ".png :cache yes :cmdline -Kdot -Tpng\n"
   "graph G {\n"
  _ - \n
   "}\n"
   "#+end_src\n")

(define-abbrev org-mode-abbrev-table  "sdot"  "" 'skel-org-block-dot)

 ;;  sditaa - Ditaa source block
( define-skeleton  skel-org-block-ditaa
   "Insert a org ditaa block, querying for filename."
   "File (no extension): "
   "#+begin_src ditaa :file " str  ".png :cache yes\n"
  _ - \n
   "#+end_src\n")

(define-abbrev org-mode-abbrev-table  "sditaa"  "" 'skel-org-block-ditaa)

 ;;  selisp - Emacs Lisp source block
( define-skeleton  skel-org-block-elisp
   "Insert a org emacs-lisp block"
   ""
   "#+begin_src emacs-lisp\n"
  _ - \n
   "#+end_src\n")

(define-abbrev org-mode-abbrev-table  "selisp"  "" 'skel-org-block-elisp)
I also use abbrev-mode when taking notes at work. I tend to write first names for people which get expanded to their complete name in my notes. So if I write mickey it gets automatically expanded to Mickey Mouse as I type. To create an abbreviation just type in the short form followed by C-x a i l to create an abbreviation for the current mode I’m in.
The only thing you have to be careful with is not to use a common word for your abbreviation since abbrev-mode will try to expand it everytime you enter it. I found this annoying when I used plantuml as one of my abbreviations.
I also use skeletons and abbrev-mode for C source files at work. This works really well for me.
<<sec-18-1-1>> 18.1.1 Example PlantUml Activity Diagram GenerationWhen creating activity diagrams I can use ‘sif’ and ‘sfor’ to add IF and FOR blocks to the diagram with unique numbering automatically generated.
Example: Create a new diagram and enter 2 IFs and 2 FOR blocks
Create diagram: “sact RET test RET”
gives
@startuml
skinparam activity {
BackgroundColor<> Cyan
}

title test -
note left: test
(*) -->  "test"
--> (*)

@enduml

Put cursor on –> (*) and enter “sif RET”
gives
@startuml
skinparam activity {
BackgroundColor<> Cyan
}

title test -
note left: test
(*) -->  "test"
if  "" then
  -> [condition] ==IF1==
  --> ==IF1M1==
  -left-> ==IF1M2==
else
end if
--> ==IF1M2==
--> (*)

@enduml

repeat on –> (*) line
gives
@startuml
skinparam activity {
BackgroundColor<> Cyan
}

title test -
note left: test
(*) -->  "test"
if  "" then
  -> [condition] ==IF1==
  --> ==IF1M1==
  -left-> ==IF1M2==
else
end if
--> ==IF1M2==
if  "" then
  -> [condition] ==IF2==
  --> ==IF2M1==
  -left-> ==IF2M2==
else
end if
--> ==IF2M2==
--> (*)

@enduml

and add two for loops at the end with “sfor RET line in file RET” and “sfor RET address in addressbook RET”
gives
@startuml
skinparam activity {
BackgroundColor<> Cyan
}

title test -
note left: test
(*) -->  "test"
if  "" then
  -> [condition] ==IF1==
  --> ==IF1M1==
  -left-> ==IF1M2==
else
end if
--> ==IF1M2==
if  "" then
  -> [condition] ==IF2==
  --> ==IF2M1==
  -left-> ==IF2M2==
else
end if
--> ==IF2M2==
--> ==LOOP1==
note left: Loop1: For each line in file
--> ==ENDLOOP1==
note left: Loop1: End for each line in file
--> ==LOOP2==
note left: Loop2: For each address in addressbook
--> ==ENDLOOP2==
note left: Loop2: End for each address in addressbook

--> (*)

@enduml

I use rectangular cut and paste if I need to indent generated blocks.
There is more than one way to do this. Use what works for you.
<<sec-18-2-1>> 18.2.1 Narrowing to a subtree withbh/org-todo
f5 and S-f5 are bound the functions for narrowing and widening the emacs buffer as defined below.
We now use:
- T (tasks) for C-c / t on the current buffer
- N (narrow) narrows to this task subtree
- U (up) narrows to the immediate parent task subtree without moving
- P (project) narrows to the parent project subtree without moving
- F (file) narrows to the current file or file of the existing restriction
The agenda keeps widening the org buffer so this gives a convenient way to focus on what we are doing.
(global-set-key (kbd  "") 'bh/org-todo)

( defun  bh/org-todo (arg)
  (interactive  "p")
  ( if (equal arg 4)
      ( save-restriction
        (bh/narrow-to-org-subtree)
        (org-show-todo-tree nil))
    (bh/narrow-to-org-subtree)
    (org-show-todo-tree nil)))

(global-set-key (kbd  "") 'bh/widen)

( defun  bh/widen ()
  (interactive)
  ( if (equal major-mode 'org-agenda-mode)
      ( progn
        (org-agenda-remove-restriction-lock)
        ( when org-agenda-sticky
          (org-agenda-redo)))
    (widen)))

(add-hook 'org-agenda-mode-hook
          '( lambda () (org-defkey org-agenda-mode-map  "W" ( lambda () (interactive) (setq bh/hide-scheduled-and-waiting-next-tasks t) (bh/widen))))
          'append)

( defun  bh/restrict-to-file-or-follow (arg)
   "Set agenda restriction to 'file or with argument invoke follow mode.
 I don't use follow mode very often but I restrict to file all the time
 so change the default 'F' binding in the agenda to allow both"
  (interactive  "p")
  ( if (equal arg 4)
      (org-agenda-follow-mode)
    (widen)
    (bh/set-agenda-restriction-lock 4)
    (org-agenda-redo)
    (beginning-of-buffer)))

(add-hook 'org-agenda-mode-hook
          '( lambda () (org-defkey org-agenda-mode-map  "F" 'bh/restrict-to-file-or-follow))
          'append)

( defun  bh/narrow-to-org-subtree ()
  (widen)
  (org-narrow-to-subtree)
  ( save-restriction
    (org-agenda-set-restriction-lock)))

( defun  bh/narrow-to-subtree ()
  (interactive)
  ( if (equal major-mode 'org-agenda-mode)
      ( progn
        (org-with-point-at (org-get-at-bol 'org-hd-marker)
          (bh/narrow-to-org-subtree))
        ( when org-agenda-sticky
          (org-agenda-redo)))
    (bh/narrow-to-org-subtree)))

(add-hook 'org-agenda-mode-hook
          '( lambda () (org-defkey org-agenda-mode-map  "N" 'bh/narrow-to-subtree))
          'append)

( defun  bh/narrow-up-one-org-level ()
  (widen)
  ( save-excursion
    (outline-up-heading 1 'invisible-ok)
    (bh/narrow-to-org-subtree)))

( defun  bh/get-pom-from-agenda-restriction-or-point ()
  (or (and (marker-position org-agenda-restrict-begin) org-agenda-restrict-begin)
      (org-get-at-bol 'org-hd-marker)
      (and (equal major-mode 'org-mode) (point))
      org-clock-marker))

( defun  bh/narrow-up-one-level ()
  (interactive)
  ( if (equal major-mode 'org-agenda-mode)
      ( progn
        (org-with-point-at (bh/get-pom-from-agenda-restriction-or-point)
          (bh/narrow-up-one-org-level))
        (org-agenda-redo))
    (bh/narrow-up-one-org-level)))

(add-hook 'org-agenda-mode-hook
          '( lambda () (org-defkey org-agenda-mode-map  "U" 'bh/narrow-up-one-level))
          'append)

( defun  bh/narrow-to-org-project ()
  (widen)
  ( save-excursion
    (bh/find-project-task)
    (bh/narrow-to-org-subtree)))

( defun  bh/narrow-to-project ()
  (interactive)
  ( if (equal major-mode 'org-agenda-mode)
      ( progn
        (org-with-point-at (bh/get-pom-from-agenda-restriction-or-point)
          (bh/narrow-to-org-project)
          ( save-excursion
            (bh/find-project-task)
            (org-agenda-set-restriction-lock)))
        (org-agenda-redo)
        (beginning-of-buffer))
    (bh/narrow-to-org-project)
    ( save-restriction
      (org-agenda-set-restriction-lock))))

(add-hook 'org-agenda-mode-hook
          '( lambda () (org-defkey org-agenda-mode-map  "P" 'bh/narrow-to-project))
          'append)

( defvar  bh/project-list nil)

( defun  bh/view-next-project ()
  (interactive)
  ( let (num-project-left current-project)
    ( unless (marker-position org-agenda-restrict-begin)
      (goto-char (point-min))
       ;  Clear all of the existing markers on the list
      ( while bh/project-list
        (set-marker (pop bh/project-list) nil))
      (re-search-forward  "Tasks to Refile")
      (forward-visible-line 1))

     ;  Build a new project marker list
    ( unless bh/project-list
      ( while (< (point) (point-max))
        ( while (and (< (point) (point-max))
                    (or (not (org-get-at-bol 'org-hd-marker))
                        (org-with-point-at (org-get-at-bol 'org-hd-marker)
                          (or (not (bh/is-project-p))
                              (bh/is-project-subtree-p)))))
          (forward-visible-line 1))
        ( when (< (point) (point-max))
          (add-to-list 'bh/project-list (copy-marker (org-get-at-bol 'org-hd-marker)) 'append))
        (forward-visible-line 1)))

     ;  Pop off the first marker on the list and display
    (setq current-project (pop bh/project-list))
    ( when current-project
      (org-with-point-at current-project
        (setq bh/hide-scheduled-and-waiting-next-tasks nil)
        (bh/narrow-to-project))
       ;  Remove the marker
      (setq current-project nil)
      (org-agenda-redo)
      (beginning-of-buffer)
      (setq num-projects-left (length bh/project-list))
      ( if (> num-projects-left 0)
          (message  "%s projects left to view" num-projects-left)
        (beginning-of-buffer)
        (setq bh/hide-scheduled-and-waiting-next-tasks t)
        ( error  "All projects viewed.")))))

(add-hook 'org-agenda-mode-hook
          '( lambda () (org-defkey org-agenda-mode-map  "V" 'bh/view-next-project))
          'append)
This makes it easy to hide all of the other details in your org-file temporarily by limiting your view to this task subtree. Tasks are folded and hilighted so that only tasks which are incomplete are shown.
I hit f5 (or the T speed key) a lot. This basically does a org-narrow-to-subtree and C-c / t combination leaving the buffer in a narrowed state. I use S-f5 (or some other widening speed key like U, W, F) to widen back to the normal view.
I also have the following setting to force showing the next headline.
(setq org-show-entry-below (quote ((default))))
This prevents too many headlines from being folded together when I’m working with collapsed trees.
<<sec-18-2-2>> 18.2.2 Limiting the agenda to a subtreeC-c C-x < turns on the agenda restriction lock for the current subtree. This keeps your agenda focused on only this subtree. Alarms and notifications are still active outside the agenda restriction. C-c C-x > turns off the agenda restriction lock returning your agenda view back to normal.
I have added key bindings for the agenda to allow using C-c C-x < in the agenda to set the restriction lock to the current task directly. The following elisp accomplishes this.
(add-hook 'org-agenda-mode-hook
          '( lambda () (org-defkey org-agenda-mode-map  "\C-c\C-x<" 'bh/set-agenda-restriction-lock))
          'append)

( defun  bh/set-agenda-restriction-lock (arg)
   "Set restriction lock to current task subtree or file if prefix is specified"
  (interactive  "p")
  ( let* ((pom (bh/get-pom-from-agenda-restriction-or-point))
         (tags (org-with-point-at pom (org-get-tags-at))))
    ( let ((restriction-type ( if (equal arg 4) 'file 'subtree)))
      ( save-restriction
        ( cond
         ((and (equal major-mode 'org-agenda-mode) pom)
          (org-with-point-at pom
            (org-agenda-set-restriction-lock restriction-type))
          (org-agenda-redo))
         ((and (equal major-mode 'org-mode) (org-before-first-heading-p))
          (org-agenda-set-restriction-lock 'file))
         (pom
          (org-with-point-at pom
            (org-agenda-set-restriction-lock restriction-type))))))))
This allows me to set the restriction lock from agenda to task directly. I work from the agenda a lot and I find this very convenient.
Setting the restriction directly to the task is less surprising than automatically moving up the tree to the project level task – which is what I was doing before. If the select task is too restrictive it’s easy to move the restriction lock up a level by visiting the task in the org file and going up and resetting the lock - in case you want to see move of the project.
Selecting the entire project sometimes has too many tasks in it and I want to limit the view to part of the subtree. This is why I keep the N and U key bindings for adjusting the narrowed region.
I’ve added new convenience keys for restricting the agenda and org-buffer to subtree, parent task, and project task, as well as removing the restriction. These keys work both in the agenda and as speed commands on a headline in the org-file.
Nnarrows to the current task subtreeThis is the same as same as
C-c C-x <Unarrows to the parent subtree of this taskThis goes up one level and narrows to that subtree.
Pnarrows to the entire project containing this taskThis goes up the tree to the top-level
TODOkeyword and selects that as the subtree to narrow toWremoves the restriction, widening the buffer
I like the highlighting for a restriction to only affect the headline and not the entire body of the agenda restriction. I use the following setting to keep the highlight on the heading only (as was the case for pre-8.0 versions of org-mode)
 ;;  Limit restriction lock highlighting to the headline only
(setq org-agenda-restriction-lock-highlight-subtree nil)
<<sec-18-2-3>> 18.2.3 Limiting the agenda to a file
You can limit the agenda view to a single file in multiple ways.
You can use the agenda restriction lock C-c C-x < on the any line before the first heading to set the agenda restriction lock to this file only. This is equivalent using a prefix argumment ( C-u C-c C-x <) anywhere in the file. This lock stays in effect until you remove it with C-c C-x >.
This also works in the agenda with my C-u C-c c-x < key binding.
Another way is to invoke the agenda with F12 < a while visiting an org-mode file. This limits the agenda view to just this file. I occasionally use this to view a file not in my org-agenda-files in the agenda.
Various customizations affect how the agenda views show task details. This section shows each of the customizations I use in my workflow.
<<sec-18-3-1>> 18.3.1 Highlight the current agenda lineThe following code in my .emacs file keeps the current agenda line highlighted. This makes it obvious what task will be affected by commands issued in the agenda. No more acting on the wrong task by mistake!
The clock modeline time is also shown with a reverse background.
 ;;  Always hilight the current agenda line
(add-hook 'org-agenda-mode-hook
          '( lambda () (hl-line-mode 1))
          'append)
 ;;  The following custom-set-faces create the highlights
(custom-set-faces
   ;;  custom-set-faces was added by Custom.
   ;;  If you edit it by hand, you could mess it up, so be careful.
   ;;  Your init file should contain only one such instance.
   ;;  If there is more than one, they won't work right.
 '(org-mode-line-clock ((t ( :background  "grey75"  :foreground  "red"  :box ( :line-width -1  :style released-button)))) t))
<<sec-18-3-2>> 18.3.2 Keep tasks with timestamps visible on the global todo lists
Tasks with dates ( SCHEDULED:, DEADLINE:, or active dates) show up in the agenda when appropriate. The block agenda view ( F12 a) tries to keep tasks showing up only in one location (either in the calendar or other todo lists in later sections of the block agenda.) I now rarely use the global todo list search in org-mode ( F12 t, F12 m) and when I do I’m trying to find a specific task quickly. These lists now include everything so I can just search for the item I want and move on.
The block agenda prevents display of tasks with deadlines or scheduled dates in the future so you can safely ignore these until the appropriate time.
 ;;  Keep tasks with dates on the global todo lists
(setq org-agenda-todo-ignore-with-date nil)

 ;;  Keep tasks with deadlines on the global todo lists
(setq org-agenda-todo-ignore-deadlines nil)

 ;;  Keep tasks with scheduled dates on the global todo lists
(setq org-agenda-todo-ignore-scheduled nil)

 ;;  Keep tasks with timestamps on the global todo lists
(setq org-agenda-todo-ignore-timestamp nil)

 ;;  Remove completed deadline tasks from the agenda view
(setq org-agenda-skip-deadline-if-done t)

 ;;  Remove completed scheduled tasks from the agenda view
(setq org-agenda-skip-scheduled-if-done t)

 ;;  Remove completed items from search results
(setq org-agenda-skip-timestamp-if-done t)
<<sec-18-3-3>> 18.3.3 Use the Diary for Holidays and Appointments
I don’t use the emacs Diary for anything but I like seeing the holidays on my agenda. This helps with planning for those days when you’re not supposed to be working.
(setq org-agenda-include-diary nil)
(setq org-agenda-diary-file  "~/git/org/diary.org")
The diary file keeps date-tree entries created by the capture mode ‘appointment’ template. I use this also for miscellaneous tasks I want to clock during interruptions.
I don’t use a ~/diary file anymore. That is just there as a zero-length file to keep Emacs happy. I use org-mode’s diary functions instead. Inserting entries with i in the emacs agenda creates date entries in the ~/git/org/diary.org file.
I include holidays from the calendar in my todo.org file as follows:
#+FILETAGS: PERSONAL
* Appointments
  :PROPERTIES:
  :CATEGORY: Appt
  :ARCHIVE:  %s_archive::* Appointments
  :END:
** Holidays
   :PROPERTIES:
   :Category: Holiday
   :END:
  %%(org-calendar-holiday)
** Some other Appointment
  ...
I use the following setting so any time strings in the heading are shown in the agenda.
(setq org-agenda-insert-diary-extract-time t)<<sec-18-3-4>> 18.3.4 Searches include archive files
I keep a single archive file for each of my org-mode project files. This allows me to search the current file and the archive when I need to dig up old information from the archives.
I don’t need this often but it sure is handy on the occasions that I do need it.
 ;;  Include agenda archive files when searching for things
(setq org-agenda-text-search-extra-files (quote (agenda-archives)))
<<sec-18-3-5>> 18.3.5 Agenda view tweaks
The following agenda customizations control
- display of repeating tasks
- display of empty dates on the agenda
- task sort order
- start the agenda weekly view with Sunday
- display of the grid
- habits at the bottom
I use a custom sorting function so that my daily agenda lists tasks in order of importance. Tasks on the daily agenda are listed in the following order:
- tasks with times at the top so they are hard to miss
- entries for today (active timestamp headlines that are not scheduled or deadline tasks)
- deadlines due today
- late deadline tasks
- scheduled items for today
- pending deadlines (due soon)
- late scheduled items
- habits
The lisp for this isn’t particularly pretty but it works.
Here are the .emacs settings:
 ;;  Show all future entries for repeating tasks
(setq org-agenda-repeating-timestamp-show-all t)

 ;;  Show all agenda dates - even if they are empty
(setq org-agenda-show-all-dates t)

 ;;  Sorting order for tasks on the agenda
(setq org-agenda-sorting-strategy
      (quote ((agenda habit-down time-up user-defined-up effort-up category-keep)
              (todo category-up effort-up)
              (tags category-up effort-up)
              (search category-up))))

 ;;  Start the weekly agenda on Monday
(setq org-agenda-start-on-weekday 1)

 ;;  Enable display of the time grid so we can see the marker for the current time
(setq org-agenda-time-grid (quote ((daily today remove-match)
                                   #( "----------------" 0 16 (org-heading t))
                                   (0900 1100 1300 1500 1700))))

 ;;  Display tags farther right
(setq org-agenda-tags-column -102)

 ;;
 ;;  Agenda sorting functions
 ;;
(setq org-agenda-cmp-user-defined 'bh/agenda-sort)

( defun  bh/agenda-sort (a b)
   "Sorting strategy for agenda items.
 Late deadlines first, then scheduled, then non-late deadlines"
  ( let (result num-a num-b)
    ( cond
      ;  time specific items are already sorted first by org-agenda-sorting-strategy

      ;  non-deadline and non-scheduled items next
     ((bh/agenda-sort-test 'bh/is-not-scheduled-or-deadline a b))

      ;  deadlines for today next
     ((bh/agenda-sort-test 'bh/is-due-deadline a b))

      ;  late deadlines next
     ((bh/agenda-sort-test-num 'bh/is-late-deadline '> a b))

      ;  scheduled items for today next
     ((bh/agenda-sort-test 'bh/is-scheduled-today a b))

      ;  late scheduled items next
     ((bh/agenda-sort-test-num 'bh/is-scheduled-late '> a b))

      ;  pending deadlines last
     ((bh/agenda-sort-test-num 'bh/is-pending-deadline '< a b))

      ;  finally default to unsorted
     (t (setq result nil)))
    result))

( defmacro  bh/agenda-sort-test (fn a b)
   "Test for agenda sort"
  `( cond
     ;  if both match leave them unsorted
    ((and (apply ,fn (list ,a))
          (apply ,fn (list ,b)))
     (setq result nil))
     ;  if a matches put a first
    ((apply ,fn (list ,a))
     (setq result -1))
     ;  otherwise if b matches put b first
    ((apply ,fn (list ,b))
     (setq result 1))
     ;  if none match leave them unsorted
    (t nil)))

( defmacro  bh/agenda-sort-test-num (fn compfn a b)
  `( cond
    ((apply ,fn (list ,a))
     (setq num-a (string-to-number (match-string 1 ,a)))
     ( if (apply ,fn (list ,b))
         ( progn
           (setq num-b (string-to-number (match-string 1 ,b)))
           (setq result ( if (apply ,compfn (list num-a num-b))
                            -1
                          1)))
       (setq result -1)))
    ((apply ,fn (list ,b))
     (setq result 1))
    (t nil)))

( defun  bh/is-not-scheduled-or-deadline (date-str)
  (and (not (bh/is-deadline date-str))
       (not (bh/is-scheduled date-str))))

( defun  bh/is-due-deadline (date-str)
  (string-match  "Deadline:" date-str))

( defun  bh/is-late-deadline (date-str)
  (string-match  " \\ ( [0-9]* \\ )  d\. ago:" date-str))

( defun  bh/is-pending-deadline (date-str)
  (string-match  "In  \\ ( [ ^ -]* \\ ) d\.:" date-str))

( defun  bh/is-deadline (date-str)
  (or (bh/is-due-deadline date-str)
      (bh/is-late-deadline date-str)
      (bh/is-pending-deadline date-str)))

( defun  bh/is-scheduled (date-str)
  (or (bh/is-scheduled-today date-str)
      (bh/is-scheduled-late date-str)))

( defun  bh/is-scheduled-today (date-str)
  (string-match  "Scheduled:" date-str))

( defun  bh/is-scheduled-late (date-str)
  (string-match  "Sched\. \\ ( .* \\ ) x:" date-str))
<<sec-18-3-6>> 18.3.6 Sticky Agendas
Sticky agendas allow you to have more than one agenda view created simultaneously. You can quickly switch to the view without incurring an agenda rebuild by invoking the agenda custom command key that normally generates the agenda. If it already exists it will display the existing view. g forces regeneration of the agenda view.
I normally have two views displayed ( F12 a for the daily/weekly agenda and F12 SPC for my project management view)
 ;;  Use sticky agenda's so they persist
(setq org-agenda-sticky t)
Checklists are great for repeated tasks with lots of things that need to be done. For a long time I was manually resetting the check boxes to unchecked when marking the repeated task DONE but no more! There’s a contributed org-checklist that can uncheck the boxes automagically when the task is marked done.
Add the following to your .emacs
(add-to-list 'load-path (expand-file-name  "~/git/org-mode/contrib/lisp"))

( require ' org-checklist)
and then to use it in a task you simply set the property RESET_CHECK_BOXES to t like this
*  TODO  Invoicing and Archive Tasks  [0/7]
  DEADLINE:  <2009-07-01 Wed +1m -0d>
  :PROPERTIES:
  :RESET_CHECK_BOXES: t
  :END:

 -  [ ] Do task 1
 -  [ ] Do task 2
 ...
 -  [ ] Do task 7
Backups that you have to work hard at don't get done.
I lost a bunch of data over 10 years ago due to not having a working backup solution. At the time I said I'm not going to lose any important data ever again. So far so good :)
My backups get done religiously. What does this have to do with org-mode? Not much really, other than I don’t spend time doing backups – they just happen – which saves me time for other more interesting things.
My backup philosophy is to make it possible to recover your data – not necessarily easy. It doesn’t have to be easy/fast to do the recovery because I’ll rarely have to recover data from the backups. Saving time for recovery doesn’t make sense to me. I want the backup to be fast and painless since I do those all the time.
I set up an automated network backup over 10 years ago that is still serving me well today. All of my systems gets daily backups to a network drive. These are collected monthly and written to an external removable USB disk.
Once a month my task for backups prompts me to move the current collection of montly backups to the USB drive for external storage. Backups take minimal effort currently and I’m really happy about that.
Since then git came into my life, so backups of git repositories that are on multiple machines is much less critical than it used to be. There is an automatic backup of everything pushed to the remote repository.
Blocked tasks are tasks that have subtasks which are not in a done todo state. Blocked tasks show up in a grayed font by default in the agenda.
To enable task blocking set the following variable:
(setq org-enforce-todo-dependencies t)
This setting prevents tasks from changing to DONE if any subtasks are still open. This works pretty well except for repeating tasks. I find I’m regularly adding TODO tasks under repeating tasks and not all of the subtasks need to be complete before the next repeat cycle.
You can override the setting temporarily by changing the task with C-u C-u C-u C-c C-t but I never remember that. I set a permanent property on the repeated tasks as follows:
*  TODO  New Repeating Task
  SCHEDULED:  <2009-06-16 Tue +1w>
  :PROPERTIES:
  :NOBLOCKING: t
  :END:
 ...
**  TODO  Subtask
This prevents the New Repeating Task from being blocked if some of the items under it are not complete.
Occassionally I need to complete tasks in a given order. Org-mode has a property ORDERED that enforces this for subtasks.
*  TODO  Some Task
  :PROPERTIES:
  :ORDERED: t
  :END:
**  TODO  Step 1
**  TODO  Step 2
**  TODO  Step 3
In this case you need to complete Step 1 before you can complete Step 2, etc. and org-mode prevents the state change to a done task until the preceding tasks are complete.
This section describes various org-mode settings I use to control how tasks are displayed while I work on my org mode files.
<<sec-18-7-1>> 18.7.1 Controlling display of leading stars on headlinesOrg-mode has the ability to show or hide the leading stars on task headlines. It’s also possible to have headlines at odd levels only so that the stars and heading task names line up in sublevels.
To make org show leading stars use
(setq org-hide-leading-stars nil)
I now use org-indent mode which hides leading stars.
<<sec-18-7-2>> 18.7.2 org-indent modeI recently started using org-indent mode. I like this setting a lot. It removes the indentation in the org-file but displays it as if it was indented while you are working on the org file buffer.
org-indent mode displays as if org-odd-levels-only is true but it has a really clean look that I prefer over my old setup.
I have org-indent mode on by default at startup with the following setting:
(setq org-startup-indented t)<<sec-18-7-3>> 18.7.3 Handling blank lines
Blank lines are evil :). They keep getting inserted in between headlines and I don’t want to see them in collapsed (contents) views. When I use TAB to fold (cycle) tasks I don’t want to see any blank lines between headings.
The following setting hides blank lines between headings which keeps folded view nice and compact.
(setq org-cycle-separator-lines 0)
I find extra blank lines in lists and headings a bit of a nuisance. To get a body after a list you need to include a blank line between the list entry and the body – and indent the body appropriately. Most of my lists have no body detail so I like the look of collapsed lists with no blank lines better.
The following setting prevents creating blank lines before headings but allows list items to adapt to existing blank lines around the items:
(setq org-blank-before-new-entry (quote ((heading)
                                         (plain-list-item . auto))))
<<sec-18-7-4>> 18.7.4 Adding new tasks quickly without disturbing the current task content
To create new headings in a project file it is really convenient to use C-RET, C-S-RET, M-RET, and M-S-RET. This inserts a new headline possibly with a TODO keyword. With the following setting
(setq org-insert-heading-respect-content nil)
org inserts the heading at point for the M- versions and respects content for the C- versions. The respect content setting is temporarily turned on for the C- versions which adds the new heading after the content of the current item. This lets you hit C-S-RET in the middle of an entry and the new heading is added after the body of the current entry but still allow you to split an entry in the middle with M-S-RET.
I enter notes for tasks with C-c C-z (or just z in the agenda). Changing tasks states also sometimes prompt for a note (e.g. moving to WAITING prompts for a note and I enter a reason for why it is waiting). These notes are saved at the top of the task so unfolding the task shows the note first.
(setq org-reverse-note-order nil)<<sec-18-7-6>> 18.7.6 Searching and showing results
Org-mode’s searching capabilities are really effective at finding data in your org files. C-c / / does a regular expression search on the current file and shows matching results in a collapsed view of the org-file.
I have org-mode show the hierarchy of tasks above the matched entries and also the immediately following sibling task (but not all siblings) with the following settings:
(setq org-show-following-heading t)
(setq org-show-hierarchy-above t)
(setq org-show-siblings (quote ((default))))
This keeps the results of the search relatively compact and mitigates accidental errors by cutting too much data from your org file with C-k. Cutting folded data (including the …) can be really dangerous since it cuts text (including following subtrees) which you can’t see. For this reason I always show the following headline when displaying search results.
Org-mode allows special handling of the C-a, C-e, and C-k keys while editing headlines. I also use the setting that pastes (yanks) subtrees and adjusts the levels to match the task I am pasting to. See the docstring ( C-h v org-yank-adjust-subtrees) for more details on each variable and what it does.
I have org-special-ctrl-a/e set to enable easy access to the beginning and end of headlines. I use M-m or C-a C-a to get to the beginning of the line so the speed commands work and C-a to give easy access to the beginning of the heading text when I need that.
(setq org-special-ctrl-a/e t)
(setq org-special-ctrl-k t)
(setq org-yank-adjusted-subtrees t)
Attachments are great for getting large amounts of data related to your project out of your org-mode files. Before attachments came along I was including huge blocks of SQL code in my org files to keep track of changes I made to project databases. This bloated my org file sizes badly.
Now I can create the data in a separate file and attach it to my project task so it’s easily located again in the future.
I set up org-mode to generate unique attachment IDs with org-id-method as follows:
(setq org-id-method (quote uuidgen))
Say you want to attach a file x.sql to your current task. Create the file data in /tmp/x.sql and save it.
Attach the file with C-c C-a a and enter the filename: x.sql. This generates a unique ID for the task and adds the file in the attachment directory.
* Attachments                                                         :ATTACH:
  :PROPERTIES:
  :Attachments: x.sql
  :ID:       f1d38e9a-ff70-4cc4-ab50-e8b58b2aaa7b
  :END:
The attached file is saved in data/f1/d38e9a-ff70-4cc4-ab50-e8b58b2aaa7b/. Where it goes exactly isn’t important for me – as long as it is saved and retrievable easily. Org-mode copies the original file /tmp/x.sql into the appropriate attachment directory.
Tasks with attachments automatically get an ATTACH tag so you can easily find tasks with attachments with a tag search.
To open the attachment for a task use C-c C-a o. This prompts for the attachment to open and TAB completion works here.
The ID changes for every task header when a new ID is generated.
It’s possible to use named directories for attachments but I haven’t needed this functionality yet – it’s there if you need it.
I store my org-mode attachments with my org files in a subdirectory data. These are automatically added to my git repository along with any other org-mode changes I’ve made.
Deadlines and due dates are a fact or life. By default I want to see deadlines in the agenda 30 days before the due date.
The following setting accomplishes this:
(setq org-deadline-warning-days 30)
This gives me plenty of time to deal with the task so that it is completed on or before the due date.
I also use deadlines for repeating tasks. If the task repeats more often than once per month it would be always bugging me on the agenda view. For these types of tasks I set an explicit deadline warning date as follows:
*  TODO  Pay Wages
  DEADLINE:  <2009-07-01 Wed +1m -0d>
This example repeats monthly and shows up in the agenda on the day it is due (with no prior warning). You can set any number of lead days you want on DEADLINES using -Nd where N is the number of days in advance the task should show up in the agenda. If no value is specified the default org-deadline-warning-days is used.
I generate org-mode tables with details of task specifications and record structures for some of my projects. My clients like to use spreadsheets for this type of detail.
It’s easy to share the details of the org-mode table by exporting in HTML but that isn’t easy for anyone else to work with if they need to edit data.
To solve this problem I export my table as comma delimited values (CSV) and then send that to the client (or read it into a spreadsheet and email the resulting spreadsheet file).
Org-mode can export tables as TAB or comma delimited formats. I set the default format to CSV with:
(setq org-table-export-default-format "orgtbl-to-csv")
Exporting to CSV format is the only one I use and this provides the default so I can just hit RETURN when prompted for the format.
To export the following table I put the cursor inside the table and hit M-x org-table-export which prompts for a filename and the format which defaults to orgtbl-to-csv from the setting above.
| One | Two | Three |
|---|---|---|
| 1 | 1 | 2 |
| 3 | 6 | 5 |
| fred | kpe | mary |
| 234.5 | 432.12 | 324.3 |
This creates the file with the following data
One ,Two ,Three
1 ,1 ,2
3 ,6 ,5
fred ,kpe ,mary
234.5 ,432.12 ,324.3
Links to emails, web pages, and other files are sprinkled all over my org files. The following setting control how org-mode handles opening the link.
(setq org-link-frame-setup (quote ((vm . vm-visit-folder)
                                   (gnus . org-gnus-no-new-news)
                                   (file . find-file))))

 ;  Use the current window for C-c ' source editing
(setq org-src-window-setup 'current-window)
I like to keep links in the same window so that I don’t end up with a ton of frames in my window manager. I normally work in a full-screen window and having links open in the same window just works better for me.
If I need to work in multiple files I’ll manually create the second frame with C-x 5 2 or split the window with C-x 4 2 or C-X 4 3. When I visit files in Emacs I normally want to replace the current window with the new content.
Most of my logging is controlled by the global org-todo-keywords
My logging settings are set as follows:
(setq org-log-done (quote time))
(setq org-log-into-drawer t)
(setq org-log-state-notes-insert-after-drawers nil)
My org-todo-keywords are set as follows:
(setq org-todo-keywords
      (quote ((sequence  "TODO(t)"  "NEXT(n)"  "|"  "DONE(d)")
              (sequence  "WAITING(w@/!)"  "HOLD(h@/!)"  "|"  "CANCELLED(c@/!)"  "PHONE"  "MEETING"))))
This adds a log entry whenever a task moves to any of the following states:
- to or out of
DONEstatus - to
WAITINGstatus (with a note) or out ofWAITINGstatus - to
HOLDstatus - to
CANCELLEDstatus (with a note) or out ofCANCELLEDstatus
I keep clock times and states in the LOGBOOK drawer to keep my tasks uncluttered. If a task is WAITING then the reason for why it is waiting is near the top of the LOGBOOK and unfolding the LOGBOOK drawer provides that information. From the agenda simply hitting SPC on the task will reveal the LOGBOOK drawer.
Org-mode has this great new feature for signalling alarms when the estimated time for a task is reached. I use this to limit the amount of time I spend on a task during the day.
As an example, I’ve been working on this document for over two months now. I want to get it finished but I can’t just work on it solely until it’s done because then nothing else gets done. I want to do a little bit every day but limit the total amount of time I spend documenting org-mode to an hour a day.
To this end I have a task
*  NEXT  Document my use of org-mode
 :LOGBOOK:...
  :PROPERTIES:
  :CLOCK_MODELINE_TOTAL: today
  :Effort:   1:00
  :END:
The task has an estimated effort of 1 hour and when I clock in the task it gives me a total in the mode-line like this
--:** org-mode.org 91% (2348,73) Git:master (Org Fly yas Font)-----[0:35/1:00 (Document my use of org-mode)]-------
I’ve spent 35 minutes of my 1 hour so far today on this document and other help on IRC.
I set up an alarm so the Star Trek door chime goes off when the total estimated time is hit. (Yes I’m a Trekkie :) )
(setq org-clock-sound "/usr/local/lib/tngchime.wav")
When the one hour time limit is hit the alarm sound goes off and a message states that I should be done working on this task. If I switch tasks and try to clock in this task again I get the sound each and every time I clock in the task. This nags me to go work on something else :)
You can use similar setups for repeated tasks. By default the last repeat time is recorded as a property when a repeating task is marked done. For repeating tasks the mode-line clock total counts since the last repeat time by default. This lets you accumulate time over multiple days and counts towards your estimated effort limit.
John Wiegley recently added support for Habit tracking to org-mode.
I have lots of habits (some bad) but I’d still like to improve and build new good habits. This is what habit tracking is for. It shows a graph on the agenda of how well you have been doing on developing your habits.
I have habits like:
- Hand wash the dishes
- 30 minute brisk walk
- Clean the house
etc. and most of these need a push to get done regularly. Logging of the done state needs to be enabled for habit tracking to work.
A habit is just like a regular task except it has a special PROPERTY value setting and a special SCHEDULED date entry like this:
*  TODO  Update Org Mode Doc
  SCHEDULED:  <2009-11-21 Sat .+7d/30d>
  [2009-11-14 Sat 11:45]
  :PROPERTIES:
  :STYLE: habit
  :END:
This marks the task as a habit and separates it from the regular task display on the agenda. When you mark a habit done it shows up on your daily agenda the next time based on the first interval in the SCHEDULED entry ( .+7d)
The special SCHEDULED entry states that I want to do this every day but at least every 2 days. If I go 3 days without marking it DONE it shows up RED on the agenda indicating that I have been neglecting this habit.
The world isn’t going to end if you neglect your habits. You can hide and display habits quickly using the K key on the agenda.
These are my settings for habit tracking.
 ;  Enable habit tracking (and a bunch of other modules)
(setq org-modules (quote (org-bbdb
                          org-bibtex
                          org-crypt
                          org-gnus
                          org-id
                          org-info
                          org-jsinfo
                          org-habit
                          org-inlinetask
                          org-irc
                          org-mew
                          org-mhe
                          org-protocol
                          org-rmail
                          org-vm
                          org-wl
                          org-w3m)))

 ;  position the habit graph on the agenda to the right of the default
(setq org-habit-graph-column 50)
During the day I’ll turn off the habit display in the agenda with K. This is a persistent setting and since I leave my Emacs running for days at a time my habit display doesn’t come back. To make sure I look at the habits daily I have the following settings to redisplay the habits in the agenda each day. This turns the habit display on again at 6AM each morning.
(run-at-time "06:00" 86400 '( lambda () (setq org-habit-show-habits t)))
I tend to keep habits under a level 1 task * Habits with a special logging property that only logs changes to the DONE state. This allows me to cancel a habit and not record a timestamp for it since that messes up the habit graph. Cancelling a habit just to get it off my agenda because it’s undoable (like get up before 6AM) should not mark the habit as done today. I only cancel habits that repeat every day.
My habit tasks look as follows - and I tend to have one in every org file that can have habits defined
* Habits
  :PROPERTIES:
  :LOGGING:  DONE(!)
  :ARCHIVE:  %s_archive::* Habits
  :END:
I use git to synchronize my org-mode files between my laptop and my workstation. This normally requires saving all the current changes, pushing to a bare repo, and fetching on the other system. After that I need to revert all of my org-mode files to get the updated information.
I used to use org-revert-all-org-buffers but have since discovered global-auto-revert-mode. With this setting any files that change on disk where there are no changes in the buffer automatically revert to the on-disk version.
This is perfect for synchronizing my org-mode files between systems.
(global-auto-revert-mode t)
I used to keep my encrypted data like account passwords in a separate GPG encrypted file. Now I keep them in my org-mode files with a special tag instead. Encrypted data is kept in the org-mode file that it is associated with.
org-crypt allows you to tag headings with a special tag crypt and org-mode can keep data in these headings encrypted when saved to disk. You decrypt the heading temporarily when you need access to the data and org-mode re-encrypts the heading as soon as you save the file.
I use the following setup for encryption:
( require ' org-crypt)
 ;  Encrypt all entries before saving
(org-crypt-use-before-save-magic)
(setq org-tags-exclude-from-inheritance (quote ( "crypt")))
 ;  GPG key to use for encryption
(setq org-crypt-key  "F0B66B40")
M-x org-decrypt-entry will prompt for the passphrase associated with your encryption key and replace the encrypted data where the point is with the plaintext details for your encrypted entry. As soon as you save the file the data is re-encrypted for your key. Encrypting does not require prompting for the passphrase - that’s only for looking at the plain text version of the data.
I tend to have a single level 1 encrypted entry per file (like * Passwords). I prevent the crypt tag from using inheritance so that I don’t have encrypted data inside encrypted data. I found M-x org-decrypt-entries prompting for the passphrase to decrypt data over and over again (once per entry to decrypt) too inconvenient.
I leave my entries encrypted unless I have to look up data - I decrypt on demand and then save the file again to re-encrypt the data. This keeps the data in plain text as short as possible.
<<sec-18-17-1>> 18.17.1 Auto Save FilesEmacs temporarily saves your buffer in an autosave file while you are editing your org buffer and a sufficient number of changes have accumulated. If you have decrypted subtrees in your buffer these will be written to disk in plain text which possibly leaks sensitive information. To combat this org-mode now asks if you want to disable the autosave functionality in this buffer.
Personally I really like the autosave feature. 99% of the time my encrypted entries are perfectly safe to write to the autosave file since they are still encrypted. I tend to decrypt an entry, read the details for what I need to look up and then immediately save the file again with C-x C-s which re-encrypts the entry immediately. This pretty much guarantees that my autosave files never have decrypted data stored in them.
I disable the default org crypt auto-save setting as follows:
(setq org-crypt-disable-auto-save nil)
There’s an exciting feature called org-speed-commands in the org-mode.
Speed commands allow access to frequently used commands when on the beginning of a headline - similar to one-key agenda commands. Speed commands are user configurable and org-mode provides a good set of default commands.
I have the following speed commands set up in addition to the defaults. I don’t use priorities so I override the default settings for the 1, 2, and 3 keys. I also disable cycling with ‘c’ and add ‘q’ as a quick way to get back to the agenda and update the current view.
(setq org-use-speed-commands t)
(setq org-speed-commands-user (quote (( "0" . ignore)
                                      ( "1" . ignore)
                                      ( "2" . ignore)
                                      ( "3" . ignore)
                                      ( "4" . ignore)
                                      ( "5" . ignore)
                                      ( "6" . ignore)
                                      ( "7" . ignore)
                                      ( "8" . ignore)
                                      ( "9" . ignore)

                                      ( "a" . ignore)
                                      ( "d" . ignore)
                                      ( "h" . bh/hide-other)
                                      ( "i" progn
                                       (forward-char 1)
                                       (call-interactively 'org-insert-heading-respect-content))
                                      ( "k" . org-kill-note-or-show-branches)
                                      ( "l" . ignore)
                                      ( "m" . ignore)
                                      ( "q" . bh/show-org-agenda)
                                      ( "r" . ignore)
                                      ( "s" . org-save-all-org-buffers)
                                      ( "w" . org-refile)
                                      ( "x" . ignore)
                                      ( "y" . ignore)
                                      ( "z" . org-add-note)

                                      ( "A" . ignore)
                                      ( "B" . ignore)
                                      ( "E" . ignore)
                                      ( "F" . bh/restrict-to-file-or-follow)
                                      ( "G" . ignore)
                                      ( "H" . ignore)
                                      ( "J" . org-clock-goto)
                                      ( "K" . ignore)
                                      ( "L" . ignore)
                                      ( "M" . ignore)
                                      ( "N" . bh/narrow-to-org-subtree)
                                      ( "P" . bh/narrow-to-org-project)
                                      ( "Q" . ignore)
                                      ( "R" . ignore)
                                      ( "S" . ignore)
                                      ( "T" . bh/org-todo)
                                      ( "U" . bh/narrow-up-one-org-level)
                                      ( "V" . ignore)
                                      ( "W" . bh/widen)
                                      ( "X" . ignore)
                                      ( "Y" . ignore)
                                      ( "Z" . ignore))))

( defun  bh/show-org-agenda ()
  (interactive)
  ( if org-agenda-sticky
      (switch-to-buffer  "*Org Agenda( )*")
    (switch-to-buffer  "*Org Agenda*"))
  (delete-other-windows))
The variable org-speed-commands-default sets a lot of useful defaults for speed command keys. The default keys I use the most are I and O for clocking in and out and t to change todo state.
J jumps to the current or last clocking task.
c and C are disabled so they self insert. I use TAB and S-TAB for cycling - I don’t need c and C as well. TAB works everywhere while c and C only works on the headline and sometimes I accidentally cycle when I don’t intend to.
Org protocol is a great way to create capture notes in org-mode from other applications. I use this to create tasks to review interesting web pages I visit in Firefox.
I have a special capture template set up for org-protocol to use (set up with the w key).
My org-mode setup for org-protocol is really simple. It enables org-protocol and creates a single org-protocol capture template as described in Capture Templates.
( require ' org-protocol)
The bulk of the setup is in the Firefox application so that C-c c on a page in Firefox will trigger the org-protocol capture template with details of the page I’m currently viewing in firefox.
I set up org-protocol in firefox as described in Keybindings for Firefox.
The following setting was mainly for editing yasnippets where I want to be able to expand a snippet but stay on the same line. I used this mainly for replacing short strings or initials with full names for people during meeting notes. I now use abbrev-mode- for this and no longer need this setting.
(setq require-final-newline nil)
When I save a file in Emacs I want a final newline - this fits better with the source code projects I work on. This is the setting I use now:
(setq require-final-newline t)
I insert inactive timestamps when working on org-mode files.
For remember tasks the timestamp is in the remember template but for regular structure editing I want the timestamp automatically added when I create the headline.
I have a function that is run by an org-mode hook to automatically insert the inactive timestamp whenever a headline is created.
Adding the timestamp can be controlled by f9 T which toggles the creation of the timestamp on and off for new headlines.
( defvar  bh/insert-inactive-timestamp t)

( defun  bh/toggle-insert-inactive-timestamp ()
  (interactive)
  (setq bh/insert-inactive-timestamp (not bh/insert-inactive-timestamp))
  (message  "Heading timestamps are %s" ( if bh/insert-inactive-timestamp  "ON"  "OFF")))

( defun  bh/insert-inactive-timestamp ()
  (interactive)
  (org-insert-time-stamp nil t t nil nil nil))

( defun  bh/insert-heading-inactive-timestamp ()
  ( save-excursion
    ( when bh/insert-inactive-timestamp
      (org-return)
      (org-cycle)
      (bh/insert-inactive-timestamp))))

(add-hook 'org-insert-heading-hook 'bh/insert-heading-inactive-timestamp 'append)
Everytime I create a heading with M-RET or M-S-RET the hook invokes the function and it inserts an inactive timestamp like this
*
  [2009-11-22 Sun 18:45]
This keeps an automatic record of when tasks are created which I find very useful.
I also have a short cut key defined to invoke this function on demand so that I can insert the inactive timestamp anywhere on demand.
(global-set-key (kbd " t") 'bh/insert-inactive-timestamp)
To prevent the timestamps from being exported in documents I use the following setting
(setq org-export-with-timestamps nil)
The following setting make RET insert a new line instead of opening links. This setting is a love-hate relationship for me. When it first came out I immediately turned it off because I wanted to insert new lines in front of my links and RET would open the link instead which at the time I found extremely annoying. Since then I’ve retrained my fingers to hit RET at the end of the previous line.
(setq org-return-follows-link t)
The current clocking task is displayed on the modeline. If this has an estimated time and we run over the limit I make this stand out on the modeline by changing the background to red as follows
(custom-set-faces
   ;;  custom-set-faces was added by Custom.
   ;;  If you edit it by hand, you could mess it up, so be careful.
   ;;  Your init file should contain only one such instance.
   ;;  If there is more than one, they won't work right.
 '(org-mode-line-clock ((t ( :foreground  "red"  :box ( :line-width -1  :style released-button)))) t))
I take meeting notes with org-mode. I record meeting conversations in point-form using org-mode lists. If action items are decided on in the meeting I’ll denote them with a bullet and a TODO: or DONE: flag.
A meeting is a task and it is complete when the meeting is over. The body of the task records all of the interesting meeting details. If TODO items are created in the meeting I make separate TODO tasks from those.
I use the function bh/prepare-meeting-notes to prepare the meeting notes for emailing to the participants (in a fixed-width font like “Courier New”). As soon as the meeting is over the notes are basically ready for distribution – there’s not need to waste lots of time rewriting the minutes before they go out. I haven’t bothered with fancy HTML output – the content is more important than the style.
*  TODO  Sample Meeting
 - Attendees
   -  [ ] Joe
   -  [X] Larry
   -  [X] Mary
   -  [X] Fred
 - Joe is on vacation this week
 - Status Updates
   + Larry
     - did this
     - and that
     - TODO: Needs to follow up on this
   + Mary
     - got a promotion for her recent efforts
   + Fred
     - completed all his tasks 2 days early
     - needs more work
     - DONE: everything
 *  TODO  Sample Meeting
   - Attendees
     -  [ ] Joe
     -  [X] Larry
     -  [X] Mary
     -  [X] Fred
   - Joe is on vacation this week
   - Status Updates
     + Larry
       - did this
       - and that
>>>>>>>> TODO: Needs to follow up on this
     + Mary
       - got a promotion for her recent efforts
     + Fred
       - completed all his tasks 2 days early
       - needs more work
>>>>>>>> DONE: everything
Here is the formatting function. Just highlight the region for the notes and it turns tabs into spaces, and highlights todo items. The resulting notes are in the kill buffer ready to paste to another application.
( defun  bh/prepare-meeting-notes ()
   "Prepare meeting notes for email
    Take selected region and convert tabs to spaces, mark TODOs with leading >>>, and copy to kill ring for pasting"
  (interactive)
  ( let (prefix)
    ( save-excursion
      ( save-restriction
        (narrow-to-region (region-beginning) (region-end))
        (untabify (point-min) (point-max))
        (goto-char (point-min))
        ( while (re-search-forward  "^ \\ (  *-\ \\ )   \\ ( TODO \\ | DONE \\ ) : " (point-max) t)
          (replace-match (concat (make-string (length (match-string 1)) ?>)  " " (match-string 2)  ": ")))
        (goto-char (point-min))
        (kill-ring-save (point-min) (point-max))))))
I’m finding I use org-occur C-c / / a lot when trying to find details in my org-files. The following setting keeps the highlighted results of the search even after modifying the text. This allows me to edit the file without having to reissue the org-occur command to find the other matches in my file. C-c C-c removes the highlights.
(setq org-remove-highlights-with-change nil)
Setting this variable to t will automatically remove the yellow highlights as soon as the buffer is modified.
I’ve gone back to automatically removing the highlights with change which is the default setting. I’ve been using regular M-x occur a lot more lately to find things in any Emacs buffer.
(setq org-remove-highlights-with-change t)
I use the org-mode info documentation from the git repository so I set up emacs to find the info files from git before the regular (out of date) system versions.
(add-to-list 'Info-default-directory-list "~/git/org-mode/doc")
By default org-mode prefers dates in the future. This means that if today’s date is May 2 and you enter a date for April 30th (2 days ago) org-mode will jump to April 30th of next year. I used to find this annoying when I wanted to look at what happened last Friday since I have to specify the year. Now I’ve trained my fingers to go back relatively in the agenda with b so this isn’t really an issue for me anymore.
To make org-mode prefer the current year when entering dates set the following variable
(setq org-read-date-prefer-future nil)
I now have this variable set to 'time so times before now (with no date specified) will default to tomorrow..
(setq org-read-date-prefer-future 'time)
I take point-form notes during meetings. Having the same list bullet for every list level makes it hard to read the details when lists are indented more than 3 levels.
Org-mode has a way to automatically change the list bullets when you change list levels.
| Current List Bullet | Next indented list bullet |
|---|---|
| + | - |
| * | - |
| 1. | - |
| 1) | - |
| A) | - |
| B) | - |
| a) | - |
| b) | - |
| A. | - |
| B. | - |
| a. | - |
| b. | - |
(setq org-list-demote-modify-bullet (quote (( "+" .  "-")
                                            ( "*" .  "-")
                                            ( "1." .  "-")
                                            ( "1)" .  "-")
                                            ( "A)" .  "-")
                                            ( "B)" .  "-")
                                            ( "a)" .  "-")
                                            ( "b)" .  "-")
                                            ( "A." .  "-")
                                            ( "B." .  "-")
                                            ( "a." .  "-")
                                            ( "b." .  "-"))))
I don’t like the indented view for sublevels on a tags match in the agenda but I want to see all matching tasks (including sublevels) when I do a agenda tag search ( F12 m).
To make all of the matched headings for a tag show at the same level in the agenda set the following variable:
(setq org-tags-match-list-sublevels t)
I use babel for including source blocks in my documents with
, ...
where LANG specifies the language to use (ditaa, dot, sh, emacs-lisp, etc) This displays the language contents fontified in both the org-mode source buffer and the exported document.
See this Git Repository synchronization in this document for an example..
This is a great feature! Persistent agenda filters means if you limit a search with / TAB SomeTag the agenda remembers this filter until you change it.
Enable persistent filters with the following variable
(setq org-agenda-persistent-filter t)
The current filter is displayed in the modeline as {+SomeTag} so you can easily see what filter currently applies to your agenda view.
I use this with FILETAGS to limit the displayed results to a single client or context.
Everyone so often something will come along that is really important and you know you want to be able to find it back fast sometime in the future.
For these types of notes and tasks I add a special :FLAGGED: tag. This tag gets a special fast-key ? which matches the search key in the agenda for flagged items. See Tags for the setup of org-tag-alist for the FLAGGED entry.
Finding flagged entries is then simple - just F12 ? and you get them all.
The following setting makes org-mode open mailto: links using compose-mail.
(setq org-link-mailto-program (quote (compose-mail "%a" "%s")))
It’s possible to create mail from an org-mode subtree. I use C-c M-o to start an email message with the details filled in from the current subtree. I use this for repeating reminder tasks where I need to send an email to someone else. The email contents are already contained in the org-mode subtree and all I need to do is C-c M-o and any minor edits before sending it off.
I discovered smex for IDO-completion for M-x commands after reading a post of the org-mode mailing list. I actually use M-x a lot now because IDO completion is so easy.
Here’s the smex setup I use
(add-to-list 'load-path (expand-file-name  "~/.emacs.d"))
( require ' smex)
(smex-initialize)

(global-set-key (kbd  "M-x") 'smex)
(global-set-key (kbd  "C-x x") 'smex)
(global-set-key (kbd  "M-X") 'smex-major-mode-commands)
I’ve started using emacs bookmarks to save a location and return to it easily. Normally I want to get back to my currently clocking task and that’s easy - just hit F11. When I’m working down a long checklist I find it convenient to set a bookmark on the next item to check, then go away and work on it, and return to the checkbox to mark it done.
I use Emacs bookmarks for this setup as follows:
 ;;  Bookmark handling
 ;;
(global-set-key (kbd  "") '( lambda () (interactive) (bookmark-set  "SAVED")))
(global-set-key (kbd  "") '( lambda () (interactive) (bookmark-jump  "SAVED")))
When I want to save the current location I just hit C-f6 and then I can return to it with f6 anytime. I overwrite the same bookmark each time I set a new position.
I’m experimenting with sending mime mail from org. I’ve added C-c M=o key bindings in the org-mode-hook to generate mail from an org-mode subtree.
( require ' org-mime)
I skip multiple timestamps for the same entry in the agenda view with the following setting.
(setq org-agenda-skip-additional-timestamps-same-entry t)
This removes the clutter of extra state change log details when multiple timestamps exist in a single entry.
I drop the old A3/B4 style references from tables when editing with the following setting.
(setq org-table-use-standard-references (quote from))
To get consistent applications for opening tasks I set the org-file-apps variable as follows:
(setq org-file-apps (quote ((auto-mode . emacs)
                            ( "\\.mm\\'" . system)
                            ( "\\.x?html?\\'" . system)
                            ( "\\.pdf\\'" . system))))
This uses the entries defined in my system mailcap settings when opening file extensions. This gives me consistent behaviour when opening an link to some HTML file with C-c C-o or when previewing an export.
 ;  Overwrite the current window with the agenda
(setq org-agenda-window-setup 'current-window)
(setq org-clone-delete-id t)
Org mode can fold (cycle) plain lists.
(setq org-cycle-include-plain-lists t)
I find this setting useful when I have repeating tasks with lots of sublists with checkboxes. I can fold the completed list entries and focus on what is remaining easily.
It is possible to display org-mode source blocks fontified in their native mode. This allows colourization of keywords for C and shell script source etc. If I edit the source I use C-c ' (control-c single quote) to bring up the source window which is then rendered with syntax highlighting in the native mode. This setting also shows the syntax highlighting when viewing in the org-mode buffer.
(setq org-src-fontify-natively t)
There is a shortcut key sequence in org-mode to insert structure templates quickly into your org files.
I use example and source blocks often in my org files.
| Key Sequence | Expands to |
|---|---|
| < s TAB | #+begin_src … #+end_src |
| < e TAB | #+begin_example … #+end_example |
I’ve added a block for saving email text which I copy from MS Outlook at work so I have context associated with my org-mode tasks.
The following lisp makes the blocks lowercase instead of the default upper case in org-mode.
(setq org-structure-template-alist
      (quote (( "s"  "#+begin_src ?\n\n#+end_src"  "\n\n")
              ( "e"  "#+begin_example\n?\n#+end_example"  "\n?\n")
              ( "q"  "#+begin_quote\n?\n#+end_quote"  "\n?\n")
              ( "v"  "#+begin_verse\n?\n#+end_verse"  "\n?\n")
              ( "c"  "#+begin_center\n?\n#+end_center"  "\n?\n")
              ( "l"  "#+begin_latex\n?\n#+end_latex"  "\n?\n")
              ( "L"  "#+latex: "  "?")
              ( "h"  ""  "\n?\n")
              ( "H"  "#+html: "  "?")
              ( "a"  "#+begin_ascii\n?\n#+end_ascii")
              ( "A"  "#+ascii: ")
              ( "i"  "#+index: ?"  "#+index: ?")
              ( "I"  "#+include %file ?"  ""))))
NEXT keywords are for tasks and not projects. I’ve added a function to the todo state change hook and clock in hook so that any parent tasks marked NEXT automagically change from NEXT to TODO since they are now projects and not tasks.
( defun  bh/mark-next-parent-tasks-todo ()
   "Visit each parent task and change NEXT states to TODO"
  ( let ((mystate (or (and (fboundp 'org-state)
                          state)
                     (nth 2 (org-heading-components)))))
    ( when mystate
      ( save-excursion
        ( while (org-up-heading-safe)
          ( when (member (nth 2 (org-heading-components)) (list  "NEXT"))
            (org-todo  "TODO")))))))

(add-hook 'org-after-todo-state-change-hook 'bh/mark-next-parent-tasks-todo 'append)
(add-hook 'org-clock-in-hook 'bh/mark-next-parent-tasks-todo 'append)
Startup in folded view.
(setq org-startup-folded t)
I used to use content view by default so I could review org subtrees before archiving but my archiving workflow has changed so I no longer need this manual step.
The following setting adds alphabetical lists like
a. item one
b. item two
(setq org-alphabetical-lists t)
In order for filling to work correctly this needs to be set before the exporters are loaded.
orgstruct++-mode is enabled in Gnus message buffers to aid in creating structured email messages.
(add-hook 'message-mode-hook 'orgstruct++-mode 'append)
(add-hook 'message-mode-hook 'turn-on-auto-fill 'append)
(add-hook 'message-mode-hook 'bbdb-define-all-aliases 'append)
(add-hook 'message-mode-hook 'orgtbl-mode 'append)
(add-hook 'message-mode-hook 'turn-on-flyspell 'append)
(add-hook 'message-mode-hook
          '( lambda () (setq fill-column 72))
          'append)
flyspell-mode is enabled for almost everything to help prevent creating documents with spelling errors.
 ;;  flyspell mode for spell checking everywhere
(add-hook 'org-mode-hook 'turn-on-flyspell 'append)

 ;;  Disable keys in org-mode
 ;;     C-c [
 ;;     C-c ]
 ;;     C-c ;
 ;;     C-c C-x C-q  cancelling the clock (we never want this)
(add-hook 'org-mode-hook
          '( lambda ()
              ;;  Undefine C-c [ and C-c ] since this breaks my
              ;;  org-agenda files when directories are include It
              ;;  expands the files in the directories individually
             (org-defkey org-mode-map  "\C-c[" 'undefined)
             (org-defkey org-mode-map  "\C-c]" 'undefined)
             (org-defkey org-mode-map  "\C-c;" 'undefined)
             (org-defkey org-mode-map  "\C-c\C-x\C-q" 'undefined))
          'append)

(add-hook 'org-mode-hook
          ( lambda ()
            (local-set-key (kbd  "C-c M-o") 'bh/mail-subtree))
          'append)

( defun  bh/mail-subtree ()
  (interactive)
  (org-mark-subtree)
  (org-mime-subtree))
I do not preserve indentation for source blocks mainly because this doesn’t look nice with indented org-files. The only reason I’ve found to preserve indentation is when TABs in files need to be preserved (e.g. Makefiles). I don’t normally edit these files in org-mode so I leave this setting turned off.
I’ve changed the default block indentation so that it is not indented from the text in the org file. This allows editing source blocks in place without requiring use of C-c ' so that code lines up correctly.
(setq org-src-preserve-indentation nil)
(setq org-edit-src-content-indentation 0)
The following setting prevents accidentally editing hidden text when the point is inside a folded region. This can happen if you are in the body of a heading and globally fold the org-file with S-TAB
I find invisible edits (and undo’s) hard to deal with so now I can’t edit invisible text. C-c C-r (org-reveal) will display where the point is if it is buried in invisible text to allow editing again.
(setq org-catch-invisible-edits 'error)
I use utf-8 as the default coding system for all of my org files.
(setq org-export-coding-system 'utf-8)
(prefer-coding-system 'utf-8)
(set-charset-priority 'unicode)
(setq default-process-coding-system '(utf-8-unix . utf-8-unix))
The default for clock durations has changed to include days which is 24 hours. At work I like to think of a day as 6 hours of work (the rest of the time is lost in meetings and other overhead on average) so displaying clock durations in days doesn’t make sense to me.
The following setting displays clock durations (from C-c C-x C-d in hours and minutes.
(setq org-time-clocksum-format
      '( :hours  "%d"  :require-hours t  :minutes  ":%02d"  :require-minutes t))
The following setting creates a unique task ID for the heading in the PROPERTY drawer when I use C-c l. This allows me to move the task around arbitrarily in my org files and the link to it still works.
(setq org-id-link-to-org-use-id 'create-if-interactive-and-no-custom-id)
This is a partial list of things I know about but do not use. org-mode is huge with tons of features. There are features out there that I don’t know about yet or haven’t explored so this list is not going to be complete.
This was a cute idea but I find archiving entire complete subtrees better. I don’t mind having a bunch of tasks marked DONE (but not archived)
Strike-through emphasis is just unreadable and tends to only show up when pasting data from other files into org-mode. This just removes the strike-through completely which I find a lot nicer.
(setq org-emphasis-alist (quote (( "*" bold  ""  "")
                                 ( "/" italic  ""  "")
                                 ( "_" underline  ""  "")
                                 ( "=" org-code  ""  "" verbatim)
                                 ( "~" org-verbatim  ""  "" verbatim))))
I don’t currently write documents that need subscripts and superscript support. I disable handling of _ and ^ for subscript and superscripts with
(setq org-use-sub-superscripts nil)
Yasnippet is cool but I don’t use this anymore. I’ve replaced yasnippet with a combination of abbrev-mode and skeletons which are available by default in Emacs.
The following description applies to yasnippet version 0.5.10. The setup requirements may have changed with newer versions.
You type the snippet name and TAB and yasnippet expands the name with the contents of the snippet text - substituting snippet variables as appropriate.
Yasnippet comes with lots of snippets for programming languages. I used a few babel related snippets with org-mode.
I downloaded and installed the unbundled version of yasnippet so that I can edit the predefined snippets. I unpacked the yasnippet software in my ~/.emacs.d/plugins directory, renamed yasnippet0.5.10 to yasnippet and added the following setup in my .emacs:
(add-to-list 'load-path (expand-file-name  "~/.emacs.d/plugins"))

( require ' yasnippet)
(yas/initialize)
(yas/load-directory  "~/.emacs.d/plugins/yasnippet/snippets")

 ;;  Make TAB the yas trigger key in the org-mode-hook and enable flyspell mode and autofill
(add-hook 'org-mode-hook
          ( lambda ()
             ;;  yasnippet
            (make-variable-buffer-local 'yas/trigger-key)
            (org-set-local 'yas/trigger-key [tab])
            (define-key yas/keymap [tab] 'yas/next-field-group)
             ;;  flyspell mode for spell checking everywhere
            (flyspell-mode 1)
             ;;  auto-fill mode on
            (auto-fill-mode 1)))
I used snippets for the following:
beginfor generic#+begin_blocksdotfor graphvizumlfor PlantUML graphicsshfor bash shell scriptselispfor emacs lisp code- initials of a person converts to their full name I used this while taking meeting notes
Here is the definition for the begin snippet:
org-mode Yasnippet: ~/.emacs.d/plugins/yasnippet/snippets/text-mode/org-mode/begin
#name : #+begin_...#+end_
# --
$0
I used this to create #+begin_* blocks like
#+begin_example#+begin_src- etc.
Simply type begin and then TAB it replaces the begin text with the snippet contents. Then type src TAB emacs-lisp TAB and your snippet block is done. I’ve shortened this specific sequence to just elisp TAB since I use it fairly often.
Hit C-c SingeQuote(') and insert whatever emacs-lisp code you need. While in this block you’re in a mode that knows how to format and colourize emacs lisp code as you enter it which is really nice. C-c SingleQuote(') exits back to org-mode. This recognizes any emacs editing mode so all you have to do is enter the appropriate mode name for the block.
dot
#dot : #+begin_src dot ... #+end_src
# --
$0
uml
#uml : #+begin_src plantuml ... #+end_src
# --
$0
sh
#sh: #+begin_src sh ... #+end_src
# --
$0
elisp
#elisp : #+begin_src emacs-lisp ...#+end_src emacs-lisp
# --
$0
This is a great time saver.
This has been replaced by org-indent-mode
I’ve converted my files between odd-levels-only and odd-even using the functions org-convert-to-odd-levels and org-convert-to-oddeven-levels functions a number of times. I ended up going back to odd-even levels to reduce the amount of leading whitespace on tasks. I didn’t find that lining up the headlines and tasks in odd-levels-only to be all that helpful.
(setq org-odd-levels-only nil)
I used to have a STARTED and NEXT task state. These were basically the same except STARTED indicated that I’ve clocked some time on the task. Since then I’ve just moved to using NEXT for this.
The following code used to propagate the STARTED task up the project tree but I don’t use this anymore.
When a task is marked STARTED (either manually or by clocking it in) the STARTED state propagates up the tree to any parent tasks of this task that are TODO or NEXT. As soon as I work on the first NEXT task in a tree the project is also marked STARTED. This helps me keep track of things that are in progress.
Here’s the setup I use to propagate STARTED to parent tasks:
 ;;  Mark parent tasks as started
( defvar  bh/mark-parent-tasks-started nil)

( defun  bh/mark-parent-tasks-started ()
   "Visit each parent task and change TODO states to STARTED"
  ( unless bh/mark-parent-tasks-started
    ( when (equal org-state  "STARTED")
      ( let ((bh/mark-parent-tasks-started t))
        ( save-excursion
          ( while (org-up-heading-safe)
            ( when (member (nth 2 (org-heading-components)) (list  "TODO"  "NEXT"))
              (org-todo  "STARTED"))))))))

(add-hook 'org-after-todo-state-change-hook 'bh/mark-parent-tasks-started 'append)
I used to spend time on an open source project called BZFlag. During work for releases I want to clock the time I spend testing the new BZFlag client. I have a key binding in my window manager that runs a script which starts the clock on my testing task, runs the BZFlag client, and on exit resumes the clock on the previous clocking task.
The testing task has an ID property of dcf55180-2a18-460e-8abb-a9f02f0893be and the following elisp code starts the clock on this task.
( defun  bh/clock-in-bzflagt-task ()
  (interactive)
  (bh/clock-in-task-by-id  "dcf55180-2a18-460e-8abb-a9f02f0893be"))
This is invoked by a bash shell script as follows:
 # !/bin/ sh
emacsclient -e  '(bh/clock-in-bzflagt-task)'
~/git/bzflag/trunk/bzflag/src/bzflag/bzflag -directory ~/git/bzflag/trunk/bzflag/data $ *
emacsclient -e  '(bh/resume-clock)'
The resume clock function just returns the clock to the previous clocking task
( defun  bh/resume-clock ()
  (interactive)
  ( if (marker-buffer org-clock-interrupted-task)
      (org-with-point-at org-clock-interrupted-task
        (org-clock-in))
    (org-clock-out)))
If no task was clocking bh/resume-clock just stops the clock.
With Sticky Agendas burying the buffer is the default behaviour for the q key so this is not needed anymore.
I change the q key in the agenda so instead of killing the agenda buffer it merely buries it to the end of the buffer list. This allows me to pull it back up quickly with the q speed key or f9 f9 and regenerate the results with g.
(add-hook 'org-agenda-mode-hook
          ( lambda ()
            (define-key org-agenda-mode-map  "q" 'bury-buffer))
          'append)
I use the agenda to figure out what to do work on next. I don’t use priorities at all normally but at work I occasionally get priorities from my manager. In this case I mark my tasks with the priorities from the external source just to track the values and force the agenda to display tasks in the priority order.
I use priorities A-E where tasks without a specific priority are lowest priority E.
(setq org-enable-priority-commands t)
(setq org-default-priority ?E)
(setq org-lowest-priority ?E)
Editing folded regions of your org-mode file can be hazardous to your data. My method for dealing with this is to put my org files in a Git source repository.
My setup saves all of my org-files every hour and creates a commit with my changes automatically. This lets me go back in time and view the state of my org files for any given hour over the lifetime of the document. I’ve used this once or twice to recover data I accidentally removed while editing folded regions.
My Emacs setup saves all org buffers at 1 minute before the hour using the following code in my .emacs
(run-at-time "00:59" 3600 'org-save-all-org-buffers)
A cron job runs at the top of the hour to commit any changes just saved by the call to org-save-all-org-buffers above. I use a script to create the commits so that I can run it on demand to easily commit all modified work when moving from one machine to another.
crontab details:
0 * * * * ~/bin/org-git-sync.sh >/dev/null<<sec-20-1-1>> 20.1.1 ~/bin/org-git-sync.sh
Here is the shell script I use to create a git commit for each of my org-repositories. This loops through multiple repositories and commits any modified files. I have the following org-mode repositories:
- org
for all of my organization project files and todo lists
- doc-norang.ca
for any changes to documents under http://doc.norang.ca/
- www.norang.ca
for any changes to my other website http://www.norang.ca/
This script does not create empty commits - git only creates a commit if something was modified.
# !/bin/ sh
#  Add org file changes to the repository
REPOS= "org doc.norang.ca www.norang.ca"

for REPO  in $ REPOS
do
    echo  "Repository: $REPO"
    cd ~/git/$ REPO
    #  Remove deleted files
   git ls-files --deleted -z | xargs -0 git rm >/dev/null 2>&1
    #  Add new files
   git add . >/dev/null 2>&1
   git commit -m  "$( date )"
done
I use the following .gitignore file in my org-mode git repositories to keep export generated files out of my git repositories. If I include a graphic from some other source than ditaa or graphviz then I’ll add it to the repository manually. By default all PNG graphic files are ignored (since I assume they are produced by ditaa during export)
core
core.*
*.html
*~
.#*
\#*\#
*.txt
*.tex
*.aux
*.dvi
*.log
*.out
*.ics
*.pdf
*.xml
*.org-source
*.png
*.toc
I use git in all of my directories where editing a file should be tracked.
This means I can edit files with confidence. I’m free to change stuff and break things because it won’t matter. It’s easy to go back to a previous working version or to see exactly what changed since the last commit. This is great when editing configuration files (such as apache webserver, bind9 DNS configurations, etc.)
I find this extremely useful where your edits might break things and having git tracking the changes means if you break it you can just go back to the previous working version easily. This is also true for package upgrades for software where the upgrade modifies the configuration files.
I have every version of my edits in a local git repository.
I acquired a Eee PC 1000 HE which now serves as my main road-warrior laptop replacing my 6 year old Toshiba Tecra S1.
I have a server on my LAN that hosts bare git repositories for all of my projects. The problem I was facing is I have to leave in 5 minutes and want to make sure I have up-to-date copies of everything I work on when I take it on the road (without Internet access).
To solve this I use a server with bare git repositories on it. This includes my org-mode repositories as well as any other git repositories I’m interested in.
Just before I leave I run the git-sync script on my workstation to update the bare git repositories and then I run it again on my Eee PC to update all my local repositories on the laptop. For any repositories that give errors due to non-fast-forward merges I manually merge as required and rerun git-sync until it reports no errors. This normally takes a minute or two to do. Then I grab my Eee PC and leave. When I’m on the road I have full up-to-date history of all my git repositories.
The git-sync script replaces my previous scripts with an all-in-one tool that basically does this:
- for each repository on the current system
- fetch objects from the remote
- for each branch that tracks a remote branch
- Check if the ref can be moved
- fast-forwards if behind the remote repository and is fast-forwardable
- Does nothing if ref is up to date
- Pushes ref to remote repository if ref is ahead of remote repository and fast-forwardable
- Fails if ref and remote have diverged
- Check if the ref can be moved
This automatically advances changes on my 35+ git repositories with minimal manual intervention. The only time I need to manually do something in a repository is when I make changes on my Eee PC and my workstation at the same time - so that a merge is required.
Here is the git-sync script
 # !/bin/ sh
 #

 #  Local bare repository name
 syncrepo=norang
 reporoot=~/git

 #  Display repository name only once
log_repo() {
  [  "x$lastrepo" ==  "x$repo" ] || {
     printf  "\nREPO: ${repo}\n"
     lastrepo= "$repo"
  }
}

 #  Log a message for a repository
log_msg() {
  log_repo
   printf  "  $1\n"
}

 #  fast-forward reference $1 to $syncrepo/$1
fast_forward_ref() {
  log_msg  "fast-forwarding ref $1"
   current_ref=$( cat .git/HEAD)
   if [  "x$current_ref" =  "xref: refs/heads/$1" ]
   then
     #  Check for dirty index
     files=$( git diff-index --name-only HEAD --)
    git merge refs/remotes/$ syncrepo/$ 1
   else
    git branch -f $ 1 refs/remotes/$ syncrepo/$ 1
   fi
}

 #  Push reference $1 to $syncrepo
push_ref() {
  log_msg  "Pushing ref $1"
   if ! git push --tags $ syncrepo $ 1
   then
     exit 1
   fi
}

 #  Check if a ref can be moved
 #    - fast-forwards if behind the sync repo and is fast-forwardable
 #    - Does nothing if ref is up to date
 #    - Pushes ref to $syncrepo if ref is ahead of syncrepo and fastforwardable
 #    - Fails if ref and $syncrop/ref have diverged
check_ref() {
   revlist1=$( git rev-list refs/remotes/$ syncrepo/$ 1..$ 1)
   revlist2=$( git rev-list $ 1..refs/remotes/$ syncrepo/$ 1)
   if [  "x$revlist1" =  "x" -a  "x$revlist2" =  "x" ]
   then
     #  Ref $1 is up to date.
    :
   elif [  "x$revlist1" =  "x" ]
   then
     #  Ref $1 is behind $syncrepo/$1 and can be fast-forwarded.
    fast_forward_ref $ 1 ||  exit 1
   elif [  "x$revlist2" =  "x" ]
   then
     #  Ref $1 is ahead of $syncrepo/$1 and can be pushed.
    push_ref $ 1 ||  exit 1
   else
    log_msg  "Ref $1 and $syncrepo/$1 have diverged."
     exit 1
   fi
}

 #  Check all local refs with matching refs in the $syncrepo
check_refs () {
  git for-each-ref refs/heads/* |  while  read sha1 commit ref
   do
     ref=${ ref/refs \/heads \//}
    git for-each-ref refs/remotes/$ syncrepo/$ ref |  while  read sha2 commit ref2
     do
       if [  "x$sha2" !=  "x" -a  "x$sha2" !=  "x" ]
       then
        check_ref $ ref ||  exit 1
       fi
     done
   done
}

 #  For all repositories under $reporoot
 #    Check all refs matching $syncrepo and fast-forward, or push as necessary
 #    to synchronize the ref with $syncrepo
 #    Bail out if ref is not fastforwardable so user can fix and rerun
 time {
   retval=0
   if find $ reporoot -type d -name  '*.git' | {
       while  read repo
       do
         repo=${ repo/ \/.git/}
         cd ${ repo}
         upd=$( git remote update $ syncrepo 2>&1 ||  retval=1)
        [  "x$upd" =  "xFetching $syncrepo" ] || {
          log_repo
           printf  "$upd\n"
        }
        check_refs ||  retval=1
       done
       exit $ retval
    }
   then
     printf  "\nAll done.\n"
   else
     printf  "\nFix and redo.\n"
   fi
}

 exit $ retval
Author: Bernt Hansen (IRC: BerntH on freenode)
Email: [email protected]
Created: 2015-07-23 Thu 22:36
Emacs 23.2.1 ( Org mode 8.2.10)
brew install emacs-plus --with-modern-nuvola-icon --with-xwidgets --without-imagemagick --with-jansson
- create virtualenv with virtualenvwrapper
pyenv shell 3.6.9
pyenv shell ${version}
# we will need to install virtualenvwrapper. This is done with either the pyenv virtualenvwrapper or pyenv virtualenvwrapper_lazy (preferred) command:
pyenv virtualenvwrapper_lazy
# or
pyenv virtualenvwrapper

workon #lists the virtualenv
workon $projectName #switch to project
mkvirtualenv $name #make virtual env for a project
mkvirtualenv --python=`pyenv which python` $name #This will set python verion using pyenv
mkvirtualenv --python=`pyenv which python3` $(basename `pwd`)
mktempenv # makes temp env
rmvirtualenv $name #remove virtual env
setvirtualenvproject #This will tie the project directory to virtualenv. This is typically entered in a active virtualenv
mkproject  $projectname # creates a new projects, create a virtualenv , binds project and virtualenv and moves to directory
- once virtualenvwrapper is created use
pipenvto install packagespipenv install -r requirements.txt pipenv install -d --skip-lock pylint black # to install developer packages pipenv install -d --skip-lock pylint black pigar mypy pipenv run pipenv_to_requirements - Using Pyright in LSP mode
- use
.dir-locals.el
- use
  ;;; Directory Local Variables
  ;;; For more information see (info "(emacs) Directory Variables")
  ;; ((python-mode . (
  ;;                  (eval . (venv-workon "git-warden"))
  ;;                  (eval . (lsp-register-custom-settings
  ;;                           `(("python.pythonPath" "/Users/ckoneru/.virtualenvs/git-warden/bin/python")
  ;;                             ("python.venvPath" "/Users/ckoneru/.virtualenvs/git-warden/"))))
  ;;                  )))
((python-mode . ((lsp-pyright-venv-path . "/Users/ckoneru/.virtualenvs/git-warden")
                 (eval . (venv-workon "git-warden"))
                 )))
  ;; ((nil . ((python-mode . (
  ;; (venv-workon "git-warden")
  ;; (lsp-python-ms-python-executable . "/Users/ckoneru/.virtualenvs/git-warden/bin/python")
  ;; )))))

  ;; or if you use pyvenv
  ((python-mode . ((pyvenv-workon . "git-warden"))))
[2020-10-13 Tue 14:19]
#emacs | #GNU | #org | #programming
This is the second post in the serie of how I use Emacs Org mode (from now on org) and it will cover usage of org tables. Some of the content assumes basic knowledge about org. If you are new to org I can recommend this two videos; hrs and kitchin.
Org tables are like spreadsheets with super powers. Tables can be used to keep information organized, as input to source blocks (more about that in the first post, “Emacs Org mode source blocks”) or used in calculations.
My main usage of tables is to calculate work time. I sum up the time I should work and the time I have been working and calc the diff.
… of Emacs and Org mode.
    ( org-version )

 #+RESULTS :
: 9.3.7

  ( emacs-version )

 #+RESULTS :
: GNU Emacs 26.3 (build 1, x86_64-pc-linux-gnu, GTK+ Version 3.24.20)
:  of 2020-05-19
Without config Emacs don’t know how to execute source blocks. This following snippet provides Emacs with the ability to understand a set of languages/applications. The set of languages/applications need to be available in the underlying OS. To get a complete list of languages/applications available in org. A complete list can be found here: repo. Support for source blocks are available in files prefixed with ob-.
 ( setq  org-confirm-babel-evaluate  nil )

( org-babel-do-load-languages
 'org-babel-load-languages
 ' (( emacs-lisp  .  t )
   ( shell  .  t )
   ( scheme  .  t )
   ( python  .  t )
   ( awk  .  t )
   ( clojure  .  t )))
This example names the table via the #+NAME: command. This named table is then used as input to a source block. Here we use awk to sum the population in Europe. More about this can be found in the first post, “Emacs Org mode source blocks”.
  #+NAME : countries
 | Country name | Area | Population | Region        |
 |--------------+------+------------+---------------|
 | USSR         | 8649 |        275 | Asia          |
 | Canada       | 3852 |         25 | North America |
 | China        | 3705 |       1032 | Asia          |
 | USA          | 3615 |        237 | North America |
 | Brazil       | 3286 |        134 | South America |
 | India        | 1267 |        746 | Asia          |
 | Mexico       |  762 |         78 | North America |
 | France       |  211 |         55 | Europe        |
 | Japan        |  144 |        120 | Asia          |
 | Germany      |   96 |         61 | Europe        |
 | England      |   94 |         56 | Europe        |

    /Europe/  {  sum +=  $ 3  }
   END  {  print  "Sum of the population in Europe is" ,  sum }

 #+RESULTS :
: Sum of the population in Europe is 172
Data is taken from the book The AWK Programming Language.
Just like the previous example this one will do calculations based on data in a table. But this on will use table formulas ( TBLFM) to do the calculations. This time the table wont be passed to a programming language outside of Emacs. In the “before” we have some items with amount and cost data. We would like to know the amount * cost for each row and the sum of all “Total” rows.
By putting the pointer on the TBLFM formula and use the keyboard sequence C-c C-c the calculations will be executed.
Org docs on table formulas and advanced features.
 Before  =TBLFM= is evaluated

 | Description | Amounts | Cost | Total |
 |-------------+---------+------+-------|
 | Item 1      |       5 |   10 |       |
 | Item 2      |       1 |   55 |       |
 | Item 3      |      20 |   10 |       |
 | Item 4      |    1000 |    1 |       |
 |-------------+---------+------+-------|
 | Sum:        |         |      |       |
 #+TBLFM : $4=$2*$3::@>$4=vsum(@<<$4..@>>$4)

After  =TBLFM= is evaluated

 | Description | Amounts | Cost | Total |
 |-------------+---------+------+-------|
 | Item 1      |       5 |   10 |    50 |
 | Item 2      |       1 |   55 |    55 |
 | Item 3      |      20 |   10 |   200 |
 | Item 4      |    1000 |    1 |  1000 |
 |-------------+---------+------+-------|
 | Sum:        |         |      |  1305 |
 #+TBLFM : $4=$2*$3::@>$4=vsum(@<<$4..@>>$4)
This is more or less the same as in previous example but this time we have a U in the TBLFM and that tells org to calculate time. Org have many different ways of manage time, more about that here.
 Before  =TBLFM= is evaluated

 | Task  |  Time |
 |-------+-------|
 | Taks1 |  8:00 |
 | Task2 |  0:30 |
 | Task3 |  2:00 |
 |-------+-------|
 | Total |       |
 #+TBLFM : @>$2=vsum(@<<$2..@>>$2);U

After  =TBLFM= is evaluated

 | Task  |  Time |
 |-------+-------|
 | Taks1 |  8:00 |
 | Task2 |  0:30 |
 | Task3 |  2:00 |
 |-------+-------|
 | Total | 10:30 |
 #+TBLFM : @>$2=vsum(@<<$2..@>>$2);U
This is an example on how I use tables to make sure that I work my hours.
At my current work we have 40 hours a week freely distributed, no 8-17. As I am a person that like routines I often try to do 8-17 but I am not to strict about it. Working some hours in the night or on weekends is normal. I have a setup where I schedule 8 hours of work every weekday (5*8=40). And to keep track that I really do that I use a table together with some Emacs LiSP code and a TBLFM formula. If I am sick or on vacation I put “0:00” in “Worked”. This tells the LiSP code to not add “8:00” hours in the “Should work” spot. And if I work hours on a weekend that day should not add extra “8:00” to “Should work”.
( defun  jh/hours-a-day  ( date  time )
 ( if  ( string-equal  time  "0:00" )
     ""
   ( if  ( or  ( string-match  " Mon"  date )
           ( string-match  " Tue"  date )
           ( string-match  " Wed"  date )
           ( string-match  " Thu"  date )
           ( string-match  " Fri"  date ))
       "8:00"  "" )))
The example contains multiple TBLFM, eval them one by one from the top to the bottom.
  | Day              | Worked | Should work |
 |------------------+--------+-------------|
| [2020-06-20 Sat] |   2:00 |             | # Day off, it's a weekend
 | [2020-06-19 Fri] |   8:00 |        8:00 |
 | [2020-06-18 Thu] |   8:00 |        8:00 |
 | [2020-06-17 Wed] |   7:30 |        8:00 |
 | [2020-06-16 Tue] |   7:30 |        8:00 |
| [2020-06-15 Mon] |   0:00 |             | # Sick or vacation, as it's a weekday
 |------------------+--------+-------------|
 | Total            |  33:00 |       32:00 |
 | Diff             |        |       01:00 |
 #+TBLFM : @<<$3..@>>>$3='(jh/hours-a-day $1 $2)'
 #+TBLFM : @>>$2=vsum(@<<$2..@>>>$2);U
 #+TBLFM : @>>$3=vsum(@<<$3..@>>>$3);U
 #+TBLFM : @>$3=(@>>$2-@>>$3);U
This example is not about tables but headlines, drawers and clocktable will be part of a bigger example later.
So, org have headlines. A headline is a row that starts with one or more *. The number of * declares the depth of the sub headline. In this example Work is headline, [2020-06-10 Wed] Deployed server and [2020-06-11 Thu] Updated deps are sub headlines. Here is headline docs.
Drawers are values associated with a headline. In this case we use LOGBOOK drawer and each LOGBOOK have one or more CLOCK entries. Each CLOCK entry is a datetime range.
Clocktable is a report on CLOCK entries. It asks for a scope and finds clocking information from it. In this case the scope is the current buffer. To eval a clocktable, put the pointer on #+BEGIN: row and use C-c C-c. Here is the doc on clocktable.
 #+BEGIN:  clocktable  :scope file :maxlevel 2
# +CAPTION: Clock summary at [2020-06-21 Sun 21:03]
| Headline                             | Time    |      |
|--------------------------------------+--------- +------|
| *Total time*                         | *12:00* |      |
|--------------------------------------+---------+------|
| Work                                 | 12:00   |      |
| \_  [2020-06-11 Thu] Updated deps    |         | 4:00 |
| \_  [2020-06-10 Wed] Deployed server |         | 8:00 |
#+END:

*  Work
** [2020-06-11 Thu] Updated deps
   :LOGBOOK:
    CLOCK: [2020-06-11 Thu 13:00]--[2020-06-11 Thu 17:00] =>  4:00
    :END:

** [2020-06-10 Wed] Deployed server
   :LOGBOOK:
    CLOCK: [2020-06-10 Wed 08:00]--[2020-06-10 Wed 12:00] =>  4:00
   CLOCK: [2020-06-10 Wed 13:00]--[2020-06-10 Wed 17:00] =>  4:00
    :END:
HINT: Total time format may differ. Look here: how to change Total time format.
This example combines many of the features we have gone through. The main idea here is a headline with sub headlines. Each sub headline contains a date and a optional text together with clocking information. This file scope is used by clocktable to generate a report. After the report is generated a formula is executed on the table. This formula is pretty extensive. But the main things is to calculate the “Worked” and “Should work” columns and subtract “Should work” with “Worked” to show how many hours I have left to work.
This example depends on the jh/hours-a-day LiSP snippet.
The example below states that I have one more hour to work before I have completed my 40 hours.
 *  Timetable

  #+BEGIN:  clocktable  :scope file :compact t :formula "$3='(jh/hours-a-day $1 $2)'::@3$3=vsum(@4$3..@>$3);U::@1$2=string(\"Worked|\")::@1$3=string(\"Should work\")::@2$2=vsum(@4$2..@>$2)-vsum(@4$3..@>$3);U::@2$1=string(\"Hour pool\")"
  # +CAPTION: Clock summary at [2020-06-21 Sun 21:53]
  | Headline                                   | Worked | Should work |
  |--------------------------------------------+-------- +-------------|
  | Hour pool                                  | -01:00 |             |
  |--------------------------------------------+--------+-------------|
  | Work                                       |  39:00 |       40:00 |
  | \_  [2020-06-13 Sat] Fixed server problems |   3:00 |             |
  | \_  [2020-06-12 Fri]                       |   4:00 |        8:00 |
  | \_  [2020-06-11 Thu] Updated deps          |   8:00 |        8:00 |
  | \_  [2020-06-10 Wed] Deployed server       |   8:00 |        8:00 |
  | \_  [2020-06-09 Tue] Meetings              |   8:00 |        8:00 |
  | \_  [2020-06-08 Mon]                       |   8:00 |        8:00 |
 #+TBLFM: $3='(jh/hours-a-day $1 $2)'::@3$3=vsum(@4$3..@>$3);U::@1$2=string("Worked|")::@1$3=string("Should work")::@2$2=vsum(@4$2..@>$2)-vsum(@4$3..@>$3);U::@2$1=string("Hour pool")
  #+END:

*  Work
** [2020-06-13 Sat] Fixed server problems
   :LOGBOOK:
    CLOCK: [2020-06-13 Sat 08:00]--[2020-06-13 Sat 11:00] =>  3:00
    :END:

** [2020-06-12 Fri]
   :LOGBOOK:
    CLOCK: [2020-06-12 Fri 13:00]--[2020-06-12 Fri 17:00] =>  4:00
    :END:

** [2020-06-11 Thu] Updated deps
   :LOGBOOK:
    CLOCK: [2020-06-11 Thu 08:00]--[2020-06-11 Thu 12:00] =>  4:00
   CLOCK: [2020-06-11 Thu 13:00]--[2020-06-11 Thu 17:00] =>  4:00
    :END:

** [2020-06-10 Wed] Deployed server
   :LOGBOOK:
    CLOCK: [2020-06-10 Wed 08:00]--[2020-06-10 Wed 12:00] =>  4:00
   CLOCK: [2020-06-10 Wed 13:00]--[2020-06-10 Wed 17:00] =>  4:00
    :END:

** [2020-06-09 Tue] Meetings
   :LOGBOOK:
    CLOCK: [2020-06-09 Tue 08:00]--[2020-06-09 Tue 12:00] =>  4:00
   CLOCK: [2020-06-09 Tue 13:00]--[2020-06-09 Tue 17:00] =>  4:00
    :END:

** [2020-06-08 Mon]
   :LOGBOOK:
    CLOCK: [2020-06-08 Mon 08:00]--[2020-06-08 Mon 12:00] =>  4:00
   CLOCK: [2020-06-08 Mon 13:00]--[2020-06-08 Mon 17:00] =>  4:00
    :END:
Sub headlines with logbook entries can be created really fast from custom templates. Take a look at capture templates.
Clocking commands can be used on sub headlines to start and stop timing. More info here.
- Emacs Org mode source blocks
- Quick overview of Clojure spec, test.check and transducers
- Entity event log in Datomic
[2020-10-13 Tue 14:20]
#emacs | #GNU | #org | #programming
- [2020-06-23] New section. “Combine source blocks”
It’s time to start documenting how I use Emacs Org mode (from now on org) and it will contain a serie of posts. This is the first post and it will cover source blocks. Some of the content assumes basic knowledge about org. If you are new to org I can recommend this two videos; hrs and kitchin.
One of the features I’ve been using very frequently is source blocks. The power of evaluating code directly from a block and get the results back into the document is really convenient. While reading The AWK Programming Language I took notes and did all of the awk programming withing source blocks. This makes me able to have notes, code and execution results in the same document. And as everything is just text, it’s easy to version control!
This is the structure of a source block. Org mode’s documentation on source blocks can be found here.
Header arguments differ for different languages and applications. Look in the documentation for your specific language/application to find out what and how to use it.
… of Emacs and Org mode.
    ( org-version )

 #+RESULTS :
: 9.3.7

  ( emacs-version )

 #+RESULTS :
: GNU Emacs 26.3 (build 1, x86_64-pc-linux-gnu, GTK+ Version 3.24.20)
:  of 2020-05-19
Without config Emacs don’t know how to execute source blocks. This following snippet provides Emacs with the ability to understand a set of languages/applications. The set of languages/applications need to be available in the underlying OS. To get a complete list of languages/applications available in org. A complete list can be found here: repo. Support for source blocks are available in files prefixed with ob-.
 ( setq  org-confirm-babel-evaluate  nil )

( org-babel-do-load-languages
 'org-babel-load-languages
 ' (( emacs-lisp  .  t )
   ( shell  .  t )   ; in my case /bin/bash
   ( scheme  .  t )
   ( python  .  t )
   ( ledger  .  t )
   ( sed  .  t )
   ( awk  .  t )
   ( clojure  .  t )))
This small example uses bash to evaluate the echo command. Evaluation is done by moving the pointer to the source block and press the key sequence C-c C-c.
 What shell am I using?

    echo  $SHELL

 #+RESULTS :
: /bin/bash
Arguments can be passed to source blocks from the document. This example passes 2 :var, ARG1 and ARG2. The command get the arguments and uses them in the command.
    echo  $ARG1  $ARG2

 #+RESULTS :
: FOO BAR
Lets elaborate on argument to source blocks even further. Org documents can contain variables that holds data. This example contains a org table with the variable name my-list. my-list is passed as an argument to the Python source block via the variable lst. When executed by Python the lst data structure is a vector with vectors.
  #+NAME : my-list
 | A | 1 |
 | B | 2 |
 | C | 3 |

my-list is a variable in this org document and can be passed in as data to a
source code block.

    print ( lst )

The data structure that will be passed to the source block is a vector or
vectors.

 #+RESULTS :
: [['A', 1], ['B', 2], ['C', 3]]

Just like with a normal Python application you can manipulate the data.

    return  [[ chr (( ord ( x ) + 1 )),  y + 1 ]  for  x , y  in  lst ]

 #+RESULTS :
[['B', 2], ['C', 3], ['D', 4]]
Results output can be in many different shapes. Raw output, tables, as code and many more. Output results are described with the :results switch in the source block header. This post won’t go more into details but more information can be found here.
This example provides another org document variable. In this case the text-example text block. The text in that block is passed as an argument to the awk source block. awk is a programming language with good features to manipulate text. It can take text from stdin. That’s exactly what is happening here. Often you see awk used in shell commands, similar to this: cat /etc/passwd | awk -F":" '{ print $1 }'. Here awk gets stdin data from the pipe. But in our source block it gets stdin data from the org document.
#+NAME : text-example
Item1 100
Item2 200
Item3 50
Sum field nr 2.
BEGIN { OFS = "|" }; { sum += $ 2 }; END { print "Sum" , sum }#+RESULTS :
| Sum | 350 |
This example is very similar to the one in “Echo input variables”. It passed a variable to the source block that tells a file path to awk. awk is then called with that :in-file as an argument.
Get system users that have  =/bin/bash= access.

   BEGIN  {  FS = ":" }
  $ 7  ==  "/bin/bash"  {  print  $ 1 }

#+RESULTS :
| root |
| john |
It’s possible to combine text from different source blocks with the :noweb yes header argument. This example shows a ledger that’s split up into income and expenses source blocks. They are then combined in the balance source block. Ledger is a plaintext accounting tool and can create a balance report from our assets, income and expenses. The :noweb header arguments in not something that is specific for ledger.
Docs on :noweb header argument can be found here. Docs on ledger can be found here.
  #+NAME : income
   2020-06-24 * Sold old computer
      Assets:Bank:Card                         5000.00
      Income:Secondhand                       -5000.00
  2020-06-25 * Salary
      Assets:Bank:Card                        25000.00
      Income:Work:Salary                     -25000.00

 #+NAME : expenses
   2020-06-23 * Rent
      Expenses:Rent                            3000.00
      Assets:Bank:Card                        -3000.00
  2020-06-24 * Gas
      Expenses:Cas:Gas                         3000.00
      Assets:Bank:Card                        -3000.00

 #+NAME : balance
   <>
  <>

 #+RESULTS : balance
:                24000  Assets:Bank:Card
:                 6000  Expenses
:                 3000    Cas:Gas
:                 3000    Rent
:               -30000  Income
:                -5000    Secondhand
:               -25000    Work:Salary
: --------------------
:                    0
Now lets use the result from one source block as argument to another. The example requires some files with a .awk ending to be present in /tmp. We use bash to get data about our file system. That result is then feed to awk that creates a good looking table. That table is then sent to Python for further processing.
There is nothing different here from the other examples except that in this case we use #+NAME: on source blocks instead of a text blocks or a tables. The results from the named source blocks will then be available as input to other source blocks.
 List files ending with .awk in  /tmp/ dir.

 #+NAME : ls-output
   ls -la *.awk

 #+RESULTS : ls-output
: -rw-r--r-- 1 john users 492 Jun 15 11:46 awk-play.awk
: -rw-r--r-- 1 john users 396 Jun 15 13:10 copy-line-on-confirm.awk
: -rw-r--r-- 1 john users 412 Jun 15 12:25 filter-google-chromepasswords.awk

Take only size and filename and return a table.

 #+NAME : ls-output-table
    BEGIN  {  OFS = "|"  };  {  print  $ 5 ,  $ 9 }

 #+RESULTS : ls-output-table
 | 492 | awk-play.awk                      |
 | 396 | copy-line-on-confirm.awk          |
 | 412 | filter-google-chromepasswords.awk |

Process the table with Python.

    print ( table )
   print ( max ( table ))                               # Biggest awk file
   print ( min ( table ))                               # Smallest awk file
   print ( sum ([ x  for  x , y  in  table ])  /  1000  ,  "kb" )  # Sum of all awk files

 #+RESULTS :
: [[492, 'awk-play.awk'],
:  [396, 'copy-line-on-confirm.awk'],
:  [412, 'filter-google-chromepasswords.awk']]
: [492, 'awk-play.awk']
: [396, 'copy-line-on-confirm.awk']
: 1.3 kb
Org have ways to execute code on remote servers via source blocks. This is awesome and can be used for DevOps. I have used it in cases where an Ansible playbook is overkill. There is a really nice blog post and video about this stuff here.
Source blocks can also be written to the file system via the header switch :tangle. This is also very useful. More info about that can be found here.
I think org is truly an amazing piece of software. With very little effort from the user it can provide a very rich and interactive experience with a lot of applications and languages. From the document view everything is just text so version control a org document is very simple.
[2020-10-13 Tue 14:20]
#emacs | #GNU | #org | #programming
This is the third post in a series about Emacs Org mode and the second about source code blocks.
The last post about source code blocks (blocks from now on) covered org document variables, named blocks and combining blocks.
This post will focus on how and where block result output will end up. It won’t cover all of the arguments and features as I don’t use all of them. If you wanna get the full picture, here is the docs.
Since last post a new Emacs version 27.1 have been released! Here are some about the release, news.
I haven’t covered this type of blocks before. They are called “inline code block” and is very useful when doing one liners that returns a single value. The documentation on inline code blocks can be found here.
Here are the “inline code blocks” used to show what versions of the software I am currently using.
 src_emacs-lisp{emacs-version}  {{{results(=27.1=)}}}
src_emacs-lisp{org-version}  {{{results(=9.4=)}}}
Results from source block evaluation can appear in many different shapes. As list, as source block, as “raw”, to file and so on.
This is how it end up if no argument if provided.
    echo  "Hello Emacs"

#+RESULTS:
: Hello Emacs
This is the same as the argument :results output.
    echo  "Hello Emacs"

#+RESULTS:
: Hello Emacs
Lets output the result into a new source code block. By default the new block gets the same language as the parent. In this case the language is shell.
    echo  "Hello Emacs"

#+RESULTS:
 Hello Emacs
If the output language is not the same as the parent. :wrap can be used to tell what language the result block will get.
    echo  "Hello Emacs"

#+RESULTS:
 Hello Emacs
Results can be appended into the org document. In this case the block have been evaluated three times. I don’t use this very often.
   date + '%Y-%m-%d %H:%M:%S'

#+RESULTS:
: 2020-08-29 11:52:34
: 2020-08-29 11:52:36
: 2020-08-29 11:52:38
Results can end up in nicely formatted org tables
   ps -a

#+RESULTS:
 |     PID | TTY   |     TIME | CMD      |
 |    5456 | tty1  | 00:00:00 | swaybg   |
 |    5468 | tty1  | 00:00:49 | swaybar  |
 |    5479 | tty1  | 00:01:12 | sh       |
 |    5937 | tty1  | 00:07:14 | Xwayland |
 | 1279652 | pts/0 | 00:00:03 | hugo     |
Or what about a nice looking NetworkManager table.
   nmcli -g name,type,device con  | awk  'BEGIN{FS=":"; OFS="\t"};{print $1, $2, $3}'

#+RESULTS:
 | iPhone             | 802-11-wireless | wlp0s20f3     |
 | integrity_vpn      | wireguard       | integrity_vpn |
Results can be written to a file. In the results area a org link to the file containing the results is provided.
  echo  "#!/bin/bash"
 echo  "echo Hey"

#+RESULTS:
[[ file:script.sh]]
Here is a larger case. Write the results to a file. The filename should be script.sh and be written in folder /tmp. The file should also have execute permissions for all three user types. This :file-mode argument came in Org version 9.4.
 #+HEADER: :results file
#+HEADER: :file script.sh
#+HEADER: :output-dir /tmp
#+HEADER: :file-mode (identity #o777)
    "#!/bin/bash\necho Hello World"

#+RESULTS:
[[ file:/tmp/script.sh]]
Let’s look on the attributes of the script.sh file.
   ls -la  | grep script.sh

#+RESULTS:
 -r-xr-xr-x   1 nils users    28 Aug  29 11:59 script.sh
Result data from one source block can be passed to another in the same execution. You don’t need to run C-c C-c two times and have results stored in variables. In the example on bash block generates a string and numbers from 1 to 20. Those two lines are then passed on to the attr_wrap named source block. This block takes data from the previous block and append two more lines. One with a string and the other with numbers from 20 to 30.
 #+NAME: attr_wrap
    echo -n  " $data "
   echo  "... and this appends this"
   echo  {20..30 }

Evaluate the block below, the upper block will be called
automatically.

#+HEADER: :post attr_wrap(data= *this*)
#+HEADER: :file /tmp/a.txt
#+HEADER: :results output code
    echo  "This blocks generates this data"
   echo  {01..10 }

#+RESULTS:
 This blocks generates this data
 01  02  03  04  05  06  07  08  09  10
... and this appends this
 20  21  22  23  24  25  26  27  28  29  30
This is a sidestep from source code block results, but it’s related. Text within a source code block can be written to a file. Using the (org-babel-tangle) function. (org-babel-tangle) will look through all of the document and find all of the source code blocks with :tangle arguments and write all of them to the local file system.
This example writes some text from a source code block to a file.
   This is some text

   cat /tmp/hey-from-org.txt

#+RESULTS:
 This is some text
Just lite :file-mode we have :tangle-mode to set file permissions when writing a file to the file system. This example is a small bash script written to the file system and set to be executable for all users.
 #+HEADER: :tangle /tmp/hey-org-mode.sh
#+HEADER: :tangle-mode (identity #o777)
    #!/bin/bash
   echo  "Hello World"

Lets check what permissions the file got after tangled.

   ls -la /tmp  | grep hey-org-mode.sh

The file got  *read*,  *write* and  *execute* for everyone. That's what
we told in the  =:tange-mode= header.

#+RESULTS:
   -rwxrwxrwx   1 john users       31 Jul  22 11:40 hey-org-mode.sh
This example combines many of the features. And in the end it generates a nicely formatted system report with a org structure.
Lets start by specifying the commands to run in the report.
#+NAME: report-commands
| Disk usage    | df -h      |
| Memory usage  | free -h    |
| Network       | nmcli conn |
| System time   | date       |
| System uptime | uptime     |
| System kernel | uname -a   |
Run the table into a awk source code block to format it into a bash script. The result is written to a file and execute permissions are set on the file.
 #+HEADER: :stdin report-commands
#+HEADER: :results file
#+HEADER: :file /tmp/system-report.sh
#+HEADER: :file-mode (identity #o744)"
    BEGIN  {
       FS = "\t"
       print  "#!/bin/bash\n"
       print  "echo \"#+TITLE: $1\""
       print  "echo \"#+DATE: $(date +'%m-%d-%Y %H:%M:%S')\""
       print  "echo \"#+STARTUP: overview\""
       print  "echo \"\""
   }
   {
       printf ( "echo \"* %s\"\n" ,  $ 1 )
       printf ( "echo \"\"\n" )
       printf ( "echo \"#+BEGIN_SRC shell\"\n" )
       printf ( "echo \"%s\"\n" ,  $ 2 )
       printf ( "echo \"#+END_SRC\"\n" )
       printf ( "echo \"\"\n" )
       printf ( "echo \"#+RESULTS:\"\n" )
       printf ( "echo \"#+BEGIN_SRC text\"\n" )
       printf ( "echo \"$(%s)\"\n" ,  $ 2 )
       printf ( "echo \"#+END_SRC\"\n" )
       printf ( "echo \"\"\n" )
   }

#+RESULTS:
[[ file:/tmp/system-report.sh]]
The output of the system-report.sh will be pretty flat and will not look nice even in org. Lets format it with some level of indentation depending on context. This source block is only responsible for formatting and cant do anything on it’s own.
 #+NAME: org_format
#+HEADER: :var data=""
#+HEADER: :results raw
    echo -n  " $data "  \
        | awk  '$1~/BEGIN_SRC|RESULTS/,$1~/END_SRC/ { print "   ", $0; next }; { print }'  \
        | awk  '$1~/^#+/ {gsub(/^[ \t]+/, "  ", $0) ; print; next}; { print }'
Let run the script and pass it though the format source code block.
 #+HEADER: :dir /tmp
#+HEADER: :post org_format(data= *this*)
#+HEADER: :results output code
#+HEADER: :wrap src org
   ./system-report.sh  "Daily system report"
And voila, here is the result! The report is well formatted and looks very good.
#+TITLE: Daily system report
#+DATE: 10-11-2020 21:06:41
#+STARTUP: overview
* Disk usage
df -h
#+RESULTS:
Filesystem Size Used Avail Use% Mounted on
dev 16G 0 16G 0% /dev
run 16G 1.2M 16G 1% /run
/dev/mapper/cryptroot 468G 27G 418G 6% /
tmpfs 16G 187M 16G 2% /dev/shm
tmpfs 4.0M 0 4.0M 0% /sys/fs/cgroup
tmpfs 16G 2.4M 16G 1% /tmp
tmpfs 3.2G 8.7M 3.1G 1% /run/user/1000
* Memory usage
free -h
#+RESULTS:
total used free shared buff/cache available
Mem: 31Gi 1.7Gi 25Gi 621Mi 3.8Gi 28Gi
Swap: 0B 0B 0B
* Network
nmcli conn
#+RESULTS:
NAME UUID TYPE DEVICE
iPhone 22f467bf-5d07-41d1-a394-a7b778c4ceb2 wifi wlp0s20f3
integrity_vpn da1a14fe-ba3e-4251-bc98-03d604ec4fe0 wireguard integrity_vpn
* System time
date
#+RESULTS:
Sun Oct 11 09:06:42 PM CEST 2020
* System uptime
uptime
#+RESULTS:
21:06:42 up 1 day, 2:26, 1 user, load average: 0.56, 0.63, 0.58
* System kernel
uname -a
#+RESULTS:
Linux arch 5.8.14-arch1-1 #1 SMP PREEMPT Wed, 07 Oct 2020 23:59:46 +0000 x86_64 GNU/Linux
- Emacs Org mode tables
- Emacs Org mode source blocks
- Learn AWK with Emacs
- Mail in Emacs with mu4e and mbsync
- Emacs, GnuPG and Pass
[2020-10-16 Fri 18:19]
At the moment the best tools for your Scala development on Emacs are sbt-mode, metals, ob-amm, and scala-mode!
You do not use IntelliJ?!? I heard that question so many times that I enjoy the sound of it. Emacs for me is better. I started with Emacs by writing OCaml and I soon started working on Scala. At the time scala-mode was enough: we were just writing prototypes.
When I landed in a working environment where projects need multiple submodules, custom sbt executable loading certificates and other weird things… well I could feel the pressure.
A couple of years ago I was using the cool Ensime (I even developed my little scripts to use it for literate programming!), and I am really thankful for its development.
Now I would like to share the setup I built little by little for having a good Emacs environment.
A disclaimer: I do not use a debugger. My mind and printlns are enough (yours are too IMHO).
Code navigation and completion is traumatic in Scala. There are moments where you have to complete to know what the variable at point has to offer. Sometimes having that auto-completion feature feels to me like I do not know what I am doing: ideally when I am writing a function I should know input and outputs clearly enough to know what I am operating on. Still is still a life changing feature. Same for easy compilation and test run.
So let’s get to the configuration I use!
First, syntax coloring is just too nice:
(use-package scala-mode
:mode "\\.s\\(cala\\|bt\\)$"
:config
(load-file "~/.emacs.d/lisp/ob-scala.el"))
This use-package clause activates when the file ends for “.scala” or “.sbt”.
Did you note the ob-scala load statement? Well I like literate programming so we need to be able to run scala Org Mode source blocks. It does not come by default (anymore) so I load the old ob-scala: you can find the code in the Appendix.
If you like literal programming with Org Mode too, add this as well:
(org-babel-do-load-languages 'org-babel-load-languages '(; likely other languages here (scala . t)))
Now if you need to test libraries available online this is practically insufficient. Sometimes I want just to download a dependency and see how it works. A tool that sweetens this kind of exploration is Ammonite. And Emacs has some modes for it too:
(use-package ob-ammonite
:ensure-system-package (amm . "sudo sh -c '(echo \"#!/usr/bin/env sh\" && curl -L https://github.com/lihaoyi/Ammonite/releases/download/2.0.4/2.13-2.0.4) > /usr/local/bin/amm && chmod +x /usr/local/bin/amm' && amm")
:defer 1
:config
(use-package ammonite-term-repl)
(setq ammonite-term-repl-auto-detect-predef-file nil)
(setq ammonite-term-repl-program-args '("--no-remote-logging" "--no-default-predef" "--no-home-predef"))
(defun my/substitute-sbt-deps-with-ammonite ()
"Substitute sbt-style dependencies with ammonite ones."
(interactive)
(apply 'narrow-to-region (if (region-active-p) (my/cons-cell-to-list (region-bounds)) `(,(point-min) ,(point-max))))
(goto-char (point-min))
(let ((regex "\"\\(.+?\\)\"[ ]+%\\{1,2\\}[ ]+\"\\(.+?\\)\"[ ]+%\\{1,2\\}[ ]+\"\\(.+?\\)\"")
(res))
(while (re-search-forward regex nil t)
(let* ((e (point))
(b (search-backward "\"" nil nil 6))
(s (buffer-substring-no-properties b e))
(s-without-percent (apply 'concat (split-string s "%")))
(s-without-quotes (remove-if (lambda (x) (eq x ?" ;"
))
s-without-percent))
(s-as-list (split-string s-without-quotes)))
(delete-region b e)
(goto-char b)
(insert (format "import $ivy.`%s::%s:%s`" (first s-as-list) (second s-as-list) (third s-as-list)))
)
)
res)
(widen)))
Note that the :ensure-system-package clause will download Ammonite automatically for me if not available on the system.
Essentially ob-ammonite will make available amm Org Mode source blocks, in which you can easily download dependencies with the special import syntax import $ivy ....
Since a lot of dependencies I need to test come in the sbt format (the Scala major build tool), I also made a function that translates from sbt syntax to Ammonite syntax. Just copy the typical "org.scalaz" %% "scalaz-core" % "7.3.0-SNAPSHOT", move your pointer on it and do M-x my/substitute-sbt-deps-with-ammonite: you will have the dependency substituted and ready to be used in your Ammonite block or REPL.
Yes, because you can also just launch a Scala REPL with ammonite-term-repl! Very useful to test ideas on the fly.
Speaking of sbt, this is how I integrate the build tool for compiling, running and testing my project:
(use-package sbt-mode :commands sbt-start sbt-command :custom (sbt:default-command "testQuick") :config ;; WORKAROUND: https://github.com/ensime/emacs-sbt-mode/issues/31 ;; allows using SPACE when in the minibuffer (substitute-key-definition 'minibuffer-complete-word 'self-insert-command minibuffer-local-completion-map))
Note that I use most often the sbt testQuick command which runs just the most relevant Scala tests, so I made that my default command.
The rest of my configuration is taken from https://scalameta.org/metals/docs/editors/emacs.html:
(use-package lsp-mode ;; Optional - enable lsp-mode automatically in scala files :hook (scala-mode . lsp) :config (setq lsp-prefer-flymake nil)) ;; Add company-lsp backend for metals (use-package company-lsp) ; you need company mode as well for this (use-package lsp-metals) (use-package lsp-ui) ;; this is necessary to get info about compilation
This makes Emacs feel like a Scala IDE with auto-completion (of imports!), type annotations, and various other nice features the scalameta community is working on (they are amazing people by the way, and I found it fun to contribute to Scalafix sometimes ago).
If you are a Scala developer, no more excuses: load all of this in your configuration and start coding! If not, Scala is a curious language worth a try (in particular if you are a Java developer :).
Happy hacking!
This is the old mode (suggested by @hb9 on GitHub: hvesalai/emacs-scala-mode#148 (comment)):
;;; ob-scala.el --- org-babel functions for Scala evaluation
;; Copyright (C) 2012 Free Software Foundation, Inc.
;; Author: Andrzej Lichnerowicz
;; Keywords: literate programming, reproducible research
;; Homepage: http://orgmode.org
;; This file is part of GNU Emacs.
;; GNU Emacs is free software: you can redistribute it and/or modify
;; it under the terms of the GNU General Public License as published by
;; the Free Software Foundation, either version 3 of the License, or
;; (at your option) any later version.
;; GNU Emacs is distributed in the hope that it will be useful,
;; but WITHOUT ANY WARRANTY; without even the implied warranty of
;; MERCHANTABILITY or FITNESS FOR A PARTICULAR PURPOSE. See the
;; GNU General Public License for more details.
;; You should have received a copy of the GNU General Public License
;; along with GNU Emacs. If not, see .
;;; Commentary:
;; Currently only supports the external execution. No session support yet.
;;; Requirements:
;; - Scala language :: http://www.scala-lang.org/
;; - Scala major mode :: Can be installed from Scala sources
;; https://github.com/scala/scala-dist/blob/master/tool-support/src/emacs/scala-mode.el
;;; Code:
(require 'ob)
(require 'ob-ref)
(require 'ob-comint)
(require 'ob-eval)
(eval-when-compile (require 'cl))
(defvar org-babel-tangle-lang-exts) ;; Autoloaded
(add-to-list 'org-babel-tangle-lang-exts '("scala" . "scala"))
(defvar org-babel-default-header-args:scala '())
(defvar org-babel-scala-command "scala"
"Name of the command to use for executing Scala code.")
(defun org-babel-execute:scala (body params)
"Execute a block of Scala code with org-babel. This function is
called by `org-babel-execute-src-block'"
(message "executing Scala source code block")
(let* ((processed-params (org-babel-process-params params))
(session (org-babel-scala-initiate-session (nth 0 processed-params)))
(vars (nth 1 processed-params))
(result-params (nth 2 processed-params))
(result-type (cdr (assoc :result-type params)))
(full-body (org-babel-expand-body:generic
body params))
(result (org-babel-scala-evaluate
session full-body result-type result-params)))
(org-babel-reassemble-table
result
(org-babel-pick-name
(cdr (assoc :colname-names params)) (cdr (assoc :colnames params)))
(org-babel-pick-name
(cdr (assoc :rowname-names params)) (cdr (assoc :rownames params))))))
(defun org-babel-scala-table-or-string (results)
"Convert RESULTS into an appropriate elisp value.
If RESULTS look like a table, then convert them into an
Emacs-lisp table, otherwise return the results as a string."
(org-babel-script-escape results))
(defvar org-babel-scala-wrapper-method
"var str_result :String = null;
Console.withOut(new java.io.OutputStream() {def write(b: Int){
}}) {
str_result = {
%s
}.toString
}
print(str_result)
")
(defun org-babel-scala-evaluate
(session body &optional result-type result-params)
"Evaluate BODY in external Scala process.
If RESULT-TYPE equals 'output then return standard output as a string.
If RESULT-TYPE equals 'value then return the value of the last statement
in BODY as elisp."
(when session (error "Sessions are not (yet) supported for Scala"))
(case result-type
(output
(let ((src-file (org-babel-temp-file "scala-")))
(progn (with-temp-file src-file (insert body))
(org-babel-eval
(concat org-babel-scala-command " " src-file) ""))))
(value
(let* ((src-file (org-babel-temp-file "scala-"))
(wrapper (format org-babel-scala-wrapper-method body)))
(with-temp-file src-file (insert wrapper))
((lambda (raw)
(if (member "code" result-params)
raw
(org-babel-scala-table-or-string raw)))
(org-babel-eval
(concat org-babel-scala-command " " src-file) ""))))))
(defun org-babel-prep-session:scala (session params)
"Prepare SESSION according to the header arguments specified in PARAMS."
(error "Sessions are not (yet) supported for Scala"))
(defun org-babel-scala-initiate-session (&optional session)
"If there is not a current inferior-process-buffer in SESSION
then create. Return the initialized session. Sessions are not
supported in Scala."
nil)
(provide 'ob-scala)
;;; ob-scala.el ends here
[2020-11-05 Thu 08:36]
In this tutorial, I will go through setting up Emacs for Java development. The installation part will be fairly simple, as we will use my java specific Emacs settings. For this particular setup, I want to focus on Java Programming specific packages. Therefore, this setup does not contain other popular Emacs packages. Once you are comfortable with how it works, you should be able to add your favorite package to this setting or copy settings and ideas from here to your setup without any problem. We will use Language Server Protocol (LSP) related packages and settings for this setup. You can read more about LSP here. At the end of this setup you should have an editor that has a debugger UI, code auto-completion, project initializer and several other features to help you edit and manager your code. E.g.

You should have emacs installed in your computer. If not, go ahead and install it first. Also, make sure you have installed java, maven and git. Backup your current emacs folders and files. If later you don’t like this setup you can always revert back. After backing up, delete any .emacs or .emacs.d files/folders in your home directory. In a terminal window execute following commands. These commands are for unix environments. If you are on windows adjust the commands to match the directories accordingly.
$ git clone https://github.com/neppramod/java_emacs.git ~/.emacs.d
Note: If you want to test above configuration outside your primary setup, you can download it to a separate directory and load it using emacs -q -l init.el. However you will need to adjust EMACS_DIR variable value inside init.el file. Adjust it to where you have downloaded above setting. I prefer previous method, where you copy it to your primary emacs configuration directory.
I have tested this setting in java 10 and java 14. If you have older versions of java, you may need to download a newer version of java. Once downloaded you can specify them in operating system specific files, linux.el, mac.el or windows.el. Since I also have an older version of java in my Mac, I had to specify values to two variables (JAVA_HOME and lsp-java-java-path) to point to the newer java version. If emacs complains about java version during installation of LSP please add following settings to operating system specific files, and adjust the folders accordingly. It may not be a bad idea to set them up anyway.
(setenv "JAVA_HOME" "path_to_java_folder/Contents/Home/") (setq lsp-java-java-path "path_to_java_folder/Contents/Home/bin/java"
I have used DejaVu Sans Mono font for this setup. If you don’t have it installed, please install it too. You can change the font in the configuration file, or remove the line that sets the font. See the Font section in the wiki.
After above setup, you can go ahead and start emacs. It should download all the required packages and setup emacs accordingly. If at any point, it complains about missing packages, you may have to refresh to latest package list by executing package-list-packages in emacs and restart emacs. Once the installation is finished restart emacs once anyway. Now, you should have all the packages required for java development. Emacs should look like in the screenshot below.

You can switch between white and dark themes using F6 key. You can go through emacs-configuration.org and init.el to see how each packages are setup.
Next, we will tackle how to use LSP to work with java projects.
You can work on a simple java project with few files that has main method in it. However, here let’s setup a little bit more than that. LSP comes with lsp-java-spring-initializer command, an emacs interface for start.spring.io (spring initializer). Go ahead and execute that command. Use following setup instructions.
group name: com.example artifact id: demo Description: Demo project for Spring Boot Select boot-version: Select latest snapshot Java Version: I selected 11, but you can others based on your setup Select Language: Java Select Packaging: Jar Select Package Name: com.example.demo Select type: Maven Project Select project directory: select a project directory Select dependencies: Developer Tools / Spring Boot Dev Tools (Provides fast application restarts …). I selected first one from the list
At the end of the setup, emacs should ask Do you want to import the project ? Select yes. After importing the project, it should take you to the root of the project (where you will see pom.xml). If you type C-c p f you can quickly find the files within the project and select them by typing few characters.

Once you open a java file within the project, lsp-java should prompt you to install the server. Go ahead and install the available jdtls server. After that it should ask you to import the project root, import it to LSP. You can stop, start, restart, disconnect a lsp server by using C-c l and the options shown below. If you see error message while connecting the server, you may want to shutdown existing server, or start a new one if none exist.

Let’s create a simple java class. Create a class called Person in com.example.demo package inside src/main/java/com/example/demo directory with following code.
package com.example.demo;
public class Person {
private String name;
private String title;
public String getTitle() {
return title;
}
public void setTitle(String title) {
this.title = title;
}
public String getName() {
return name;
}
public void setName(String name) {
this.name = name;
}
}
You can also use various functionalities of LSP to create above code. E.g. Let’s say you did not have getter/setter for name. You coulduse C-c l a a to provide option to create getter/setter for the filed. You could also click the option presented in the top right corner of the editor, just like in below diagram. If you select the general Getters and Setters option, you should be able to select more than one variable using Space key, and generate getters and setters for all of them. Helm helps you in selecting more than one entry from the list.

Also create a unit test class called PersonTest.java inside demo/src/test/java/com/example/demo/PersonTest.java with following code
package com.example.demo;
import static org.junit.jupiter.api.Assertions.assertEquals;
import org.junit.jupiter.api.Test;
public class PersonTest
{
@Test
public void testMethods() {
Person p = new Person();
p.setName("Monkey D. Luffy");
p.setTitle("Pirate King");
assertEquals(p.getName(), "Monkey D. Luffy");
assertEquals(p.getTitle(), "Pirate King");
}
}
Projectile recognizes a test file with Test prefix with the class name. If you have Person and PersonTest, you can quickly jump between each of them using C-c p t.
If you are in Person class and use M-? ( Alt + ?), you can see see Person’s references in the project, You can go to them easily using C-n, C-p.
If you are highlighting Person type in PersonTest class, you can quickly go to the definition class ( Person) using M-. You can jump to definition of methods, variables etc using this key. To go back to previous jump point using M-,
If you use C-c l g a you can search any symbols in the workspace (including standard java symbols) and quickly jump to source code of that type.

To run the unit test use C-c p P command ( projectile-test-project) and type “ mvn test”. It should build the project and run the unit tests. You should see something like in the following diagram.
Note: I have changed the theme to white.

If you want to run the project you can use C-c p u command ( projectile-run-project) and type “ mvn spring-boot:run”. Since there is nothing to run at this moment, it should start the DemoApplication and quit with Success.
For the next part, let’s create a simple web response using the example in Building an Application with Spring Boot. Since we selected the first option while creating our spring project, we may not have spring-web added to our project. Add following dependency in pom.xml
org.springframework.boot spring-boot-starter-web
Also for test dependency you can add the exclusions as mentioned in above wiki. Test dependency should look like following.
org.springframework.boot
spring-boot-starter-test
test
org.junit.vintage
junit-vintage-engine
Now, let’s add a simple controller called HelloController.java into the project. Create a file called HelloController.java inside same folder where you have DemoApplication.java. We should have separated each part in separate packages, but for this tutorial we want to keep it simple.

- To add the package you can start by typing “ package com” emacs, should complete rest of it.
- To add the class name, we can use yasnippets. Type “ file” and press TAB. It should complete the class name for you.
- Let’s add an annotation called @RestController for the controller class. While you are tying above code, emacs should suggest you with the package name and when you press enter, it should add the package name to the file.
- Note that, if you hover over a type or method, it shows javadoc documentation.
- Use same technique for adding a string method that returns a message. Your class should look like the following code.
package com.example.demo;
import org.springframework.web.bind.annotation.RestController;
import org.springframework.web.bind.annotation.RequestMapping;
@RestController
public class HelloController {
@RequestMapping("/")
public String index() {
return "Greetings from Spring Boot!";
}
}

If you now run the project with mvn spring-boot:run using C-c p u command launcher, you should notice the application no longer quits. If you visit http://localhost:8080/ you should see the greeting message we wrote in HelloController. In my case, I went through rest of the tutorial, and after adding actuator, I was able to see the health of the website, as in following diagram.


To quit the running server, press C-c C-k in the * compilation* window (window where you see the spring messages).
There are various ways to debug your application. If you want to start from main, you can invoke dap-java-debug command to start debugging. In this example though this command will run the HelloController. Let’s instead test Person class. Open PersonTest class and invoke dap-java-debug-test-class. You can also test a single method by using dap-java-debug-test-method. You should see 1 test successful message. This is not very intuitive. Let’s add a break point at line 11 of PersonTest class. This is the next line to where Person class is initialized. Now if you invoke dap-java-debug-test-method, when your cursor is within the tetMethods() method, you should see the debug UI. There should be a hydra window at the bottom showing you keys for different options.


You can open up local variable list with sl key, similarly sb to see breakpoints, and you can jump through the code using n, i, o and c keys. If the hydra window disappears for some reason, you can always bring it back using M-F5 key ( Alt + F5). Couple of useful commands I tend to use quite often are from Eval section. E.g. I can add an expression to watch it while I am debugging. I can use ea and add an expression from objects in the test. E.g. In below example, I added expressions like “ p.getName()*“, “ *p.getTitle()*” and “ *person.getName()*“. As you know we don’t have a person object, so that should show an error. Other two values should evaluate to null until we execute the setter lines for each of the variables. Also if you look closely in the diagram below, I selected *p.getTitle() in code and used er to evaluate the selected region. Go through other options to see what they do.


This tutorial should get you to a comfortable position where you can explore more options provided by LSP, Projectile, DAP and Helm to work through your project. To make your coding easier I suggest adding various snippets to complete your code. Also remember to manage LSP servers. If you start too many servers your computer memory might go up quickly. Take a look at memory usage, and restart LSP server or emacs if necessary. To make lsp start over again, you can delete the .lsp-session* files and workspace folder (last option) inside your .emacs.d folder. Also use projectile-remove-known-project or similar projectile commands to remove projects that are no longer needed. You can always add them later. If you feel your computer is sluggish with Emacs and LSP tweak gc-cons-threshold and gc-cons-percentage values in init.el. You can also tweak read-process-output-max variable in lsp-mode setting. Java uses around 1GB memory. You can tweak lsp-java-vmargs as listed in lsp-java github configuration file as well. I hope this tutorial helped you to start using Emacs for Java development.
- https://github.com/emacs-lsp/lsp-java
- https://github.com/emacs-lsp/lsp-ui
- https://emacs-lsp.github.io/lsp-mode/page/performance/
[2020-11-09 Mon 11:06]
05 Jul 2016, by Artur Malabarba.
One of the questions we get most often about CIDER is “can I configure X on a per-project basis?”. Occasionally, you find someone suggesting (or even implementing) some sophisticated configurable variable trying to account for multiple simultaneous use-cases. Fortunately that’s one effort we don’t need to make. Emacs already has that built-in in the form of directory-local variables (dir-local for short).
As the name implies, dir-local variable values (can) apply to all files inside a given directory (also applying recursively to its sub-directories), though you can also restrict them by major-mode or by subdirectory. To configure it:
- Invoke M-x =add-dir-local-variable=.
- This will prompt you for a major-mode, then a variable name, and finally a variable value.
- Finally, it will drop you in a (newly-created) file called
.dir-locals.elin the current directory. Just save this file and you’re done!
By doing this, you have configured the given variable to always have the provided value anywhere inside the current directory, so make sure you’re at the root of your project when you call the command. If you use Projectile, there’s the projectile-edit-dir-locals command for doing just that.
Also worth noting:
- If you type
nilfor the major-mode, it applies to all major-modes. - There is (of course) tab-completion in the variable-name prompt.
- If you answer
evalfor the variable name, it will prompt you for a lisp expression, instead of a value. This expression will be saved and will be evaluated every time a file is visited. - After doing this, call =revert-buffer= on any previously-open files to apply the new value.
It’s worth mentioning that Joel McCracken posted a similar quick guide a few years ago. Some of the information is the same, but some is complementary, so you might want to have a look.
[2020-11-09 Mon 11:07]
ArticleProject Local Variables in Projectile with DirlocalsNov 28, 2013
When working on a project in Emacs, sometimes it is extremely useful to set emacs variables on a project-global level.
In fact, there is currently an open ticket for the the very excellent Projectile project requesting this feature.
I have personally been using Emacs’ per-directory local variable facilities to emulate this behavior for some time. The emacs documentation is found here, but lets explain it based upon this use case.
To create custom variables specific to your project, create a .dir-locals.el file that sits in the root of the project. This file would sit beside the Projectile file, for example.
Inside this file contains a very specially crafted lisp expression that defines the variables we want. I’m just going to quote the manual here, because I can’t think of a better way to describe it:
The
.dir-locals.elfile should hold a specially-constructed list, which maps major mode names (symbols) to alists (*note Association Lists: (elisp)Association Lists.). Each alist entry consists of a variable name and the directory-local value to assign to that variable, when the specified major mode is enabled. Instead of a mode name, you can specify `nil’, which means that the alist applies to any mode; or you can specify a subdirectory name (a string), in which case the alist applies to all files in that subdirectory.Here’s an example of a `.dir-locals.el’ file:
((nil . ((indent-tabs-mode . t) (fill-column . 80))) (c-mode . ((c-file-style . "BSD") (subdirs . nil))) ("src/imported" . ((nil . ((change-log-default-name . "ChangeLog.local"))))))This sets
indent-tabs-modeandfill-columnfor any file in the directory tree, and the indentation style for any C source file. The specialsubdirselement is not a variable, but a special keyword which indicates that the C mode settings are only to be applied in the current directory, not in any subdirectories. Finally, it specifies a differentChangeLogfile name for any file in thesrc/importedsubdirectory.
On second thought, the manual example is pretty exhaustive. Lets simplify: In order to specify a variable global to the whole project, use this form:
((nil . ((my-project-global-variable . "the value"))))
Nice and simple.
A nuance here is that the “values” are not actually evaluated whenever the variable is set for a buffer in a project. What if we require evaluation? What if we want, for example, to ensure an elisp function exists whenever working in a project?
For this, we can use the eval special form:
((nil . ((eval . (defun my-project-function ()
;; your code here
)))))
Safety is clearly a big concern here. What if we open a file in a project that has a maliciously crafted .dir-locals.el file? Well, Emacs has still got our back: By default, it will ask you if you wish to allow these variables to take effect. It also saves that setting for the future so it doesn’t need to keep asking you forever. You can find out more in the documentation here.
Using .dirlocals.el with Projectile has worked very well for me, and solves a big class of problems.
[2020-12-03 Thu 09:54]
This project exports an org-mode file with reasonably structured items into a latex file, which compiles into a nice CV. In the same spirit the org-mode file may export to markdown so that it can be used for a web based CV.
- Online documentation in https://titan-c.gitlab.io/org-cv/
- Development happens in the gitlab repository: https://gitlab.com/Titan-C/org-cv
- There is a mirror in github for backup: https://github.com/Titan-C/org-cv
This project dog feeds itself and produces the examples on this documentation page directly.
This project is not on MELPA so you have to do a manual installation. First clone this git repository.
git clone https://gitlab.com/Titan-C/org-cv.git
There are various modules to perform the export. As of now ox-moderncv, ox-altacv, ox-hugocv. Choose any or all that you prefer for install. I use use-package to manage the installation for example of ox-moderncv.
(use-package ox-moderncv :load-path "path_to_repository/org-cv/" :init (require 'ox-moderncv))
The basic structure of an org file containing your CV is shown next.
TITLE, AUTHOR and EMAIL are standard org options. But on TITLE you put your foreseen job.
| Field | Description |
|---|---|
| TITLE | Desired job |
| AUTHOR | Who are you? |
| Your contact email | |
| ADDRESS | Mailing address, this can span over multiple lines |
| HOMEPAGE | URL of your website |
| MOBILE | Mobile phone |
| GITHUB | GitHub user |
| GITLAB | GitLab user |
| Linkedin username | |
| PHOTO | path to photo file |
#+TITLE: My dream job #+AUTHOR: John Doe #+email: [email protected] #+ADDRESS: My Awesome crib #+ADDRESS: Fantastic city -- Planet Earth #+MOBILE: (+9) 87654321 #+HOMEPAGE: example.com #+GITHUB: Titan-C #+GITLAB: Titan-C #+LINKEDIN: oscar-najera #+PHOTO: smile.png
You can use org-modes hierarchical structure to describe your CV. To make a specific subtree an item describing an experience point (Job you have, degree you pursued, etc.) you use the org properties drawer and with the :CV_ENV: cventry property. You should also include the FROM and TO properties defining the span of the event, as LOCATION and EMPLOYER.
* Employement ** One job :PROPERTIES: :CV_ENV: cventry :FROM: <2014-09-01> :TO: <2017-12-07> :LOCATION: a city, a country :EMPLOYER: The employer :END: I write about awesome stuff I do. ** Other job :PROPERTIES: :CV_ENV: cventry :FROM: <2013-09-01> :TO: <2014-08-07> :LOCATION: my city, your country :EMPLOYER: The other employer :END: I write about awesome stuff I do. * Other stuff I do - I work a lot - I sleep a lot - I eat a lot
moderncv is a standard \(\LaTeX\) package that you can find in many of your latex distributions. I maintain a fork of it, to work with my use case at https://github.com/Titan-C/moderncv.git Feel free to use any or even your personal fork for your desired use case.
To configure the export for moderncv you need the addition options in your org file.
# CV theme - options include: 'casual' (default), 'classic', 'oldstyle' and 'banking' #+CVSTYLE: banking # CV color - options include: 'blue' (default), 'orange', 'green', 'red', 'purple', 'grey' and 'black' #+CVCOLOR: green
When exporting you can call the following function to get the latex file.
(org-export-to-file 'moderncv "moderncv.tex") (org-latex-compile "moderncv.tex")
Alternative text - include a link to the PDF!
AltaCV is another project to generate a CV, you will need to install it yourself. I maintain a fork too at https://github.com/Titan-C/AltaCV.git because I need extra features and I encourage to use this fork on the sections branch.
The style of this CV is more involved and you need some configuration in your org file to get it to work. First define the margins, the large margin to the right is to allow for a second column.
#+LATEX_HEADER: \geometry{left=1cm,right=9cm,marginparwidth=6.8cm,marginparsep=1.2cm,top=1.25cm,bottom=1.25cm}
Content on the right column has the same structure of a org file, but you need to enclose it in the \marginpar{} command as shown next.
#+latex: \marginpar{
* Main Interests - Free/Libre and Open Source Software (FLOSS) - Free food - Free beer * Programming - Python - C/C++ - EmacsLisp - Bash - JavaScript - PHP * Languages - *English* Fluent - *German* Fluent - *Spanish* Native - *French* Intermediate
#+latex: }
When exporting you can call the following function to get the latex file.
(org-export-to-file 'altacv "altacv.tex") (org-latex-compile "altacv.tex")
Alternative text - include a link to the PDF!
If your target is not a PDF file but a website, this exporter extends the ox-hugo exporter backend. So be sure to install that too.
To export, there is nothing fancy to keep track of, but as an example I exclude some tags during export.
(let ((org-export-exclude-tags '("noexport" "latexonly")))
(org-export-to-file 'hugocv "hugocv.md"))
[2020-12-12 Sat 09:33]
Emacs has a reputation for being borderline unusable out of the box, of being bloated but somehow surprisingly bare.
This is largely a discoverability problem 1. The solution the Internet has settled on seems to be “Emacs distributions” like Doom, Spacemacs or Prelude that glue together dozens (sometimes hundreds) of addons to deliver a batteries included, finely tuned and user-friendly experience from first launch. While it’s not for me, this does work great 2, and many of these packages will probably make their way into the default Emacs experience in due time.
But while modern features like built-in LSP support, faster syntax highlighting (through tree-sitter) and ligature support are still being debated in the development mailing list, the long running, slow moving train of Emacs has picked up many interesting passengers.
Emacs as shipped does a lot more than meets the eye, and external package functionality often partially replicates built in behavior.
Here is a list of useful features in emacs I use regularly that I don’t see mentioned or recommended often online. Guidelines I used to populate this list:
- No packages, stock Emacs only.
- No steep learning curves. Learn each feature in under two minutes or bust.
- No gimmicks. No doctor, tetris, snake, dunnet, zone or butterfly.
- Just the deltas. No commonly mentioned packages like flymake, doc-view, outline-minor-mode or eww/w3m. Nothing that Emacs brings up automatically or a nonspecific Google search gets you.
- Assume a modern Emacs, 26.3+.
The list is written in the language of Emacs’ conventions. If you’re new to Emacs, here’s some extra cognitive load for you:
| Emacs jargon | Modern parlance |
|---|---|
M-x | Alt + x |
C-x | Ctrl + x |
| Frame | Emacs window |
| Window | split/pane |
| Buffer | Contiguous chunk of text/data |
| Point | Cursor position in a buffer |
| Active Region | Text selection |
| Region | Text selection (not highlighted) |
| Face | Font, color and display properties |
OK? Let’s go.
Turn Emacs into an Ascii art based paint program. Draw (poly-)lines, rectangles and ellipses. Fill or spray.
Your browser does not support the video tag.
I’m not much of an (ascii) artist, but I do use artist-mode to draw boxes when writing documentation or READMEs.
The included pulse library provides functions to flash a region of text. The most useful general application is to flash the line the cursor is on as a navigational aid or accessibility feature.
Your browser does not support the video tag.
As is the annoying case with many things Emacs though, it provides all the ingredients and lights the flame but leaves the cooking to you. Here’s a simple recipe:
( defun pulse-line ( &rest _)
"Pulse the current line."
( pulse-momentary-highlight-one-line ( point)))
( dolist ( command '( scroll-up-command scroll-down-command
recenter-top-bottom other-window))
( advice-add command :after #' pulse-line))
Modify as needed. There’s more than one external package ( beacon) that does this and more, but pulse is just fine.
Limit your undoing to the active region:

There’s nothing to set up or run here. This is the default behavior of undo in Emacs.
Most monitors are much wider than they are tall. Most text files are much longer than they are wide. That’s a problem.
follow-mode shows a contiguous buffer paginated across multiple windows. The cursor flows from one window to the next.

If you code with rigid indentation, you can get a quick overview of your document with set-selective-display. No mucking around with folding, outline- or hs-minor-mode regexps.


Call the command with the prefix argument set to the column to hide. Call without a prefix argument to disable.
This one’s mainly for LaTeX users. Display unicode versions of math operators, greek symbols and more. M-x prettify-symbols-mode in a TeX buffer.

The equivalent in org-mode is M-x org-toggle-pretty-entities. Other major modes will have to define the replacements explicitly to get this behavior. Example with Python:
( add-hook
'python-mode-hook
( lambda ()
( mapc ( lambda ( pair) ( push pair prettify-symbols-alist))
'( ;; Syntax
( "def" . #x2131)
( "not" . #x2757)
( "in" . #x2208)
( "not in" . #x2209)
( "return" . #x27fc)
( "yield" . #x27fb)
( "for" . #x2200)
;; Base Types
( "int" . #x2124)
( "float" . #x211d)
( "str" . #x1d54a)
( "True" . #x1d54b)
( "False" . #x1d53d)
;; Mypy
( "Dict" . #x1d507)
( "List" . #x2112)
( "Tuple" . #x2a02)
( "Set" . #x2126)
( "Iterable" . #x1d50a)
( "Any" . #x2754)
( "Union" . #x22c3)))))


Provide pager-like keybindings. Makes navigating read-only buffers a breeze. Move down and up with SPC and delete (backspace) or S-SPC, half a page down and up with d and u, and isearch with s.
This is my preferred way to read code or documents as I can avoid chorded commands. Note that evil-mode doesn’t help here either, since paging is bound to C-u/d/f/b.
To that end I just hook this into =read-only-mode=. Prolific emacser Omar Antolin Camarena points out a built-in way to use view-mode in all read-only buffers, including ones you set read-only with C-x C-q:
( setq view-read-only t)
This is my favorite feature of the bunch, considering how much time I spend in Emacs reading things.
The cycle-spacing command is more versatile than it appears. By default, it cycles between deleting all whitespace around cursor but one, deleting all whitespace and restoring whitespace. But with a negative argument, it deletes all blank lines around the cursor. (Calling it with a negative argument is fast: Hold down Meta and hit minus and space in sequence.)
Put together, it’s doing the job of (almost) three older commands: just-one-space, delete-horizontal-space and delete-blank-lines 3 This opens up the bindings C-x C-o and M-\ for more useful functions.
One buffer. Two windows. Two states.
This one’s for outline/org users. Do you want to see an overview of your document and the section you’re working on? M-x make-indirect-buffer or M-x clone-indirect-buffer
Here I clone an org buffer and narrow the original to get a makeshift TOC:

At this point we’re a few lines of elisp away from writing a toc-minor-mode for org files!
But the possibilities are much larger, because as the manual puts it:
The text of the indirect buffer is always identical to the text of its base buffer; changes made by editing either one are visible immediately in the other. But in all other respects, the indirect buffer and its base buffer are completely separate. They can have different names, different values of point, different narrowing, different markers, different major modes, and different local variables.
Reproduce the look of your emacs buffer as a html file with CSS. This is either extremely useful or useless to you!
Here is the html-fontified version of the source file of this write-up.
Modern versions of Emacs provide Do-What-I-Mean versions of various editing commands: They act on the region when the region is active, and on an appropriate semantic unit otherwise. Replace upcase-word and downcase-word with upcase-dwim and downcase-dwim respectively, and you can safely eject the bindings for upcase-region and downcase-region. 5
( global-set-key ( kbd "M-u") 'upcase-dwim) ( global-set-key ( kbd "M-l") 'downcase-dwim) ( global-set-key ( kbd "M-c") 'capitalize-dwim)
DWIM is standard behavior for emacs commands even when it doesn’t say that in the name. count-words, query-replace, the list goes on. Check to see if your frequently used commands DWYM.
It’s u c. And ' (quote) for algebraic entry:

calc does a lot more with units. You can simplify, define new unit conversions and more. Hit u ? to see your options.
We’re skirting the “ *learn each feature in under two minutes or bust*” rule with this one, as it deserves its own write-up, or a perusal of the manual. The general interaction paradigm is simple, though.
Let’s find a Taylor expansion of the integral of the error function:


Access algebraic routines (root finding, symbolic manipulation) in calc under the a prefix. Indefinite integration is a i, differentiation is a d, solving algebraic equations is a S and so on. (Hit a ?)
What it says on the tin. Move the buffer instead of the cursor when navigating. Just press the scroll lock key or M-x scroll-lock-mode.
These are mentioned often, but rarely recommended. Most Emacs users find the idea of tabs in Emacs to be redundant, but will happily recommend window configuration registers, which provide similar functionality.
Tabs work great to separate projects, or work and email buffers. In principle this is equivalent to popping up a new frame and letting the window manager handle the separation, but on stacking window managers I find tabs to be much preferable.
Since there’s never one way to do something in Emacs, a secondary tab-line-mode is available that adds tabs to each window instead of frame.
icompleteandfido: Incremental completion systemscompletion-styles: Supercharge completion in the minibufferre-builderandrx: Visual regular expressionsorgtbl-mode: Easy table formatting everywherestrokes-mode: Control emacs with mouse gestures
… and more.
[2020-12-12 Sat 09:33]
Continuing from last time, here are a dozen more tricks Emacs has up its sleeve that it’s shy about telling you. We continue to chip away at Emacs’ discoverability problem, one demo at a time.
Same rules as before:
- No packages, stock Emacs only
- No steep learning curves. Learn each feature in under five minutes or bust. (Up from two minutes last time.)
- No gimmicks. No doctor, tetris, snake, dunnet…
- Just the deltas. No commonly mentioned packages like flymake, doc-view, outline-minor-mode, gnus or eww. Nothing that Emacs brings up automatically or a nonspecific Google search gets you.
- Assume a modern Emacs, 26.3+.
Also, if you’re new to Emacs:
Emacs jargon Modern parlance M-xAlt + x C-xCtrl + x Frame Emacs window Window split/pane Buffer Contiguous chunk of text/data Point Cursor position in buffer Active Region Text selection Region Text selection (not highlighted) Face Font, color and display properties
(Sorry.)
Okay? Let’s go:
Control Emacs with mouse gestures:
https://karthinks.com/img/strokes-mode-demo.mp4
Why are you using Emacs with a mouse, you ask.
In this demo I used gestures to handle window management:


This is because I lack imagination. Consider: You can bind any gesture to any Emacs command.
The real utility of this feature is when you find yourself going back and forth between different interaction paradigms, like a web browser and Emacs, requiring frequent context switching between full keyboard and keyboard/mouse based interaction.
Want to org-capture or org-roam-insert something from your browser? Want to quickly recompile a TeX document while you’re busy mousing through the corresponding PDF? Need to tweak some markup in your document while you work on graphics in Inkscape? Clone a repository you found online? strokes-mode.
The second use case for Strokes is to control Emacs during reading-centric activities, like email or RSS. Star or delete messages, pause or skip music tracks (with some elisp around playerctl), navigate info nodes, or cycle through Elfeed searches.
M-x strokes-help will get you started. As with most things Emacs, there’s more to the library than meets the eye, like support for multi-part strokes you can use to edit documents in Chinese. The buffer showing the gesture being traced is for demo purposes only, you can customize strokes-use-strokes-buffer:
( global-set-key ( kbd "") 'strokes-do-stroke) ; Draw strokes with RMB ( setq strokes-use-strokes-buffer nil) ; Don't draw strokes to the screen
The default minibuffer experience is annoying enough to send anyone into the arms of ido, ivy or helm. But Emacs does a lot better in the tab-completions department than it lets on. The minibuffer can match by substrings, regexps, initials and even (as of Emacs 27+) fuzzily, and it can do all of them at once if you don’t mind a giant pile of matches.
You can do worse than
( setq completion-styles '( initials partial-completion flex)) ; > Emacs 27.1 ( setq completion-cycle-threshold 10)
Now M-x ohba tab-expands to org-hide-block-all, M-x qrr to query-replace-regexp and so on, allowing you to tab-cycle between up to ten completions. Use tab to match file names fuzzily and expand short paths ( ~/.l/sh/g) to long ones ( ~/.local/share/git).
Stretching the five minute rule a bit: You probably want different matching rules for different categories, though. Flex matching on extended commands ( M-x) can dump hundreds of irrelevant matches on short input, for instance. You can customize completion-category-overrides to set the matching style by the category being completed.
Finally, note that completion styles dictate how a candidate pool is found. Incremental completion systems like ido specify how found candidates are displayed and chosen. These are orthogonal functions, so any set of completion styles should work with any completion system. Unfortunately this isn’t the case, because ivy and helm are off doing their own thing. Emacs’ built in completion styles do work with icomplete, ido and possibly selectrum though.
Improves the other half of the default minibuffer experience: interacting with selection candidates. Navigating to, from and inside the default completions buffer takes too many key presses. fido-mode brings ido like selection to every command in Emacs that uses completing-read, which is most of them.
Of course, ido is also built in, but you know all about it. It also takes some effort to get ido to work with every command. fido-mode is set-and-forget, but it’s Emacs 27+ only.
Your browser does not support the video tag.
The default rectangle commands in Emacs ( C-x r map) leave a little to be desired in terms of interactivity. Emacs has fully featured rectangle editing, but it’s presented in an odd sort of way, as a subfeature of Common User Access. It’s pretty nifty:
Your browser does not support the video tag.
Start or clear a rectangle selection with C-. Cycle through rectangle corners with ==. Yes, you’ll need to rebind it if you use Org or ESS.
It’s a very handy feature, but note that cua-selection-mode does not mesh well with undo. If you use undo-tree, it can lock up trying to undo a cua-selection edit.
A file explorer and much, much more in Emacs. If you need the Neotree or dired-sidebar package to do anything in Emacs, check out speedbar.
Speedbar pops up a side frame that looks like a file browser, which it is. But it also integrates with imenu to show you headings/tags inside files, and with vc to show you the status of your files:

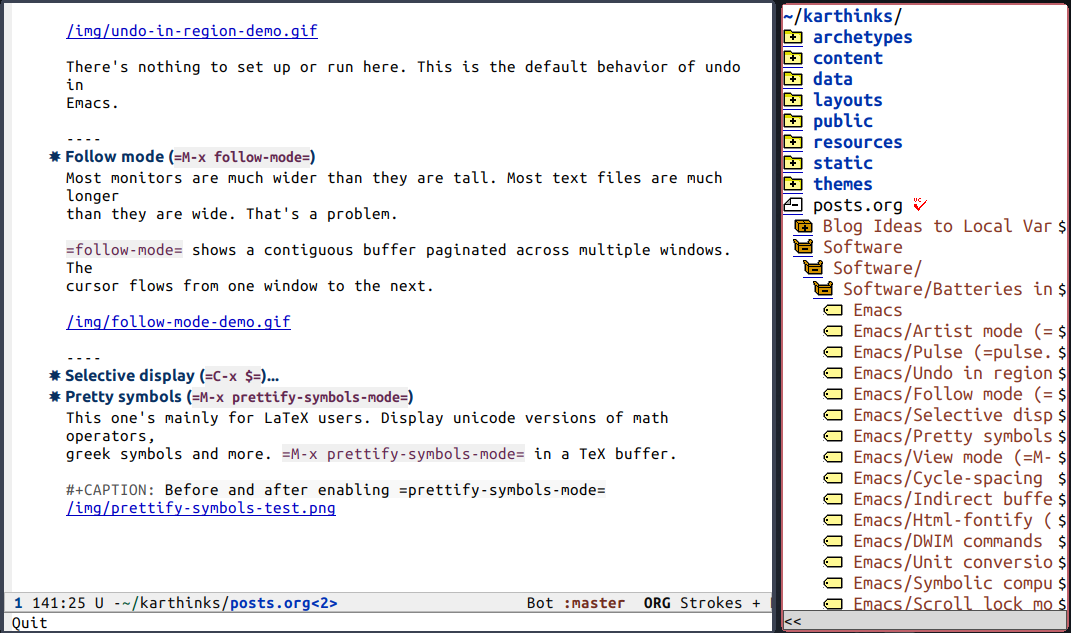

You can act on files with (frustratingly, almost dired-like) keybindings. Most commands run from speedbar will be run in the associated buffer.
It tracks the active buffer to show you appropriate hierarchical information. Here I moved point into info and latex-mode buffers:


Perhaps you’d like a list of your buffers instead. Switch between buffer and file view with b / f. (You can expand a buffer entry for tag/headings.)

Org-mode is its own thing, a full fledged notetaking, publishing, literate-programming, task tracking application with a growing ecosystem that’s parallel to Emacs’. 1
But it does provide a handy tool that’s useful in any mode: Making tables. If you’re one of the dozen Emacs users who haven’t hopped on the Org train, this one’s for you.
With orgtbl-mode, you can make tables by starting a line with the pipe character and hitting tab to make a field–like you would in org-mode–but without getting in the way of your major mode. You can just leave it on and get on with your work.
Your browser does not support the video tag.
Here I table some parameters in matlab-mode as a comment, but even more lazily than prescribed above by calling orgtbl-create-or-convert-from-region ( C-c |) on some data.
With some work, you can export the table in place to html or LaTeX, but setting this up would break the five minute rule. You can also use the table as a spreadsheet, which is beyond me.
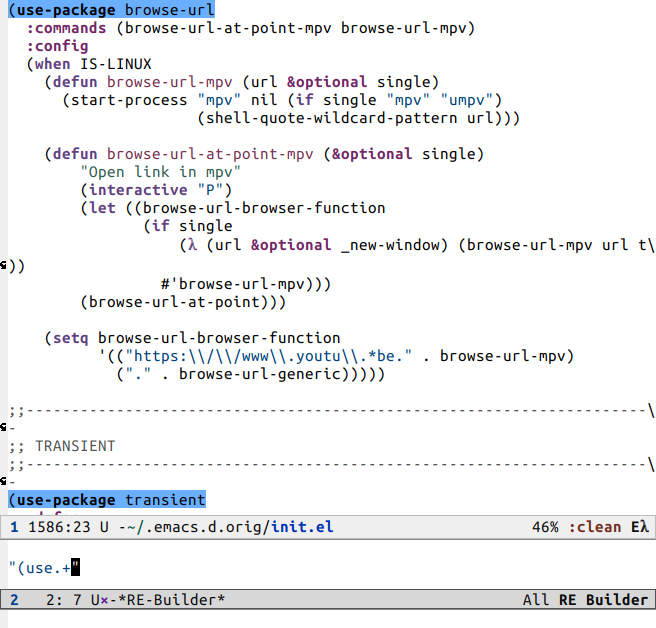

Emacs’ regular expressions syntax can be idiosyncratic if you’re used to PCRE. Are unescaped parens matched literally or do they act as capture groups? Does + need to be escaped to match multiple occurrences of a character? How do I match whitespace again? 2
I can never remember. For regularly confused users like me there is re-builder. Build your regular expressions interactively, one character at a time. Save it to the kill ring for later use. This is a godsend when testing regexes for non-interactive use, like when writing elisp helpers.
A cleaner approach to regular expressions in Emacs, as most package maintainers will tell you, is to use the rx library instead. rx translates regular expressions in sexp form to a regexp string:
( rx ( and "("
( or "use-package" "require")
( + space)
( group ( syntax symbol))))
(\(?:\(?:requir\|use-packag\)e\)[[:space:]]+\(\s_\)
M-p and M-n cycle through history items in minibuffer prompts. So what happens when you press M-n when you’re at a blank prompt?
Emacs tries to Do What You Mean. If the cursor is over a file name, for instance, M-n at the find-file prompt inserts the file path at point into the minibuffer. From the manual:
The “future history” for file names includes several possible alternatives you may find useful, such as the file name or the URL at point in the current buffer. The defaults put into the “future history” in this case are controlled by the functions mentioned in the value of the option file-name-at-point-functions.
Like the DWIM behavior of Emacs commands on regions, many utilities account for future-history. You can usually drag whatever relevant object point is at into the minibuffer prompt with M-n.
Lurking in the bevy of transposition commands in Emacs is transpose-region, which does what it says on the tin 3:
Your browser does not support the video tag.
Exchange any two non-overlapping regions in a buffer. You’ll need to assign a keybinding though.
( global-set-key ( kbd "C-x C-M-t") 'transpose-regions)
Also of note: transpose-paragraphs, which sounds like a text-mode utility but works pretty well on adjacent blocks of code.
View-mode got an airing the last time around but I like it so much I will repeat myself. Turn Emacs into a pager.
By default, pressing v in dired will open a file in view-mode. You can dismiss the window and buffer with q, so regular buffers can essentially function as info or help buffers do with View. You can scroll or isearch without pressing any modifier keys, and all advanced navigation commands (like xref) are still available, so this is the perfect way to explore a code repository.
AKA I’m not brave enough to use GNUS!

Yes, Emacs has a traditionally styled RSS reader built in. You can organize feeds by folders, peruse with one button, the usual. This is the only feature in this list I no longer use, because Elfeed’s design syncs with my brain much better. That said, Newsticker is excellent for following high volume feeds like subreddits since it doesn’t maintain a database:
You can mark [an item] as “old” when you have read it or – if you want to keep it – you can mark it as “immortal”. You can do that manually and you can define filters which do that automatically, see below. When a headline has vanished from the feed it is automatically marked as “obsolete” unless it has the status “immortal”. “Obsolete” headlines get removed automatically after a certain time.
Another advantage over GNUS is that it needs very little configuration 4. I used it for a while and never read the info page. newsticker-add-url to add a source (atom/RSS feed), newsticker-treeview to browse.
Get Emacs to decorate your python code:

Doing this is like pointing a firehose at a matchstick: Semantic is part of CEDET, a large collection of (mostly) built-in tools to try to turn Emacs into a full-fledged IDE. It… doesn’t work great on a code base of serious size or import, but it’s good at analyzing exploratory code/small utilities.
CEDET is written as plumbing, and unless you’re writing a package you probably shouldn’t need to do anything beyond turning on/off minor modes to use it.
Ultimately Semantic is inadequate on account of the XY problem. LSP handles everything it’s supposed to do and does it better, but Semantic is built-in and there if you just want some code-awareness in your Emacs.
This was my attempt at covering built-in features of Emacs I use regularly that I don’t see being talked about much. There are many more, like project, flymake and outline-minor-mode that have received a surge of interest in recent times 5. There are also features I know of that aren’t talked about much, like ede-mode, 2C-two-columns, skeleton and tempo. I don’t bring these up since I don’t have any experience with them.
So this concludes my list.
Something entirely different next time: Typing equations in Emacs faster than you can write on paper.
(require 'loadhist)
(file-dependents (feature-file 'cl))- Use
replace-regexpand give the value of thedelimiterto split, Next givenew line sequenceC-x C-jto replace.
[2021-01-30 Sat 22:22]
[[/][ ]]
]]
Apr 26, 2020
I’ve tried blogging before. All the attempts ended up following a very similar pattern: Took me a veeeery long time to write a single post and after that I never looked back at it again.
This time I’m trying things differently. I’m not going to start from the perfect blog post. I’ll start just documenting how I turned this GitHub Pages repository in a blog and see what comes next.
I already have a GitHub pages website setup. It’s as simple as creating a repository called YOURGITHUBUSER.github.io (you can see mine here). After that, you can push static HTML content and it will be available under https://YOURGITHUBUSER.github.io.
I also configured my DNS provider to point my domain clarete.li to GitHub and created a CNAME file containing the domain name.
If you’ve never done that before, I highly recommend visiting the GitHub Pages documentation. Specifically the articles for creating a new website and configuring a custom domain for your new website.
My lil website is as simple as it can get. My amazing fiance got me the logo you see on the top bar and I took care of putting it on a proper pink background for the internet enjoyment.
The index file is just HTML and CSS, nothing else. Even the list of recent posts is done manually.
This very post is written as an Org-Mode file. For those who haven’t heard of Org-Mode before, checkout their website. Long story short, Org-Mode is a text-based document format. From that perspective, it could be compared with Markdown. The difference is the ginormous feature set that Org-Mode supports compared. Including, but not limited to, many output formats and an incredible interactive experience.
HTML is one of the output formats that Org-Mode supports. Each post written in an .org file will be translated into an HTML page. This feature is built into Org-Mode. It just takes a bit of configuration.
Being completely honest, the HTML publishing feature doesn’t seem exactly designed for the blogging use case. It took quite a bit of tweaking of the configuration to get it to do all the things that I wanted.
You can read the entirety of my configuration in the file that I submitted to git as part of this website: publish. But there is one little part that I consider worth mentioning: Setting the variable org-publish-project-alist.
Although a single document can be exported to HTML, in order to apply the same configuration to various files, I was required to create a project with a source directory and an output directory.
The cool thing about this project thing was that I could have different groups of settings and aggregate them all under a single project. The commented snippet bellow will shad some light in the most essential parts of the configuration:
( setq org-publish-project-alist
;; Here's the project definition with other 3 components
` ( ( "blog" :components ( "blog-posts" "blog-static" "blog-rss" ) )
;; This is the component that translates the .org files into
;; the .html ones. There are lots of things happening here
( "blog-posts"
;; Where your org files are coming from
:base-directory ,base-dir
;; Where your HTML files will be generated
:publishing-directory ,pub-dir
;; Customize the Org file tree before it's translated into
;; HTML. I needed to override this function to hook up
;; inserting the date of the post into the subtitle.
:publishing-function local-blog-publish
;; Some configuration of what is going to be auto-generated
;; and what won't
:auto-sitemap t
:auto-preamble t
:section-numbers nil
:table-of-contents nil
:html-head-include-default-style nil
;; These allowed me to inject my own HTML for the header and
;; the footer. I'm in fact reading these two snippets from
;; separate files
:html-preamble local-blog-preamble
:html-postamble local-blog-postamble )
;; Tis is actually straight forward. It will take care of the
;; asset files included in the blog posts
( "blog-static"
:base-directory ,base-dir
:publishing-directory ,pub-dir
:base-extension "css \\ | js \\ | png \\ | jpg \\ | gif \\ | pdf"
:recursive t
:publishing-function org-publish-attachment )
;; Also straightforward, but needed to install an extension
;; ` ox-rss ' that wasn't available via package manager. This little
;; snippet will be responsible for generating the ` rss.xml '
;; file.
( "blog-rss"
:base-directory ,base-dir
:publishing-directory ,pub-dir
:publishing-function (org-rss-publish-to-rss )
:base-extension "org"
:rss-extension "xml"
:html-link-home "https://clarete.li/"
:html-link-use-abs-url t
:include ( "rss.org" )
;; This is what generates the file ` rss.org ', which in turn is
;; what's used to generate ` rss.xml '. The trickiest part for sure
;; was stitching together the custom functions starting with
;; ` local-blog- '. The references I linked in the last paragraph
;; can be of great help if my ` publish ' file isn't enough for
;; you.
:auto-sitemap t
:sitemap-filename "rss.org"
:sitemap-title "Lincoln Clarete"
:sitemap-style list
:sitemap-sort-files anti-chronologically
:sitemap-format-entry local-blog-sitemap-format-entry
:sitemap-function local-blog-sitemap-function
:publishing-function local-blog-rss-publish-to-rss ) ) )
From now one, I just have to execute the command C-c C-e P p to ask Org Publishing to generate the HTML file of all the org files that have been updated since I last executed it. It feels quite convenient, I have to say.
After changing stuff and regenerating the HTML, the last step in my publication journey is to add the changes to Git and push the changes to GitHub. Then it just takes a minute or two for GitHub Pages to pick up the changes and display it properly.
I’m very happy with the current setup and there really aren’t that many issues so far. But there are two that I want to tackle:
- I haven’t added the unfurling links as suggested by rw-r-r;
- Still need to decide if I’ll use Google Analytics or another less intrusive alternative;
- Source code snippets don’t get syntax highlight if I the script
publishdirectly from the terminal. It errors out with the following message:Cannot fontify source block (htmlize.el >1.34 required)=. Which is quite weird because I havehtmlize 1.57installed. I’m OK not fixing it for now because I can just do it from within emacs and that’s actually more convenient.
The fine grained customizations were certaingly the hardest to get to work and I wouldn’t have been able to figure it out in the amount of time I had to dedicate to this task without the amazing reference other Emacs users put together. Here’s what I consulted in no particular order:
- https://orgmode.org/worg/org-tutorials/org-publish-html-tutorial.html
- https://www.brautaset.org/articles/2017/blogging-with-org-mode.html
- https://vicarie.in/posts/blogging-with-org.html
- https://writepermission.com/org-blogging-rss-feed.html
© Lincoln Clarete — All written content on this website reflects my personal opinion and it’s available under CC BY 4.0
TL;DR Other HTTP Clients aren’t that great. Here we use Emacs and restclient, with public APIs, to identify plants and share on Twitter. Emacs and restclient offer a great user experience and workflow when documenting and exploring APIs.
Lately, I’ve spent a lot of time exploring web APIs. I’ve tried a couple of tools over the years: Postman back when it was a chrome extension, Curl, and HTTPie. They were all, ok — they got the job done — but they all ended up missing some feature or some UX. That’s when I found restclient, a package for Emacs with a simple DSL, and could convert the restclient request to an equivalent curl request.
Let’s take a look at an example of what restclient looks like when authenticating with Twitter. Here we will post our base64 encoded secrets to get a bearer token:
POST https://api.twitter.com/oauth2/token
Authorization: Basic QmRUTklkSEI5WWZHbVhwSkZ6NTZManpUNjpBMk1rOHJjaVdEWFdva3FCN1pmemZFdEk3WjRNd1lpM3JFSjhzN1JoVm9xMXhZY2pMbQ==
Content-Type: application/x-www-form-urlencoded;charset=UTF-8
grant_type=client_credentials
Then, once you’ve POSTed the request a new buffer opens up with the response.
{
"token_type": "bearer",
"access_token": "AAAAAAAAAAAAAAAAAAAAAAAAAAAAAAAAAAAAAA%2FAAAAAAAAAAAAAAAAAAAA%3DAAAAAAAAAAAAAAAAAAAAAAAAAAAAAAAAAAAAAAAAAA"
}
// POST https://api.twitter.com/oauth2/token?grant_type=client_credentials
// HTTP/1.1 200 OK
// cache-control: no-cache, no-store, must-revalidate, pre-check=0, post-check=0
// content-disposition: attachment; filename=json.json
// content-length: 155
// content-type: application/json;charset=utf-8
// date: Thu, 24 Jan 2019 05:54:09 GMT
// expires: Tue, 31 Mar 1981 05:00:00 GMT
// last-modified: Thu, 24 Jan 2019 05:54:09 GMT
// ml: S
// pragma: no-cache
// server: tsa_a
// status: 200 OK
// strict-transport-security: max-age=631138519
// x-connection-hash: b93d89db0ee8f4ea90991c99c8d58449
// x-content-type-options: nosniff
// x-frame-options: DENY
// x-response-time: 20
// x-transaction: 005403e60014e9ee
// x-twitter-response-tags: BouncerCompliant
// x-ua-compatible: IE=edge,chrome=1
// x-xss-protection: 1; mode=block; report=https://twitter.com/i/xss_report
// Request duration: 0.079710s
Using restclient as my primary means to play with APIs worked for me for quite a while. It was a easy-to-read document, that housed all the requests in a single file, and lived alongside the rest of my code in git.
However, I eventually ran into three complications when using it:
- My restclient files would become a mess and navigating to find a specific endpoint or a set of endpoints was a pain.
- I am lazy and dealing with authenticated APIs was a pain.
- I’d need to enter my credentials each time I needed to get a new token
- Once I authenticated, I would have to copy and paste that token from the response buffer into a variable, to use throughout the restclient file.
- For exploring APIs I like to take notes, record responses, and record the input.
There was a simple solution for my first and last points, which was to use org-mode. The power and flexibility of Emacs, and its suite of packages, constantly amazes me. I’ve been a long-time fan of org-mode. In my opinion it is a great replacement for Markdown and a number of other document formats in Emacs. I’ve found that org-mode is a great place to practice literate programming, but it’s also a great place to an interactive style of programming, like a REPL or a Jupyter Notebook. Org-mode has a babel extension for restclient. Babel is an extension that runs code contained in SRC block: #+BEGIN_SRC...#+END_SRC and saves anything sent to STDOUT or value returned, and then can be used in other SRC code blocks.
If you’ve never heard of org-mode, here’s three key things to know before going forward:
- Here is a short video exploring some of its features and here is a much longer video on literate programming in Emacs
- This entire document was written using org-mode and babel
- You can execute this document yourself, given you change your credentials ;)

If you’re curious what this post looks like in org-mode you can find a copy here.
Or, if you would like to run arbitrary elisp at home, you can download the following file in Emacs or your favourite flavours of Vim.
(browse-url-emacs "https://raw.githubusercontent.com/justinbarclay/justinbarclay.me/master/content/posts/literate_programming_against_rest_apis.org")Of course, you need to go out and download restclient and ob-restclient and thats it, thats all the Emacs packages you need. Oh… also NodeJS and Ruby, don’t @ me. Ok @ me, I’m lonely.
A good way to demonstrate the power of restclient and org-mode would be to post some tweets from Emacs. First, we need to be able to authenticate with Twitter. So, let’s see how we can use org-mode and restclient to authenticate with an OAuth endpoint.
First, we need to define a few functions that we are going to use during OAuth authentication. I could use a library or package for this, but when I am writing I become somewhat of a masochist.
(defun twitter-signing-key (consumer-secret token-secret)
"Creates a signing key by combining the consumer-secret and the
token secret and percent encoding the result"
(concat
(url-encode-url
consumer-secret)
"&"
(url-encode-url
token-secret)))
(defun twitter-signature-string (method base params)
"Builds a hex encoded string of the format METHOF&BASE&PARAM1=VALUE1..."
(let ((sorted-params
(sort params
(lambda (first second)
(string< (car first) (car second))))))
(concat
method
"&"
(url-hexify-string base)
"&"
(url-hexify-string
(mapconcat
(lambda (entry)
(let ((key (car entry))
(value (cdr entry)))
(concat (url-hexify-string key)
"="
(url-hexify-string value))))
sorted-params
"&")))))
(defun build-twitter-header-string (header oauth-headers)
"Takes in a list of cons cells that represent HTTP headers, as well as
the information needed to define the OAUTH response for a Twitter request,
and build a restclient style header string"
(concat
"<<\n"
(mapconcat
(lambda (entry)
(let ((key (car entry))
(value (cdr entry)))
(concat
key
": "
value
" ")))
header
"")
"\nAuthorization: OAuth "
(string-trim-right
(mapconcat
(lambda (entry)
(let ((key (car entry))
(value (cdr entry)))
(concat
key
"="
"\"" value "\""
",")))
oauth-headers
" ")
",")
"\n#"))I don’t need to store the authentication information in files, and I am to lazy to remember or copy and paste them! I can just use the information that is stored in my environment.
echo $TWITTER_CONSUMER_KEYecho $TWITTER_CONSUMER_SECRETecho $TWITTER_ACCESS_TOKENecho $TWITTER_ACCESS_SECRETBefore we can do all the fun authentication bits that is OAuth, we need to have some content. So, I feel like I need to be on brand for an Emacs user and let everyone know I am using Emacs for something that isn’t editing text.
(setq twitter-body (list (cons "status" "Hello world! I'm tweeting from Emacs")))Ok, now that we have our Twitter status, we need to autogenerate a few more pieces of information; a nonce, a timestamp, and the signature.
Emacs doesn’t really have a built in crypto library, but do you know who does? Ruby! It is a fun language with a pretty full featured standard library; let’s use it to generate our nonce.
require 'securerandom'
nonce = SecureRandom.uuid
nonce.gsub(/\W/, "")Our request is going to need a time signature.
(format-time-string "%s")We need to define the headers that we need for this request.
(list
(cons "Content-Type" "application/x-www-form-urlencoded"))Did I mention Emacs built-in cryptography is kind of lacking? Well, we’ll need to let another language do the heavy lifting when signing the request. I like Node and Node has a decent crypto library built into it. In the example below I am defining a code block as a function that I am going to call later and use it in an emacs-lisp source block.
let crypto = require('crypto')
let createSignature = (key, text) => {
return crypto.createHmac('sha1', key).update(signature_string).digest();
}
return createSignature(key, signature_string).toString('base64');Now before we can sign anything, and we do need to sign things, we need to create a signing key. We can use our consumer-secret and our access-secret to build a Twitter signing key.
(twitter-signing-key consumer-secret token-secret)Next up, we need to build the header, create a string to sign, sign that string, and then add that signature to our header. Simple.
(let*
((twitter-oauth-headers
(list
(cons "oauth_consumer_key" consumer-key)
(cons "oauth_nonce" nonce)
(cons "oauth_signature_method" "HMAC-SHA1")
(cons "oauth_timestamp" oauth-time)
(cons "oauth_token" access-token)
(cons "oauth_version" "1.0")))
(signature-string
(twitter-signature-string "POST"
"https://api.twitter.com/1.1/statuses/update.json"
(append twitter-oauth-headers twitter-body)))
(signature
(org-sbe createSignature
(signature_string (eval signature-string))
(key (eval signing-key))))) ;; Here I am calling that signing function that I defined in NodeJS
(append twitter-oauth-headers (list (cons "oauth_signature"
(url-hexify-string signature)))))Up next, our headers need to be in a string format that restclient knows how to read.
(build-twitter-header-string header (sort twitter-oauth-headers
(lambda (first second)
(string< (car first) (car second)))))We need to encode our body as a post parameter string.
(setq twitter-post-body
(concat
""
(mapconcat
(lambda (entry)
(concat (car entry) "=" (url-hexify-string (cdr entry))))
twitter-body
"&")
""))Finally, now that we’ve done all that work to format and sign things, we can finish it off by tweeting to the world how much we love Emacs.
#
:body := (concat twitter-post-body)
POST https://api.twitter.com/1.1/statuses/update.json?:body
:twitter-headers

I think using org-mode and restclient to authenticate and post on Twitter is a little too mundane. Can we do anything more elaborate?
Why, of course we can! This is Emacs, we pretty much have to do something overly complicated.
I’m a big fan of science and I want to share my enthusiasm with the world. So, we’re going to use our newly learned skills to talk across several APIs. We’re going to:
- Grab a plant name from Trefle
- Find a picture of that plant, using Google Custom Search
- Make sure that the picture we have is of that plant, using Google Vision
- Tag someone on Twitter and share the plant name and picture with them
We need a function to sanitize the response we get from restclient
(defun sanitize-restclient-response (string)
"Trim down a restclient response to JSON, removing the org source block and
header information"
(string-trim (replace-regexp-in-string
"^#\\+BEGIN_SRC js\\|^#\\+END_SRC\\|^//[[:print:]]+"
""
string)))Let’s be able to execute an arbitrary source code block
(defun run-org-block (&optional code-block-name)
(save-excursion
(let ((code-block (or code-block-name
(completing-read "Code Block: " (org-babel-src-block-names))))
(goto-char
(org-babel-find-named-block
code-block))
(org-babel-execute-src-block-maybe)))))Here’s a couple of functions we’re going to use to help us parse a response from Google’s API.
(defun parse-ml-response (responses)
"Extracts a Google AI response down to a list of label annotations"
(let* ((json-response (json-read-from-string responses))
(label-annotations (cdr
(assoc 'labelAnnotations
(elt
(cdr (assoc 'responses json-response))
0)))))
label-annotations))
(defun contains-description-p (annotations descriptions)
"Checks to see if any of the items in the sequence ANNOTATIONS has a
description that matches one of the items in DESCRIPTIONS"
(let ((annotated-descriptions (mapcar
(lambda (item)
(cdr (assoc 'description item)))
annotations)))
(reduce (lambda (predicate description)
(if predicate
predicate
(if (member (downcase description) descriptions)
't
nil)))
annotated-descriptions
:initial-value nil)))Let’s give our source block a name, #+NAME: trefle, so we can easily reference it throughout the rest of our notebook. I am using my Mac’s keychain to store and retrieve an access token I have stored for trefle.io.
security find-generic-password -gws trefle.ioTo import a variable from earlier in the file you can use :var token=trefle where :var token specifies that you want to insert a variable called token into the proceeding block and the contents of that variable are pulled from a source code block named trefle. Now we just need to build the HTTP headers we’re going to use for our interaction with Trefle.
(concat
"<<
Content-Type: application/json
Accept: application/json
Authorization: Bearer " token)As of the last time I looked, Trefle has over 4000 pages of plants, so we want to get a random plant off of a random page. So to start, we’ll generate a page number from 0 to 4000…
#
:page := (random 4000)
GET https://trefle.io/api/plants?page=:page
:headers
#
Before we can do anything with the output we need to clean it up. Restclient likes to have all the headers for the response at the bottom of the buffer, so we need to filter those out of the response.
(sanitize-restclient-response response)Now we could use emacs-lisp, but everyone has Node installed and Node is pretty much built for parsing JSON, so it only makes sense to use that. We’ll grab a random plant from the results and return its name.
let index = Math.floor(Math.random() * 30);
return JSON.parse(plants)[index].scientific_name;I need to get my Google API key. For this, I’ve been lazy and have just been storing it in my environment.
echo $GOOGLE_API_KEYWe’ve got a plant name, now we need an image of the plant.
GET https://content.googleapis.com/customsearch/v1?cx=009341007550343915479%3Afg_hsgzltxw&q=:plant-name&searchType=image&key=:api-key
Much like our search for a plant name, we need to clean up the response from Google API so it’s easily parsable as JSON.
(sanitize-restclient-response google-images)We have a nice list of plant images. Let’s play Google roulette and use the first image from the search.
return "" + JSON.parse(plant_images).items[0].linkWhen we’re running our code we don’t have time to make sure all it does what it is supposed to do and everyone knows you can’t trust Google. Instead, we’ll use machine learning provided by the fabulous Google Vision API to validate our choice. We’ll ask Google for the top 3 labels for an image and see if those labels contain the words “Flower”, “Plant”, or “Tree”.
POST https://vision.googleapis.com/v1/images:annotate?key=:api-key
{
"requests":[
{
"image":{
"source":{
"imageUri":
:plant-image
}
},
"features":[
{
"type":"LABEL_DETECTION",
"maxResults":3
}
]
}
]
}
Next, clean the response.
(sanitize-restclient-response response)If you’re curious what talking to the Google Vision API looks like, here it is.
{
"responses": [
{
"labelAnnotations": [
{
"mid": "/m/04_tb",
"description": "map",
"score": 0.9684097,
"topicality": 0.9684097
},
{
"mid": "/m/03scnj",
"description": "line",
"score": 0.734654,
"topicality": 0.734654
},
{
"mid": "/m/07j7r",
"description": "tree",
"score": 0.7276011,
"topicality": 0.7276011
}
]
}
]
}
Let’s check to see if the first three descriptors come back as plant, tree, or a flower. If it doesn’t match these descriptors, then we rerun them code block below. When we rerun ths code block image-is-plant-p this will have a cascading effect and call all previous code blocks. So, we’ll keep querying Trefle and Google until we find a pciture that meets our criteria. Warning: this could trap us into an infinite loop.
(while (not (contains-description-p
(parse-ml-response response)
'("plant" "tree" "flower")))
(org-sbe image-is-plant-p))We need one last piece of information before we can demonstrate our love of plants to the world: someone to tweet at. Let’s ask ourselves for some input.
(read-string "What is the twitter handle of someone you want to tweet? ")Now we need to build our body into something we can process later…
(setq twitter-body
(list
(cons "status" (concat "" twitter_handle " " plant_name " " (replace-regexp-in-string "'" "" plant_image)))))We can use all of the source blocks we created back when we were professing our love for Emacs. However, we need to change a few references. In the source block below we need to change the reference from body=hello-world to body=twitter-plant-body.
(let*
((twitter-oauth-headers
(list
(cons "oauth_consumer_key" consumer-key)
(cons "oauth_nonce" nonce)
(cons "oauth_signature_method" "HMAC-SHA1")
(cons "oauth_timestamp" oauth-time)
(cons "oauth_token" access-token)
(cons "oauth_version" "1.0")))
(signature-string
(twitter-signature-string "POST"
"https://api.twitter.com/1.1/statuses/update.json"
(append twitter-oauth-headers twitter-body)))
(signature
(org-sbe createSignature
(signature_string (eval signature-string))
(key (eval signing-key)))))
(append twitter-oauth-headers (list (cons "oauth_signature"
(url-hexify-string signature)))))Similiarly, we need to reassign twitter-oauth-headers=twitter-oauth-headers to twitter-oauth-headers=twitter-oauth-headers-plants
(build-twitter-header-string header (sort twitter-oauth-headers
(lambda (first second)
(string< (car first) (car second)))))Again, we encode our body…
(setq twitter-post-body
(concat
""
(mapconcat
(lambda (entry)
(concat (car entry) "=" (url-hexify-string (cdr entry))))
twitter-body
"&")
""))Voila! We’ve can post a cute plant…or tree…or flower…to Twitter!
#
:body := (concat twitter-post-body)
POST https://api.twitter.com/1.1/statuses/update.json?:body
:twitter-headers
You don’t need to use Emacs to enjoy the benefits of literate programming across 4 disparate APIs. To do that all you really need is bubblegum and determination. However, literate programming is a great paradigm to create and share your work for others to play with. I think Emacs and in particular, org-mode, is great for literate programming because it’s a lot like Jupyter Notebooks, it supports a lot more languages and supports more than one language per notebook. Plus, org-mode works wonderfully with the two best flavours of Vim!
- https://developer.twitter.com/en/docs/basics/authentication/overview/application-only
- https://cloud.google.com/vision/docs/request
- https://developer.twitter.com/en/docs/tweets/post-and-engage/api-reference/post-statuses-update.html
- https://developers.google.com/custom-search/docs/overview
- http://lti.tools/oauth/
[2021-02-10 Wed 10:18]
I’ve set up mu4e, and have my Gmail credentials stored in two files:
.offlineimaprc- this file is used by Offlineimap to connect to my Gmail and sync my inbox with mu4e..authinfo- that file stores my Gmail credential, and used by Emacs to send emails.
Unfortunately, both of those files are plain text, and though I’m not a security freak, I’m uncomfortable storing my passwords out in the open. So, I went ahead to find out how to encrypt them. Most of the tutorials I read were too technical, and covered much more than my simple usecase. It’s not that I couldn’t follow theme, but I know I wouldn’t have retained the information, and able to retract my steps if I needed to in the future.
My goal with this post was to create a simple guide on how to install gpg, generate a key, and use it in mu4e. I failed… I thought I will be able to it non-technical for the most part, but once getting to configure Emacs and mu4e to work with gpg, I had to delve into some heavy configuration, which included the creation of a python script to work along Offlineimap… The good thing is that this guide will help you get Emacs and mu4e work with an encrypted version of a .authinfo file, and your credentials will remain secret.
Now that our expectations are set, and assuming you’re up for the ride, lets start this journey.
~ $ brew install gpg
Let’s make sure gpg was installed:
~ $ gpg --version

Figure 1: gpg version information along with the list of supported algorithms
Now really, the most informative source of information is gpg’s help. Go ahead and skim it:
~ $ gpg -h
~ $ gpg --gen-key
There’s a simple wizard that lets you set the encryption type, and asks for your name, email address and other comments. Those details will be associated with your key.
Next, you’ll be asked to create a passphrase. This is like the password to your secret key. If you lose it, you’ll have no access to any of the information encrypted with this key. So don’t ever lose it…
Here’s how this flow looks like:
~ $ gpg --gen-key
gpg (GnuPG ) 1.4.19 ; Copyright (C ) 2015 Free Software Foundation, Inc.
This is free software: you are free to change and redistribute it.
There is NO WARRANTY, to the extent permitted by law.
Please select what kind of key you want:
( 1 ) RSA and RSA (default )
( 2 ) DSA and Elgamal
( 3 ) DSA (sign only )
( 4 ) RSA (sign only )
Your selection? 1
RSA keys may be between 1024 and 4096 bits long.
What keysize do you want? ( 2048 )
Requested keysize is 2048 bits
Please specify how long the key should be valid.
0 = key does not expire
= key expires in n days
w = key expires in n weeks
m = key expires in n months
y = key expires in n years
Key is valid for? ( 0 )
Key does not expire at all
Is this correct? (y/N ) y
You need a user ID to identify your key ; the software constructs the user ID
from the Real Name, Comment and Email Address in this form:
"Heinrich Heine (Der Dichter) "
Real name: Jane Roe
Email address: [email protected]
Comment: lorem ipsum
You selected this USER-ID:
"Jane Roe (lorem ipsum) "
Change (N )ame, (C )omment, (E )mail or (O )kay/ (Q )uit? O
You need a Passphrase to protect your secret key.
We need to generate a lot of random bytes. It is a good idea to perform
some other action ( type on the keyboard, move the mouse, utilize the
disks ) during the prime generation ; this gives the random number
generator a better chance to gain enough entropy.
..........+++++
.+++++
We need to generate a lot of random bytes. It is a good idea to perform
some other action ( type on the keyboard, move the mouse, utilize the
disks ) during the prime generation ; this gives the random number
generator a better chance to gain enough entropy.
..........+++++
...+++++
gpg: key 86B62C98 marked as ultimately trusted
public and secret key created and signed.
gpg: checking the trustdb
gpg: 3 marginal (s ) needed, 1 complete (s ) needed, PGP trust model
gpg: depth: 0 valid: 2 signed: 0 trust: 0-, 0q, 0n, 0m, 0f, 2u
pub 2048R/86B62C98 2016-02-17
Key fingerprint = 42FD C031 BD51 4CC8 7C02 EA14 35D4 80A2 86B6 2C98
uid Jane Roe (lorem ipsum )
sub 2048R/8C0D5E5D 2016-02-17
~ $
Now that you’ve created a key, you can go ahead and sign the .authinfo file.
Sign and encrypt the .authinfo file 1
~ $ gpg -se .authinfo
You’ll be asked for your passphrase. Enter it, and the .authinfo will be signed, and renamed to .authinfo.gpg
EmacsWiki suggests to limit permission to this file. I find it important:
~ $ chmod 600 .authinfo.gpg
Back in Emacs, there are couple of changes we need to make in order for mu4e to start working with the ,authinfo.gpg file. I wish I read this gist before, because it covers those changes succinctly, but here is a summary of those modifications:
Two additions:
- A reference to a python file where you’ll store a function to fetch your credentials from the
.authinfo.gpgfile - Under the
[Repository Remote]section add the call to theget_password_emacfunction
Here’s how your .offlineimaprc file will look like afterwards:
[general] accounts = Gmail maxsyncaccounts = 3 pythonfile = ~/.offlineimap.py [Account Gmail] localrepository = Local remoterepository = Remote [Repository Local] type = Maildir localfolders = ~/Maildir [Repository Remote] type = IMAP remoteuser = [email protected] remotehost = imap.gmail.com remotepasseval = get_password_emacs ( "imap.gmail.com" , "[email protected]" , "993" ) ssl = yes sslcacertfile = /usr/local/etc/openssl/certs/ca-bundle.crt maxconnections = 1 realdelete = no
This file will define the get_password_emac function:
#!/usr/bin/python
import re , os
def get_password_emacs ( machine , login , port ):
s = "machine %s login %s port %s password ([^ ]*) \n " % ( machine , login , port )
p = re . compile ( s )
authinfo = os . popen ( "gpg -q --no-tty -d ~/.authinfo.gpg" ) . read ()
return p . search ( authinfo ) . group ( 1 )
Lastly, in your Emacs config, under the mu4e smtp settings, add a reference to the encrypted auth file:
...
( setq message-send-mail-function 'smtpmail-send-it
starttls-use-gnutls t
smtpmail-starttls-credentials
' (( "smtp.gmail.com" 465 nil nil ))
smtpmail-auth-credentials
( expand-file-name "~/.authinfo.gpg" )
smtpmail-default-smtp-server "smtp.gmail.com"
smtpmail-smtp-server "smtp.gmail.com"
smtpmail-smtp-service 465
smtpmail-debug-info t )
...
Now, you’re emails should be sent using the .authinfo.gpg file. Go on and try it 2. Note that before actually sending the email, Emacs will ask for your pass-phrase 3
I stored all the information related to my gpg key, as well as a backup file in my 1password. Here’s how I created the key backup:
~ $ gpg --export-secret-keys --armor [email protected] > jroe-privkey.asc
Important: Make sure to store the output file in a secure place; it contains your private key in plain text.
- Mark the text you would like to encrypt
- Run
M-x epa-encrypt-region - Mark the key you would like to use for encryption
Now the encrypted text will replace the original, plain, text:

Figure 2: M-x epa-encrypt-region will encrypt a region of text in Emacs
To decrypt a message, or a file you’ve encrypted:
- Mark the text you would like to decrypt (you’ll have to mark also the header and footer of the message)
- Run
M-x epa-decrypt-region

Figure 3: M-x epa-decrypt-region will decrypt a region of text in Emacs
- Enter your pass-phrase
- Emacs will ask if you want the decrypted text to replace the original text. If you choose “No”, it will open the text in a second window.

Figure 4: The decrypted text in a second window
That’s it. If you’re interested in more than the basics that I went through above, try the links bellow.
- Gnupg - documentation
- Using gpg in emacs - EasyPG Assistant user’s manual
- Fedora Wiki pages - GPG essentials
- EmacsWiki - GnusAuthinfo
- Tricotism - EasyPG for Emacs on OS X, or sometimes Emacs doesn’t load the env paths you might expect
- ubuntu forums Encrypting and decrypting a message
1.
<<fn-1>> Made an edit here (initially, I only signed the file, without encrypting it). Thanks /u/aminab for the correction. ↩
2.
<<fn-2>>
If you still have the .authinfo file, rename it. Once we see that mu4e sends emails using the encrypted version of the auth file, we can dispose this, decrypted, version of it. ↩
3.
<<fn-3>> If Emacs asks for your passphrase too often, you might find this comment in Reddit, by /u/aminb, helpful. ↩
~/.authinfofile example
machine schema-registry.com key full-path-to-key cert full-path-to-cert
if the certificate is in p12 or pk12 format, key and cert can be generate from p12
openssl pkcs12 -in mycert.p12 -out file.key.pem -nocerts -nodes
openssl pkcs12 -in mycert.p12 -out file.crt.pem -clcerts -nokeys
# use the generated keys in curl
curl -E ./file.crt.pem --key ./file.key.pem https://myservice.com/service?wsdlcurl --cert-type P12 --cert cert.p12:password https://yoursite.comThe situation: I have a .cer (Digital Certificate) file, .pfx (Personal Information Exchange file i.e., the private key for the certificate). I cannot use either of these to authenticate to the web service as curl would not accept these formats.
The solution:
- Convert it into PEM format (X.509 certificate) using openssl.
openssl pkcs12 -in abcd.pfx -out abcd.pem Enter a passphrase and a password.
- Still you cannot use this with curl because you’d get a few errors.
- Convert this PEM certificate into three different certificates for the client, the private key and the certification authority certificate.
openssl pkcs12 -in abcd.pfx -out ca.pem -cacerts -nokeys
openssl pkcs12 -in abcd.pfx -out client.pem -clcerts -nokeys
openssl pkcs12 -in abcd.pfx -out key.pem -nocerts- Use the following command:
curl -k https://www.thesitetoauthenticate.com/test -v –key key.pem –cacert ca.pem –cert client.pem
curl -v -X POST -H "Content-Type: application/vnd.schemaregistry.v1+json" --data "@key_schema.json" --cert ./client.cert.pem --key ./client.key.pem --tlsv1.2 --cacert ./client.cert.pem https://schema-registrycom/subjects/TESTLOAD-key/versions;; To test that both the fast JSON and native compilation is working
(if (and (fboundp 'native-comp-available-p)
(native-comp-available-p))
(progn
(setq comp-deferred-compilation t)
(message "Native compilation is available"))
(message "Native complation is *not* available"))
;; And for the JSON
(if (functionp 'json-serialize)
(message "Native JSON is available")
(message "Native JSON is *not* available"))- If error (error “(setf seq-elt) is already defined as something els…”)
try emacs -Q, and eval
(native-compile-async "~/.emacs.d" 3 t)
(use-package comp
:config
(defcustom native-compile-async-jobs
(or (ignore-errors
(string-to-number (shell-command-to-string "nproc")))
1)
"How many jobs to use."
:type 'integer)
(setf native-compile-async-jobs 2)
(defun ap/package-native-compile-async (package &optional all)
"Compile PACKAGE natively, or with prefix ALL, all packages."
(interactive (list (unless current-prefix-arg
(completing-read "Package: " (mapcar #'car package-alist)))))
(let* ((directory (if package
(file-name-directory (locate-library package))
package-user-dir)))
(native-compile-async directory native-compile-async-jobs t))))
;; Code could also be written to reload the compiled packages with `load-library`
;; after the async job finishes.The beauty of using org-mode to replace a dedicated application is that it becomes more scriptable, and it’s programming language agnostic, so you can use the best language to accomplish whatever task needs to be done.
I tend to favor elisp for doing simple things like building strings as it’s highly integrated into emacs, and helps to limit the scope of supported languages.
This example uses restclient.el (A DSL for working with RESTful APIs) and ob-restclient (to provide the wrappers for org-mode). However, these are just what I use. The principles I demo here can be used with any set of programming languages that support network calls.
- Incentive to use Emacs and all the tooling it supports
- Helps support maintenance of documentation as it is actually used to interact with APIs
- Full org-mode support for task management within the documentation
- Exportable to other formats for distribution
- Useful for building scripts via tangling
- Support complex testing of API interactions by feeding the output of one request into a subsequent request
See README.md. I have provided an extremely simple server to test against. It
can be run using lein ring server
I organize the document in the typical org-mode “outline” style, where each header is a slash separated path.
We can prevent the export of sensitive information by adding a noexport to a
heading. This helps keep documentation generated from this document clean.
I’ve disabled “confirm-evaluate” because as we nest code blocks, it becomes excessive to continually respond “y” many times to execute a request.
(setq org-babel-confirm-evaluate nil)We’ll use this code block to help build our API paths in the most reusable way possible.
(print localhost)In this case we will hide code that we use for generating the oauth/token
requests based on what environment we’re testing in.
This actually fetches the Oauth token from our server, and parses out the access
token using jq. This provides an example of how it is possible to support many
programming languages inside the same document.
curl -v -X POST "$url/oauth/token" \
-u "ios-native:$secret" \
--data "grant_type=password$login_string" | jq '.access_token'(print (concat url api-version ))Purchases a stock identified by it’s stock symbol, in a given amount.
POST :url/stocks/buy
Authorization Basic: :token
Content-Type: application/json
{
"symbol": stock-symbol,
"amount": 3
}
Sell a stock identified by it’s stock symbol, in a given amount. If the user has insufficient stock to fulfill the order, it will be rejected.
POST :url/stocks/sell
Authorization: Bearer :token
Content-Type: application/json
{
"symbol": :stock-symbol,
"amount": 1
}
Endpoints used for trading options. Requires an Oauth token. All orders sent to these endpoints are executed immediately. Orders sent outside of market hours will be executed immediately when markets open.
Purchases a
POST :url/options/put
Authorization: Bearer :token
Content-Type: application/json
{
"symbol": :stock-symbol,
"amount": 3,
"action": :action
}
POST :url/options/call
Authorization: Bearer :token
Content-Type: application/json
{
"symbol": :stock-symbol,
"amount": 1,
"action": :action
}
Let’s look at what it takes to implement a new endpoint.
This was added to Jenkinsfile
// This is emacs specific config. Please do not remove
// Local Variables:
// eval: (push '(company-keywords company-dabbrev-code) company-backends)
// End:[2021-04-03 Sat 23:41]
Apr 2, 2021 2 min read emacs
Run multiple emacs daemons for different purposes and set different themes/config based on daemon name
I have been using Emacs for several years, and these days I’m using it both for writing code and for working with my email (another post on that soon).
As commonly suggested, I run Emacs in daemon-mode to keep things fast and snappy, with an alias to auto-start the daemon if it’s not started, and connect to it if started:
alias e='emacsclient -a "" -c'
Config for single daemon
But, this has some problems:
- The buffers for email and code projects get mixed together
- Restarting the emacs server for code (for example) kills the open mail buffers as well
- Emacs themes are global – they cannot be set per frame.
For code, I prefer a dark theme (most of the time), but for email, a light theme works better for me (specially for HTML email).
To solve this, I searched for a way to run multiple emacs daemons, selecting which one to connect to using shell aliases, and automatically setting the theme based on the daemon name. Here’s my setup to achieve this:
run_emacs() {
if [ "$1" != "" ];
then
server_name="${1}"
args="${@:2}"
else
server_name="default"
args=""
fi
if ! emacsclient -s ${server_name} "${@:2}";
then
emacs --daemon=${server_name}
echo ">> Server should have started. Trying to connect..."
emacsclient -s ${server_name} "${@:2}"
fi
}
This function takes an optional argument – the name to be used for the daemon. If not provided, it uses default as the name. Then, it tries to connect to a running daemon with the name. And if it’s not running, it starts the daemon and then connects to it. It also passes any additional arguments to emacsclient.
# Create a new frame in the default daemon
alias e='run_emacs default -n -c'
# Create a new terminal (TTY) frame in the default daemon
alias en='run_emacs default -t'
# Open a file to edit using sudo
es() {
e "/sudo:root@localhost:$@"
}
# Open a new frame in the `mail` daemon, and start notmuch in the frame
alias em="run_emacs mail -n -c -e '(notmuch-hello)'"
The first 3 aliases use the default daemon. The last one creates a new frame in the mail daemon and also uses emacsclient’s -e flag to start notmuch (the email package I use in Emacs).
(cond ((string= "mail" (daemonp)) (setq doom-theme 'modus-operandi) ) (t (setq doom-theme 'modus-vivendi) ) )
This checks the name of the daemon passed during startup, and sets the doom theme accordingly. The same pattern can be used to set any config based on the daemon name.
Note that I’m using doom emacs, but the above method should work with or without any framework for Emacs. Tested with Emacs 27 and 28.
[2021-07-07 Wed 12:21]
Gnus is a sophisticated and powerful crossplatform email and news reader.
It is implemented in Emacs Lisp. That way you have the full power of Emacs available in your email application.
I subscribed a bunch of mailing lists via news.gmane.org.
I use the gmane server as my primary news source.
(setq gnus-select-method '(nntp "news.gmane.org"))
Use a smtp server to send emails.
(setq smtpmail-smtp-server "[email protected]") (setq user-mail-address "[email protected]") (setq message-send-mail-real-function 'smtpmail-send-it)
Display the recipants in gnus summary buffers instead of my mail own mail address for my sent mails.
(setq gnus-ignored-from-addresses "Stefan Reichör")
Set the prefix when using jump to select a newsgroup.
;; needs a newer gnus ;; (setq gnus-group-jump-to-group-prompt '((0 . "nnml:mail.") (1 . "gmane.") ;; (2 . "nnshimbun+") ;; (3 . "nnfolder+archive:"))) (setq gnus-group-jump-to-group-prompt "nnml:mail.")
Use nnml as mail backend. Use news.host.com as nntp server.
(setq gnus-secondary-select-methods
'((nnml "")
(nntp "news.host.com")))
Keep a backup of the received mails for 60 days and delete that mails after 60 days without a confirmation.
(setq mail-source-delete-incoming 60) (setq mail-source-delete-old-incoming-confirm nil)
Expireable articles will be deleted after 35 days.
(setq nnmail-expiry-wait 35)
Display html emails via emacs-w3m
(setq mm-text-html-renderer 'w3m)
Do not use the html part of a message, use the text part if possible!
(setq mm-discouraged-alternatives '("text/html" "text/richtext"))
Specify the mail sources from which gnus should fetch new mail. The mail will be transfered to your computer and deleted on the mail host. Below you see an example definition for pop and one for imap. I have some fictional values for the needed entries.
(setq mail-sources
'((pop :server "pop.host.at" :user "[email protected]" :password "pwhost")
(imap :server "imap.host" :user "xsteve" :password "pwhost")))
Mail splitting is a very powerful and useful feature of gnus. You should add your own rules below. The rules are tried from the first to the last. If a rule matches, the Mail is spooled to the specified mail group. If no rule matches, the mail is delivered to the group “mail.other”.
(setq nnmail-split-methods 'nnmail-split-fancy)
(setq nnmail-split-fancy
'(|
(: spam-split)
(: gnus-registry-split-fancy-with-parent)
("X-BeenThere" "[email protected]" "mail.myprg.xtla")
(from ".*@amazon.de" "mail.privat.amazon")
"mail.other"))
Mails and News that you send are stored in the folders “sent-mail” or “sent-news”
(setq gnus-message-archive-group
'((if (message-news-p)
"sent-news"
"sent-mail")))
The scoring system sorts articles and authors you read often to the beginning of the available mails.\
Less interesting stuff is located at the end.
(setq gnus-use-adaptive-scoring t)
(setq gnus-score-expiry-days 14)
(setq gnus-default-adaptive-score-alist
'((gnus-unread-mark)
(gnus-ticked-mark (from 4))
(gnus-dormant-mark (from 5))
(gnus-saved-mark (from 20) (subject 5))
(gnus-del-mark (from -2) (subject -5))
(gnus-read-mark (from 2) (subject 1))
(gnus-killed-mark (from 0) (subject -3))))
;(gnus-killed-mark (from -1) (subject -3))))
;(gnus-kill-file-mark (from -9999)))
;(gnus-expirable-mark (from -1) (subject -1))
;(gnus-ancient-mark (subject -1))
;(gnus-low-score-mark (subject -1))
;(gnus-catchup-mark (subject -1))))
(setq gnus-score-decay-constant 1) ;default = 3
(setq gnus-score-decay-scale 0.03) ;default = 0.05
(setq gnus-decay-scores t) ;(gnus-decay-score 1000)
Use a global score file to filter gmane spam articles. That is a really cool feature.
(setq gnus-global-score-files
'("~/gnus/scores/all.SCORE"))
;; all.SCORE contains:
;;(("xref"
;; ("gmane.spam.detected" -1000 nil s)))
(setq gnus-summary-expunge-below -999)
Summary line format strings
(setq gnus-summary-line-format "%O%U%R%z%d %B%(%[%4L: %-22,22f%]%) %s\n") (setq gnus-summary-mode-line-format "Gnus: %p [%A / Sc:%4z] %Z")
Threading visual appearance
(setq gnus-summary-same-subject "") (setq gnus-sum-thread-tree-root "") (setq gnus-sum-thread-tree-single-indent "") (setq gnus-sum-thread-tree-leaf-with-other "+-> ") (setq gnus-sum-thread-tree-vertical "|") (setq gnus-sum-thread-tree-single-leaf "`-> ")
Use the keybinding M-F7 to toggle between the gnus window configuration and your normal editing windows.
(defun xsteve-gnus ()
(interactive)
(let ((bufname (buffer-name)))
(if (or
(string-equal "*Group*" bufname)
(string-equal "*BBDB*" bufname)
(string-match "\*Summary" bufname)
(string-match "\*Article" bufname))
(progn
(xsteve-bury-gnus))
;unbury
(if (get-buffer "*Group*")
(xsteve-unbury-gnus)
(gnus-unplugged)))))
(defun xsteve-unbury-gnus ()
(interactive)
(when (and (boundp 'gnus-bury-window-configuration) gnus-bury-window-configuration)
(set-window-configuration gnus-bury-window-configuration)))
(defun xsteve-bury-gnus ()
(interactive)
(setq gnus-bury-window-configuration nil)
(let ((buf nil)
(bufname nil))
(dolist (buf (buffer-list))
(setq bufname (buffer-name buf))
(when (or
(string-equal "*Group*" bufname)
(string-equal "*BBDB*" bufname)
(string-match "\*Summary" bufname)
(string-match "\*Article" bufname))
(unless gnus-bury-window-configuration
(setq gnus-bury-window-configuration (current-window-configuration)))
(delete-other-windows)
(if (eq (current-buffer) buf)
(bury-buffer)
(bury-buffer buf))))))
(global-set-key [(meta f7)] 'xsteve-gnus)
Generate the mail headers before you edit your message.
(setq message-generate-headers-first t)
The message buffer will be killed after sending a message.
(setq message-kill-buffer-on-exit t)
When composing a mail, start the auto-fill-mode.
(add-hook 'message-mode-hook 'turn-on-auto-fill)
Increase the score for followups to a sent article.
(add-hook 'message-sent-hook 'gnus-score-followup-article) (add-hook 'message-sent-hook 'gnus-score-followup-thread)
Toggle the Gcc Header.\
The Gcc Header specifies a local mail box that receives a copy of the sent article.
(defun message-toggle-gcc ()
"Insert or remove the \"Gcc\" header."
(interactive)
(save-excursion
(save-restriction
(message-narrow-to-headers)
(if (message-fetch-field "Gcc")
(message-remove-header "Gcc")
(gnus-inews-insert-archive-gcc)))))
(define-key message-mode-map [(control ?c) (control ?f) (control ?g)] 'message-toggle-gcc)
The message-citation-line-function is responsible to display a message citation. The following Code allows to switch
(setq message-citation-line-function 'xsteve-message-citation) ; was message-insert-citation-line
(setq message-cite-function 'message-cite-original-without-signature)
;;
(defun xsteve-message-citation ()
(interactive)
(when message-reply-headers
(xsteve-message-citation-delete)
(message-goto-body)
(let* ((parsed-address (mail-header-parse-address (mail-header-from message-reply-headers)))
(my-bbdb-record (bbdb-search-simple (cdr parsed-address) (car parsed-address)))
(start-pos (point))
(overlay)
(anrede (when my-bbdb-record (bbdb-record-getprop my-bbdb-record 'anrede)))
(full-name
(or (if my-bbdb-record
(bbdb-record-name my-bbdb-record)
(cdr parsed-address))
"Fred Namenlos ")))
(if anrede
(insert (format "%s\n\n" anrede))
(funcall xsteve-message-citation-function full-name))
(unless (eq start-pos (point))
(setq overlay (make-overlay start-pos (point)))
(overlay-put overlay 'xsteve-message-citation nil)))))
(defun xsteve-message-citation-hallo (full-name)
(insert "Hallo " (car (split-string full-name)) "!\n\n"))
(defun xsteve-message-citation-hi (full-name)
(insert "Hi " (car (split-string full-name)) "!\n\n"))
(defun xsteve-message-citation-herr (full-name)
(insert "Hallo Herr " (cadr (split-string (or full-name "Fred Namenlos "))) "!\n\n"))
(defun xsteve-message-citation-default (full-name)
(message-insert-citation-line))
(xsteve-define-alternatives 'xsteve-message-citation-function '(xsteve-message-citation-hallo
xsteve-message-citation-herr
xsteve-message-citation-hi
xsteve-message-citation-default))
(defun xsteve-message-citation-delete ()
(interactive)
(let ((overlay)
(start-pos))
(goto-char (point-min))
(goto-char (next-overlay-change (point)))
(setq overlay (car-safe (overlays-at (point)))) ;; do not use car...
(when overlay
(overlay-get overlay 'xsteve-message-citation)
(setq start-pos (point))
(goto-char (next-overlay-change (point)))
(delete-region start-pos (point)))))
(defun xsteve-message-citation-toggle ()
(interactive)
(save-excursion
(toggle-xsteve-message-citation-function)
(xsteve-message-citation)))
(define-key message-mode-map [f6] 'xsteve-message-citation-toggle)
Bind M-h to a function that shows the latest received mails.
(defun xsteve-show-nnmail-split-history () (interactive) (let ((hi (sort (mapcar 'caar nnmail-split-history) 'string Store gnus specific files to ~/gnus (setq gnus-directory "~/gnus") (setq message-directory "~/gnus/mail") (setq nnml-directory "~/gnus/nnml-mail") (setq gnus-article-save-directory "~/gnus/saved") (setq gnus-kill-files-directory "~/gnus/scores") (setq gnus-cache-directory "~/gnus/cache")
Integration to bbdb and dired
(add-hook 'gnus-startup-hook 'bbdb-insinuate-gnus) (add-hook 'dired-mode-hook 'turn-on-gnus-dired-mode)
Use the gnus registry
(require 'gnus-registry) (gnus-registry-initialize)
Select the header that should be shown. Yes I am interested in the used mail or news client from other people ;-)
(setq gnus-visible-headers "^From:\\|^Newsgroups:\\|^Subject:\\|^Date:\\|^Followup-To:\\|^Reply-To:\\|^Summary:\\|^Keywords:\\|^To:\\|^[BGF]?Cc:\\|^Posted-To:\\|^Mail-Copies-To:\\|^Mail-Followup-To:\\|^Apparently-To:\\|^Gnus-Warning:\\|^Resent-From:\\|^X-Sent:\\|^User-Agent:\\|^X-Mailer:\\|^X-Newsreader:")
Specify the order of the header lines
(setq gnus-sorted-header-list '("^From:" "^Subject:" "^Summary:" "^Keywords:" "^Newsgroups:" "^Followup-To:" "^To:" "^Cc:" "^Date:" "^User-Agent:" "^X-Mailer:" "^X-Newsreader:"))
Use the topic mode
(add-hook 'gnus-group-mode-hook 'gnus-topic-mode)
Added some keybindings to the gnus summary mode
(define-key gnus-summary-mode-map [(meta up)] '(lambda() (interactive) (scroll-other-window -1))) (define-key gnus-summary-mode-map [(meta down)] '(lambda() (interactive) (scroll-other-window 1))) (define-key gnus-summary-mode-map [(control down)] 'gnus-summary-next-thread) (define-key gnus-summary-mode-map [(control up)] 'gnus-summary-prev-thread)
I use gnus-alias to make it possible to use different mail addresses for me. I have changed the mail addresses below to some invalid ones. I can use C-c C-p to select an identity from the given list. It is also possible via gnus-alias-identity-rules to select the correct mail address from a given context.
(require 'gnus-alias)
(setq gnus-alias-identity-alist
'(("riic-xsteve" "" "Stefan Reichör " "" nil "" "")
;;("web.de" "" "Stefan Reichör " "" nil "" "Stefan.")
("sigriic" "" "Stefan Reichör " "" nil "" "~/data/.signature-riic")))
(setq gnus-alias-identity-rules '(("xtla.el"
("to" "[email protected]" current)
"xsteve")))
(setq gnus-alias-default-identity "xsteve")
(gnus-alias-init)
(define-key message-mode-map "\C-c\C-p" 'gnus-alias-select-identity)
My spam settings. I use the spam processing for the gmane groups.
(setq spam-directory "~/gnus/spam/")
(setq gnus-spam-process-newsgroups
'(("^gmane\\."
((spam spam-use-gmane)))))
(require 'spam)
Make it easier to find ham messages in my spam folder nnml:spam.\
The following setup highlights some words that I expect in ham messages.
(setq gnus-summary-nospam-highlight-list '("[PATCH]" "svn" "x-dict" "pwsafe"
"emacs" "python"))
(defun gnus-summary-hl-nospam ()
(interactive)
(highlight-regexp (regexp-opt gnus-summary-nospam-highlight-list)))
(defun gnus-summary-hl-nospam-in-spam-group ()
(when (string= gnus-newsgroup-name "nnml:spam")
(message "Highlighting words for possible ham mails")
(gnus-summary-hl-nospam)))
(add-hook 'gnus-summary-prepare-hook 'gnus-summary-hl-nospam-in-spam-group)
Setup the search via gnus-namazu. First create the index via the command line.
# generate the database: look at gnus-directory, mine is "~/gnus" # ~/gnus/nnml-mail contains the mails mkdir ~/gnus/namazu mknmz -a -h -O ~/gnus/namazu ~/gnus/nnml-mail
Enable gnus-namazu. You can start a search vie C-c C-n.
(require 'gnus-namazu) (gnus-namazu-insinuate) (setq gnus-namazu-index-update-interval nil) ;; call explicitely M-x gnus-namazu-update-all-indices
Update the namazu index every day at 6:00am
(defun xsteve-gnus-namazu-update-all-indices () (interactive) (gnus-namazu-update-all-indices t)) (defun xsteve-gnus-update-namazu-index () (run-at-time "6:00am" nil 'xsteve-gnus-namazu-update-all-indices)) (require 'midnight) (add-hook 'midnight-hook 'xsteve-gnus-update-namazu-index)
Display the signatures in a less readable font.
(require 'sigbegone)
http://xsteve.nit.at/php/xcount.php?src=gnus
\
Back to my Programming Homepage
[2021-07-26 Mon 21:51]
Jul 26, 2021
Handy function to export environment variables to Emacs from the command line:
function export-emacs {
if [ " $(emacsclient -e t ) " != 't' ] ; then
return 1
fi
for name in " ${ @ } " ; do
value = $( eval echo \"\$ ${ name } \" )
emacsclient -e "(setenv \" ${ name } \" \" ${ value } \" )" >/dev/null
done
}
Use it like this:
export BLAH = "Some value" export-emacs BLAH
And in emacs:
( getenv "BLAH" ) ; => "Some value"
[2022-05-07 Sat 22:21]
You can use both melpa and melpa-stable, and pin certain packages to certain repositories by customizing package-pin-packages:
(require 'package)
(add-to-list 'package-archives
'("melpa-stable" . "http://stable.melpa.org/packages/") t)
(add-to-list 'package-archives
'("melpa" . "https://melpa.org/packages/") t)
(setq package-pinned-packages
'((imenu-anywhere . "melpa-stable")
(spaceline . "melpa-stable")
(clj-refactor . "melpa-stable")
(cider . "melpa-stable")
(clojure-mode . "melpa-stable")
(linum-relative . "melpa-stable")
(aggressive-indent . "melpa-stable")
(evil-leader . "melpa-stable")
(evil-visualstart . "melpa-stable")
(evil-jumper . "melpa-stable")
(evil-snipe . "melpa-stable")
(evil . "melpa-stable")
(evil-commentary . "melpa-stable")))
[2022-09-02 Fri 09:36]
I like Ivy. I like it a lot. Together with Counsel it makes a fantastic completion framework for Emacs.
However there is something driving me up the wall. Searching the active buffer with Swiper is quite slow. Meaning that the Minibuffer sometimes needs more than a second to appear. Which actually feels like 3 seconds.
Now this could have been solved by doing some research to fix it. But it would have not be fun, would it? To be completely honest there are two more reasons for switching.
- I want to try the new and – according to the community fashionable – way of doing stuff.
- Tweaking the Emacs configuration is a wonderful way of getting work done without getting work done.
Vertico provides a performant and minimalistic vertical completion UI, which is based on the default completion system.
This being the description of the author of vertico.el - VERTical Interactive COmpletion himself sounds fairly promising – maybe even convincing.
Thus my decision to try it out together with consult.el - Consulting completing-read as my completion framework.
To got about switching I needed to think about my use of Ivy and the accompanying packages and figure out if there will be proper substitutions for them after the move.
To be frank here I was reasonably sure that I would find equivalents for the following functions. Even if there were no corresponding functions to Vertico or Consult, my experience suggests that the community surely would have been at it.
- ivy-switch-buffer:
- the equivalent function for switching buffers:
consult-buffer - counsel-find-file:
- the equivalent function for opening files with completion:
find-file - counsel-M-x:
- the equivalent for calling interactive functions:
execute-extended-command - swiper:
- the equivalent for searching the current buffer:
consult-line - counsel-projectile-switch-project:
- the equivalent for switching projects:
projectile-switch-project - counsel-bookmark:
- the equivalent for finding saved bookmarks:
consult-bookmark - Ivy actions:
- Embark for actions on completion candidates:
embark-act.
The changes for the first working code with Vertico & Consult are reflected in this commit.
After using Emacs for a fairly significant time – around 2 years in my case – one of course customizes the workflows. Custom functions, keybindings and other adjustments become a frequent occurrence. I am no exception here.
Following are a few of changes that I had to make to adjust for the new completions system. These will be formatted as diffs to reflect the changes.
Function to open miscellaneous config files: @@ -477,10 +477,10 @@ This will display a Quicklook of the file at point in macOS."
(defun timu/find-config-file ()
- "Open a config file with `ivy-completing-read'."
+ "Open a config file with `completing-read'."
(interactive)
(let ((config-file
- (ivy-completing-read
+ (completing-read
"Select account: "
timu-config-files)))
(find-file config-file)))
Search my frequently used directories
@@ -426,12 +416,12 @@ This will display a Quicklook of the file at point in macOS." (defun timu/search-org-files () "Grep for a string in the `~/org' using `rg'." (interactive) - (counsel-rg "" "~/org" nil "Search in Org Files: ")) + (consult-ripgrep "~/org" "")) (defun timu/search-project-files () "Grep for a string in the `~/projects' using `rg'." (interactive) - (counsel-rg "" "~/projects" nil "Search in Project Files: ")) + (consult-ripgrep "~/projects" ""))Custom finding of headings in org-mode
@@ -144,15 +144,22 @@ This runs `org-babel-load-file' on `config.org'." -(defun timu/ivy-go-to-heading (&optional arg) - "Like `helm-org-in-buffer-headings', the preconfigured helm for org buffer headings. -This function will use `counsel-outline' and also move the heading to the top of the buffer -with the evil funtion `evil-scroll-line-to-top'" +(defun timu/org-go-to-heading (&optional arg) + "Go to an outline heading with `consult-org-heading'. +Also move the heading to the top of the buffer with `evil-scroll-line-to-top'" (interactive) - (counsel-outline) + (consult-org-heading) (evil-scroll-line-to-top arg))Filter Elfeed articles by tags
@@ -103,23 +103,23 @@ the buffer."
-;;; Add "+" tags to filter with ivy
-(defun timu/elfeed-ivy-filter-include-tag ()
+;;; Add "+" tags to filter with completion
+(defun timu/elfeed-filter-include-tag ()
"Use Ivy to select tags to include `+'.
The function reads the tags from the elfeed db."
(interactive)
- (let ((filtered-tag (ivy-completing-read "Select Tags: " (elfeed-db-get-all-tags))))
+ (let ((filtered-tag (completing-read "Select Tags: " (elfeed-db-get-all-tags))))
(progn
(setq elfeed-search-filter (concat elfeed-search-filter " +" filtered-tag))
(elfeed-search-update--force))))
The question is… Was the switch worth it? It definitely was. Let me explain!
First things first. The switch indeed fixed the speed issue mentioned at the top. With consult-line the Minibuffer with candidates appears instantaneously. This already made the whole thing absolutely worth it for me.
Still there are more advantages to switching. One major one being that Vertico & Consult automagically use the Emacs built-in system completing-read. I cannot explain the intricacies behind it, but I know one thing. This makes matters easier for me configuring the whole thing.
- Example:
- Instead of using a custom command
counsel-find-filefor finding files, I can justfind-fileand Vertico takes over. Other functions/commands using completion will automatically hand over to Vertico as well. No configuration needed on my part. This is munch much better for scaling and porting.