- Trailer
- About
- How it works
- Features
- Changelog
- Requirements
- Installation
- Architecture
- Tutorial
- Showcases
- Donate
- License
- Acknowledgment
Loading screens aren't trivial in general, especially in Unreal Engine. And this makes a lot of UE newcomers are confused at first. Due to User Widget is destroyed at level transition, and level loading runs on the main thread, it blocks any other game activities until it's completed. That's why you need to use Level Streaming for loading screens otherwise your widget blueprint will not work. You have to manually control which object is loaded/unloaded, you can't use different Game Mode, Player Controller for each level, and sometimes there's still occasional freezing.
That said, you may need to change your game logic to fit with Level Streaming mechanic and it requires a lot of works to achieve a simple thing: Add a Loading Screen. To create a custom loading screen without Level Streaming, you have to do it in Unreal C++. However, this is a hard task for artists and designers, even for developers who are not familiar with the Slate framework and engine module code. Async Loading Screen plug-in comes to a savior.
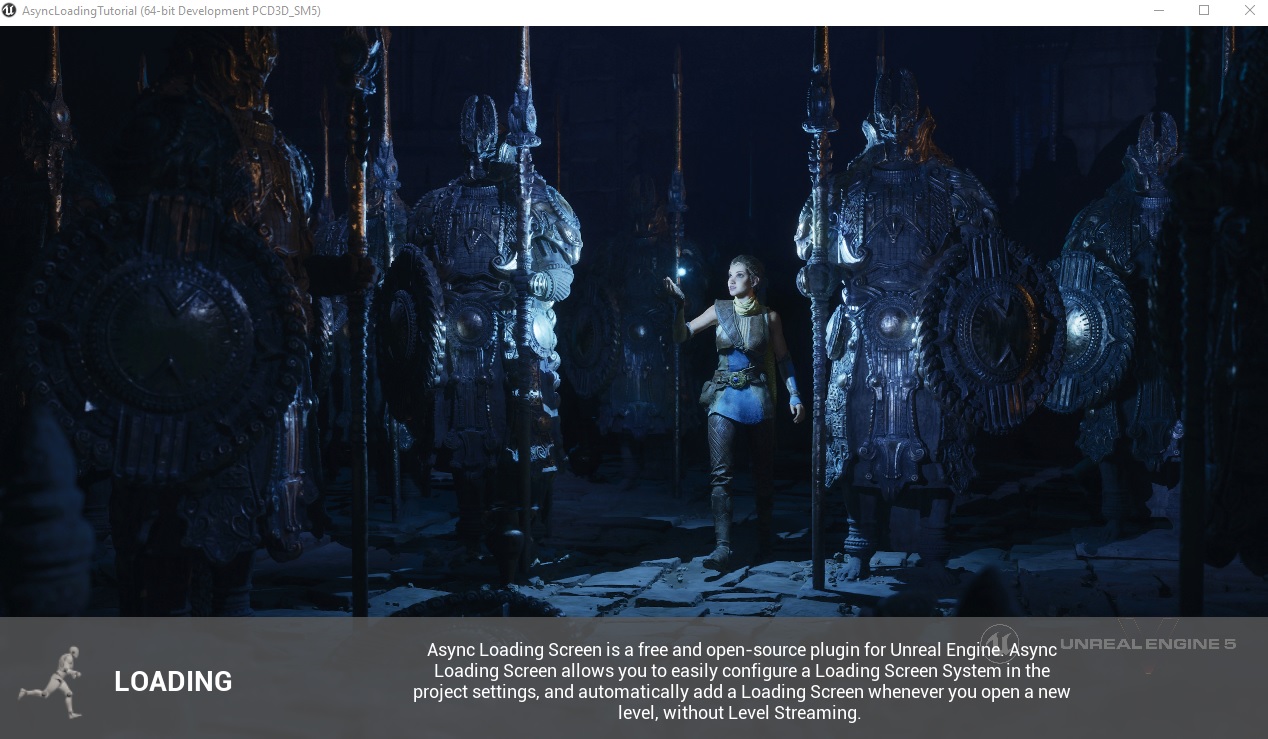
Async Loading Screen allows you to easily configure a Loading Screen System in the project settings, and automatically add a Loading Screen whenever you open a new level. Async Loading Screen also comes with pre-design UI layouts and default icons that make it easy to custom your loading screen in a few minutes (less than 5 minutes I swear).
Async Loading Screen uses MoviePlayer to play a movie at level transition, on a different thread than game thread. MoviePlayer is not only playing movie files but also can display a Slate widget on top of the movie. We use this widget for the loading screen.
MoviePlayer is registered to PreLoadMap and PostLoadMapWithWorld delegates so it will be called and shut down automatically by the engine whenever you open a new level.
- Easy to set up, easy to use.
- Customizable pre-make responsive layouts.
- Customizable loading icons.
- Pre-make default loading icons.
- Supported animating images sequence.
- Supported on all major platforms.
- Easily play movies, audio files.
- No need for coding.
- No temporary maps, no level streaming.
- Automatically handles all level transitions.
- Integrates seamlessly with an existing project.
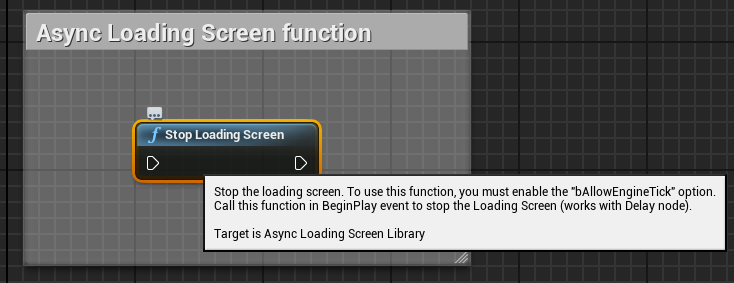
- Added new blueprint library function Stop Loading Screen. To use this function, you must enable the Allow Engine Tick option. Call this function in BeginPlay event to stop the Loading Screen (works with Delay node):
- Added Show Loading Complete Text option and Loading Complete Text Settings section, which show a text when level loading is complete. Note that you need to set Wait For Manual Stop = true, and Minimum Loading Screen Display Time = -1, this also allows players press any key to stop the Loading Screen by themself.
Show Loading Complete Text Settings:

- Added Shuffle option in the movie setting.
- Implemented set specific background/tip/movie for each level.
- Added SetDisplayBackgroundManually, SetDisplayTipTextManually, SetDisplayMovieManually options.
- Changed TipWidgetVerticalPadding to BorderVerticalOffset in Center Layout settings.
- Changed WidgetHorizontalPadding to BorderHorizontalOffset in Sidebar Layout settings.
- Add Async Loading Screen Function Library with 3 Blueprint functions:

Async Loading Screen plug-in requires Visual Studio and a C++ code project. If your project is blueprint based then you will need to convert it to C++ project otherwise you cannot package your game with code plug-in.
⚠️ After installed Async Loading Screen plugin, the "Project/Movies" setting won't work anymore. You need to set up your startup movies in the 'Startup Loading Screen' section of the plugin's setting.
Clone this repository into your project's /Plugins folder, make one if it doesn’t exist, then compile your game in Visual Studio. If your project is blueprint based you’ll need to convert it to a c++ project by adding any c++ class. Supports Engine version from 4.23 and above.
Download Async Loading Screen from Marketplace and enable the plugin in Plugins.
You can disable/enable the plugin in Edit→Plugins→Project/Loading Screen. You configure the plug-in settings in project settings Project Settings/Game/Async Loading Screen.
Async Loading Screen has four main components: Background, Loading Widget, Tip Widget, and Layout.
The background is a static image, you can add many images as you want, it will be displayed randomly (unless Set Display Background Manually option is enabled). Leave it empty if you just want to show a movie instead of a static image.
- Background Setting:
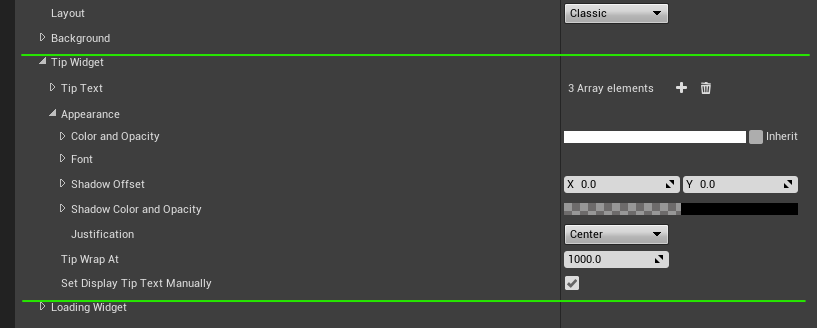
Just some useful texts that will be shown randomly (unless Set Display Tip Text Manually option is enabled) for players to have something to look at while waiting for a new level loaded.
- Tip Widget Setting:
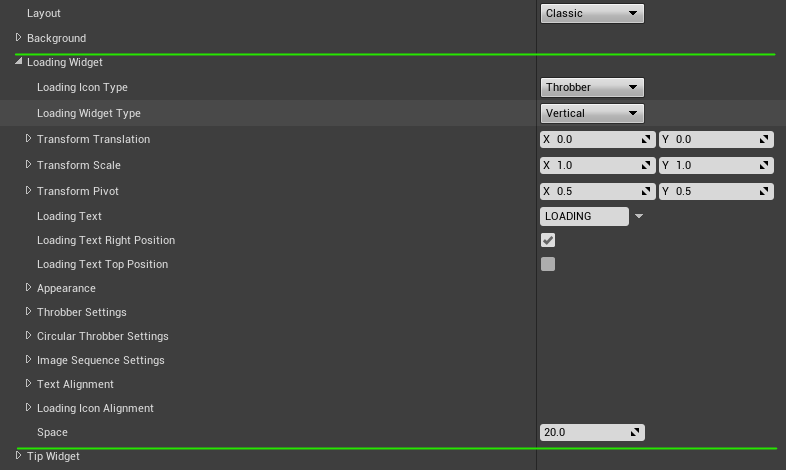
This is the most important component of the plug-in, Loading Widget lets players know that the game is still running and not freezing.
Loading Widget has two parts: Loading Icon and Loading Text. The Loading Text is just a text shown beside the Loading Icon, we mostly care about the Loading Icon. Async Loading Screen supports 3 types of Loading Icon: Throbber, Circular Throbber, and Image Sequence.
- Loading Widget Setting:
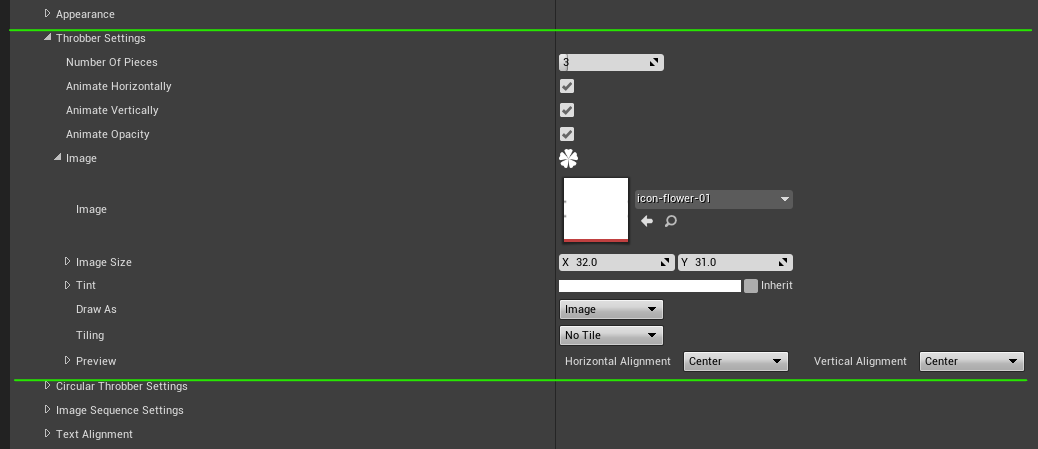
- Throbber Setting:
- Throbber loading icon example:
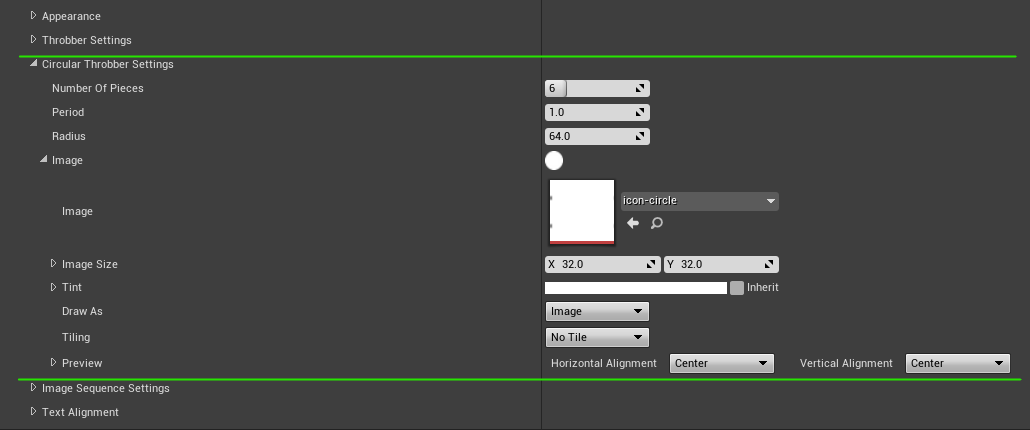
- Circular Throbber Setting:
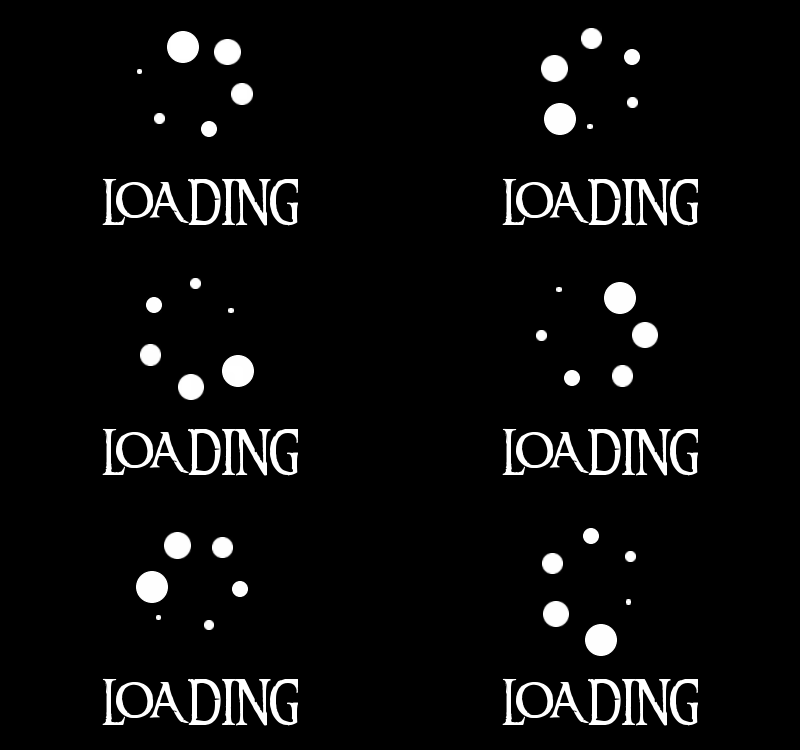
- Circular Throbber loading icon example:
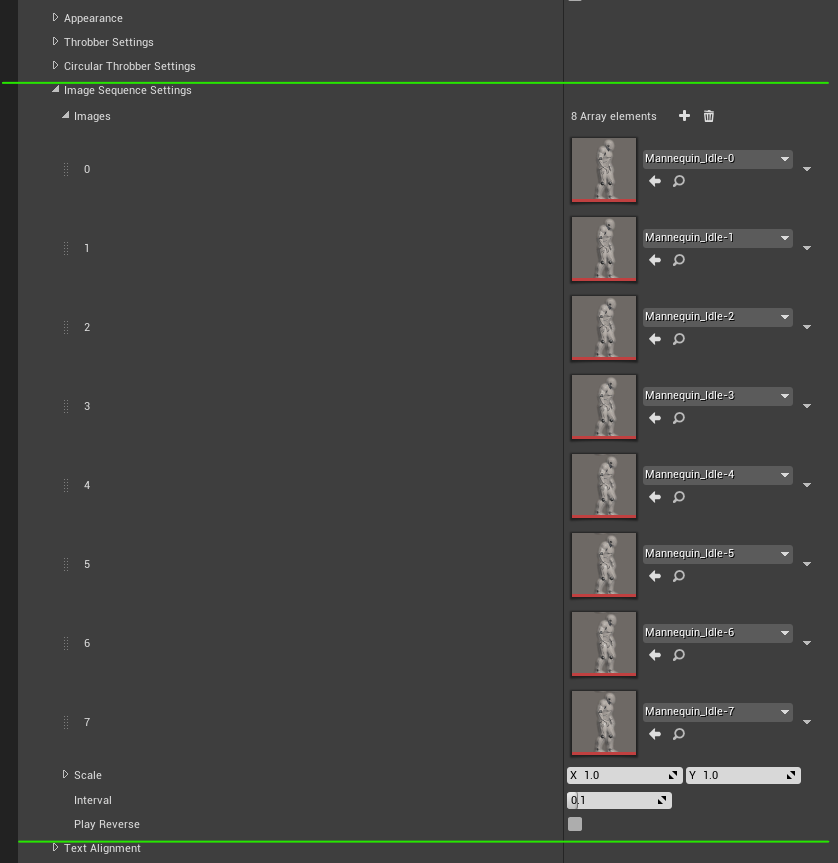
- Image Sequence Setting:
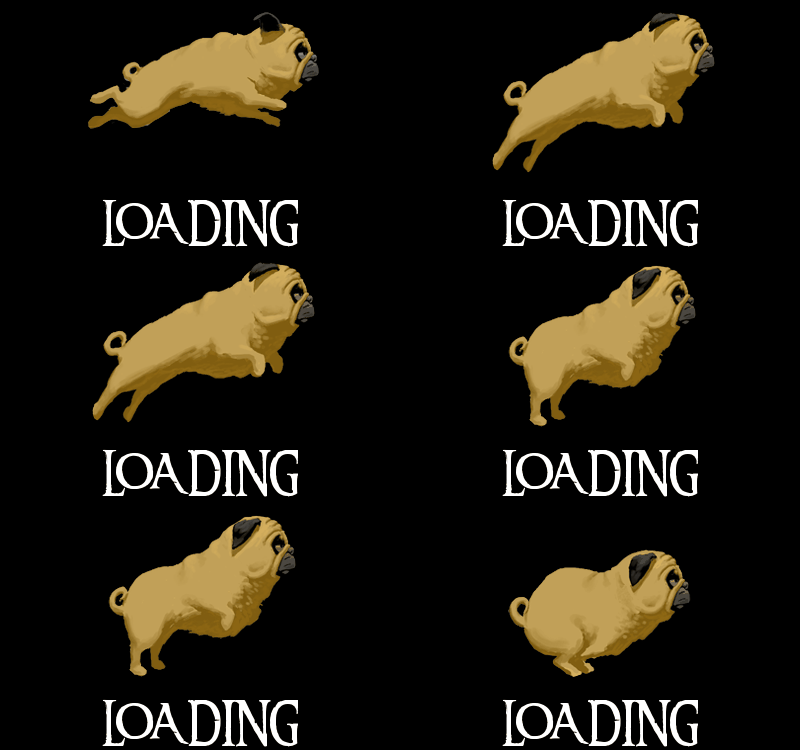
- Image Sequence loading icon examples:
This is the way Async Loading Screen widgets are arranged on the screen. In version 1.0 Async Loading Screen supports 5 different Layouts: Classic, Center, Letterbox, Sidebar, and Dual Sidebar.
- Layout Settings:
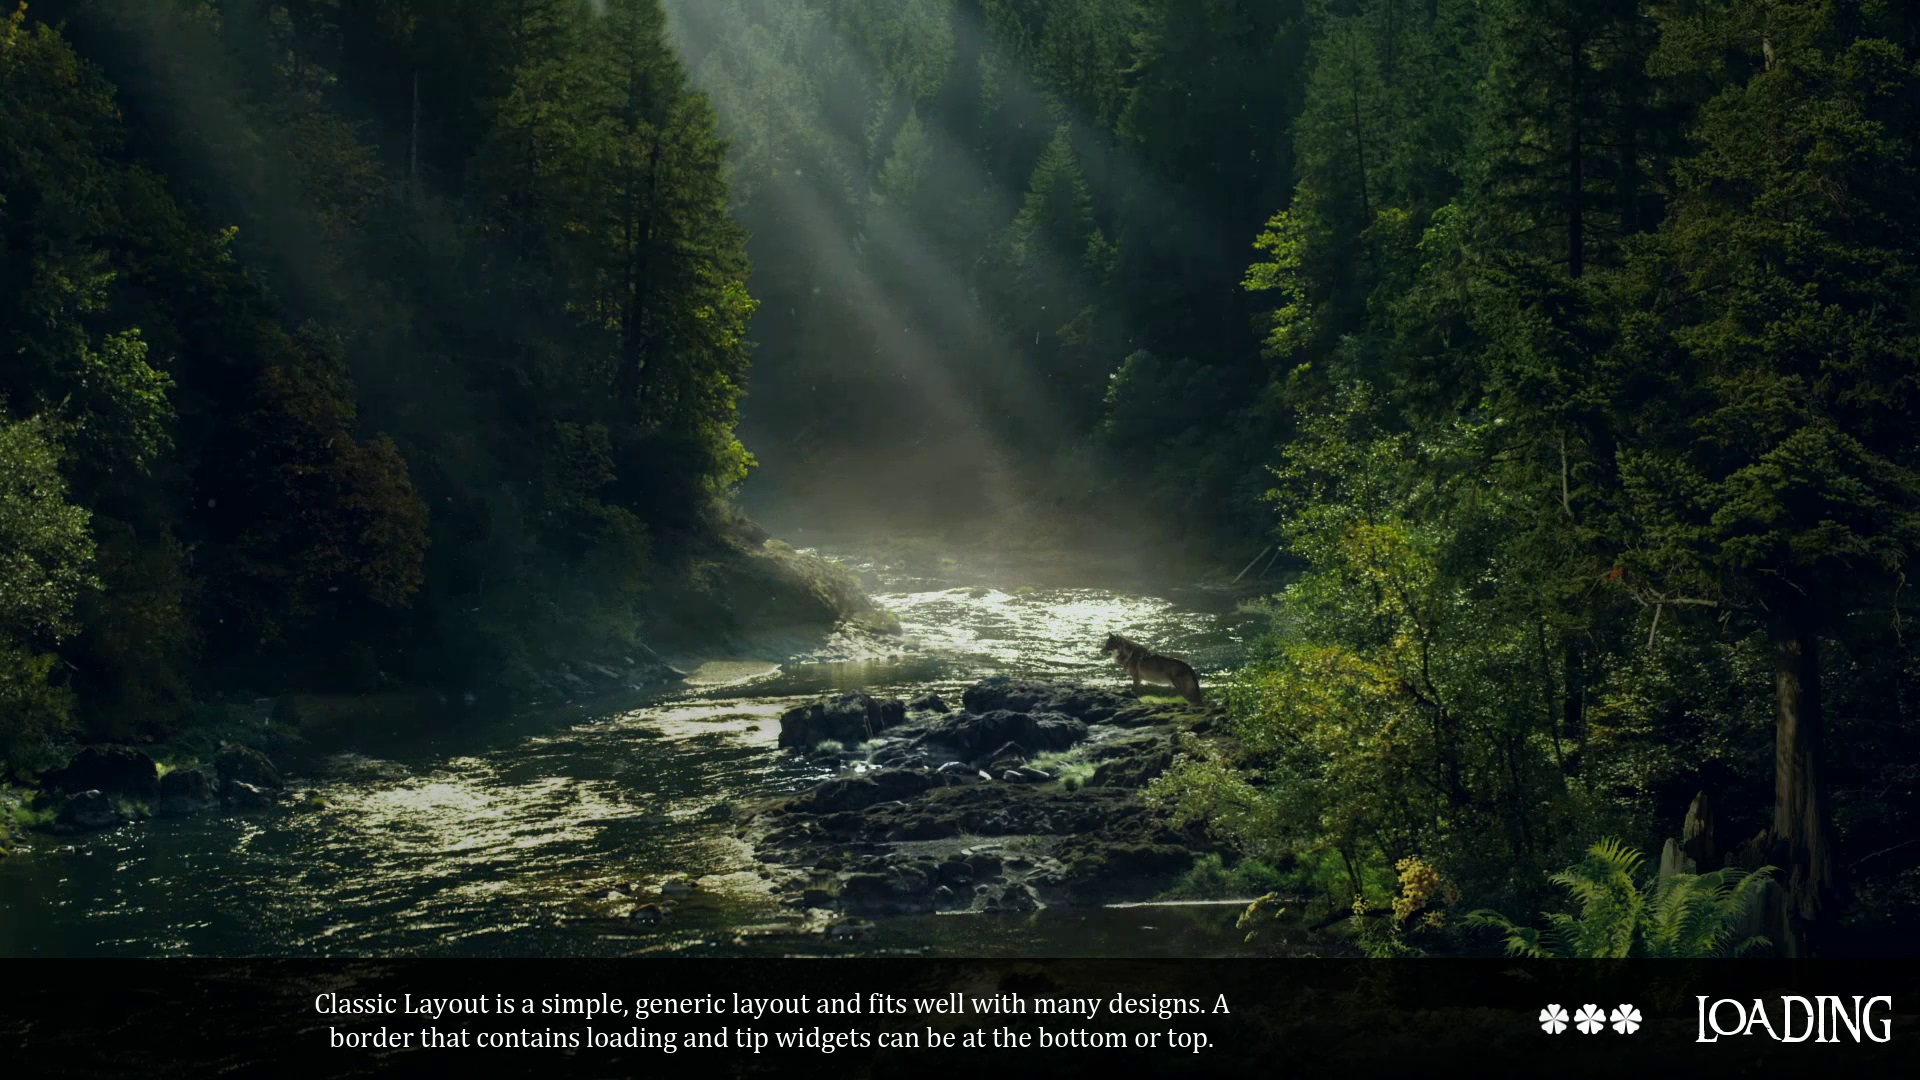
- Classic layout example:
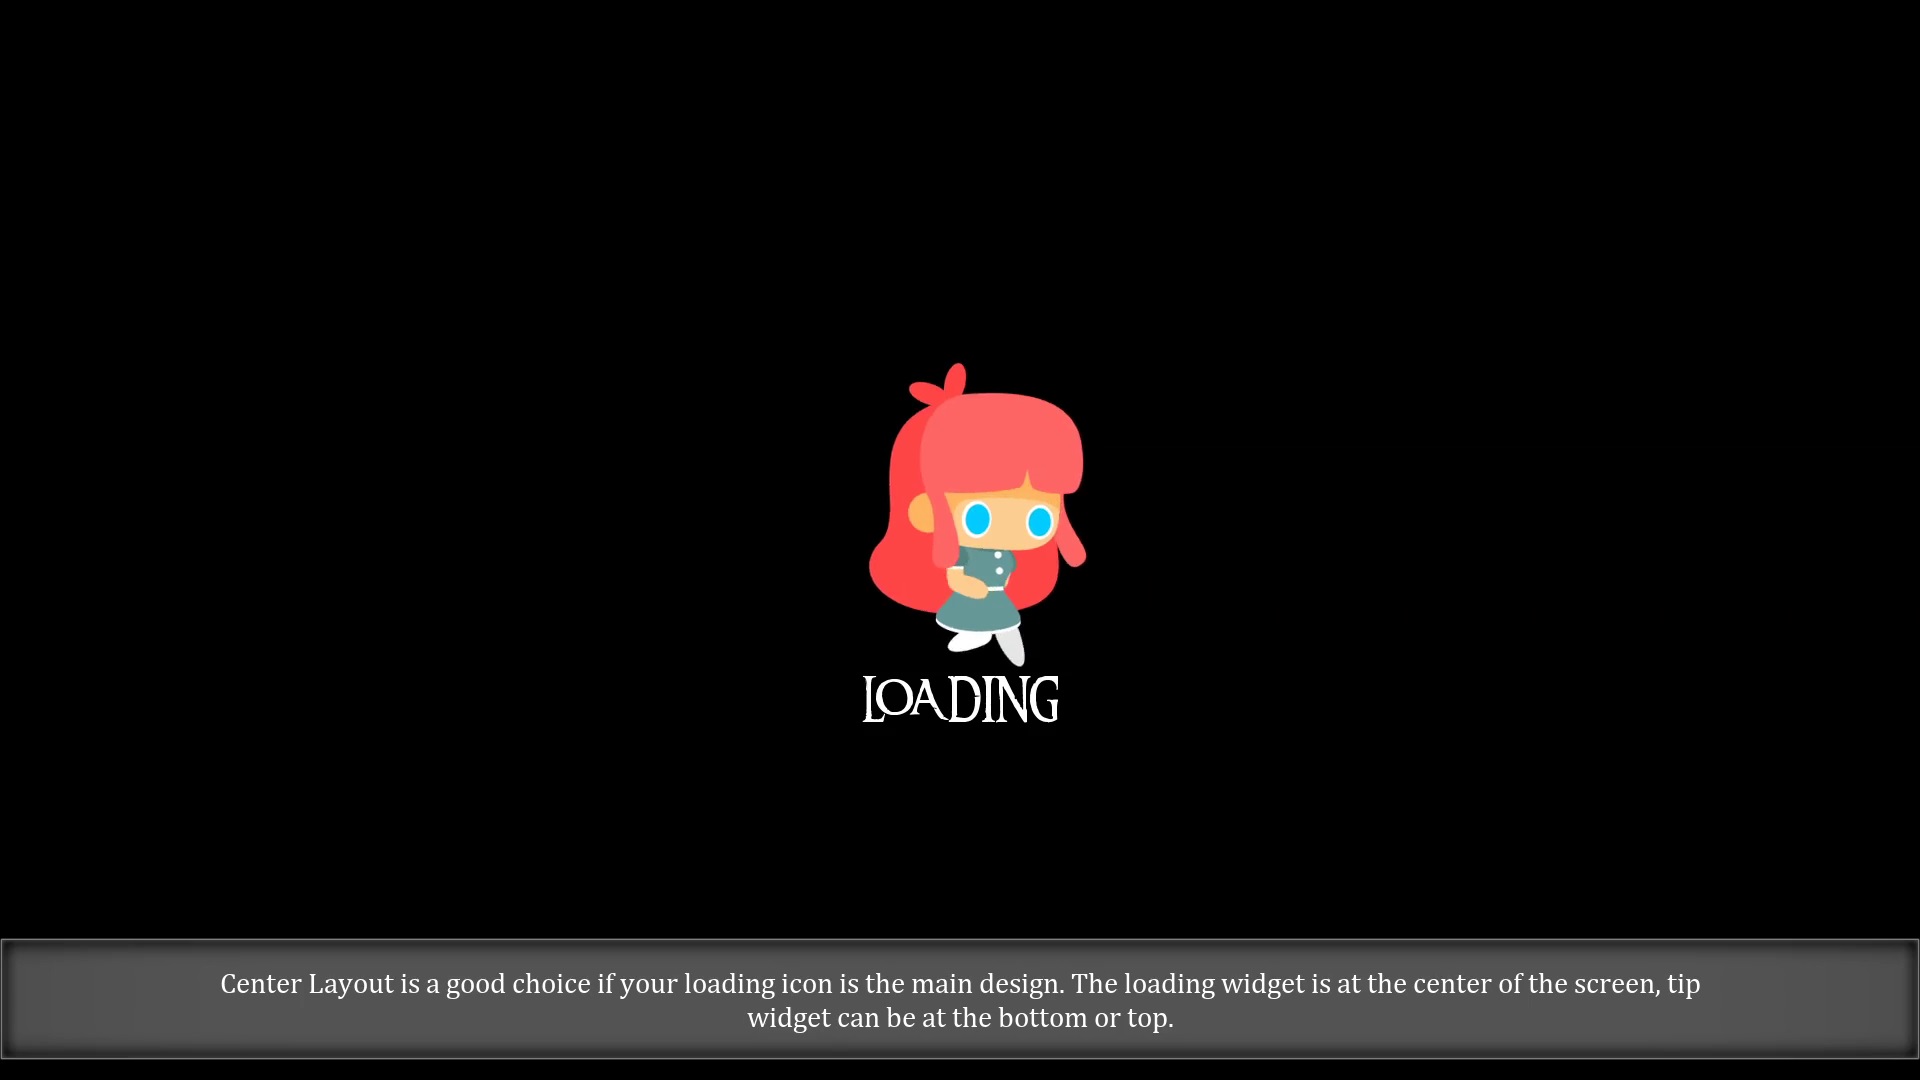
- Center layout example:
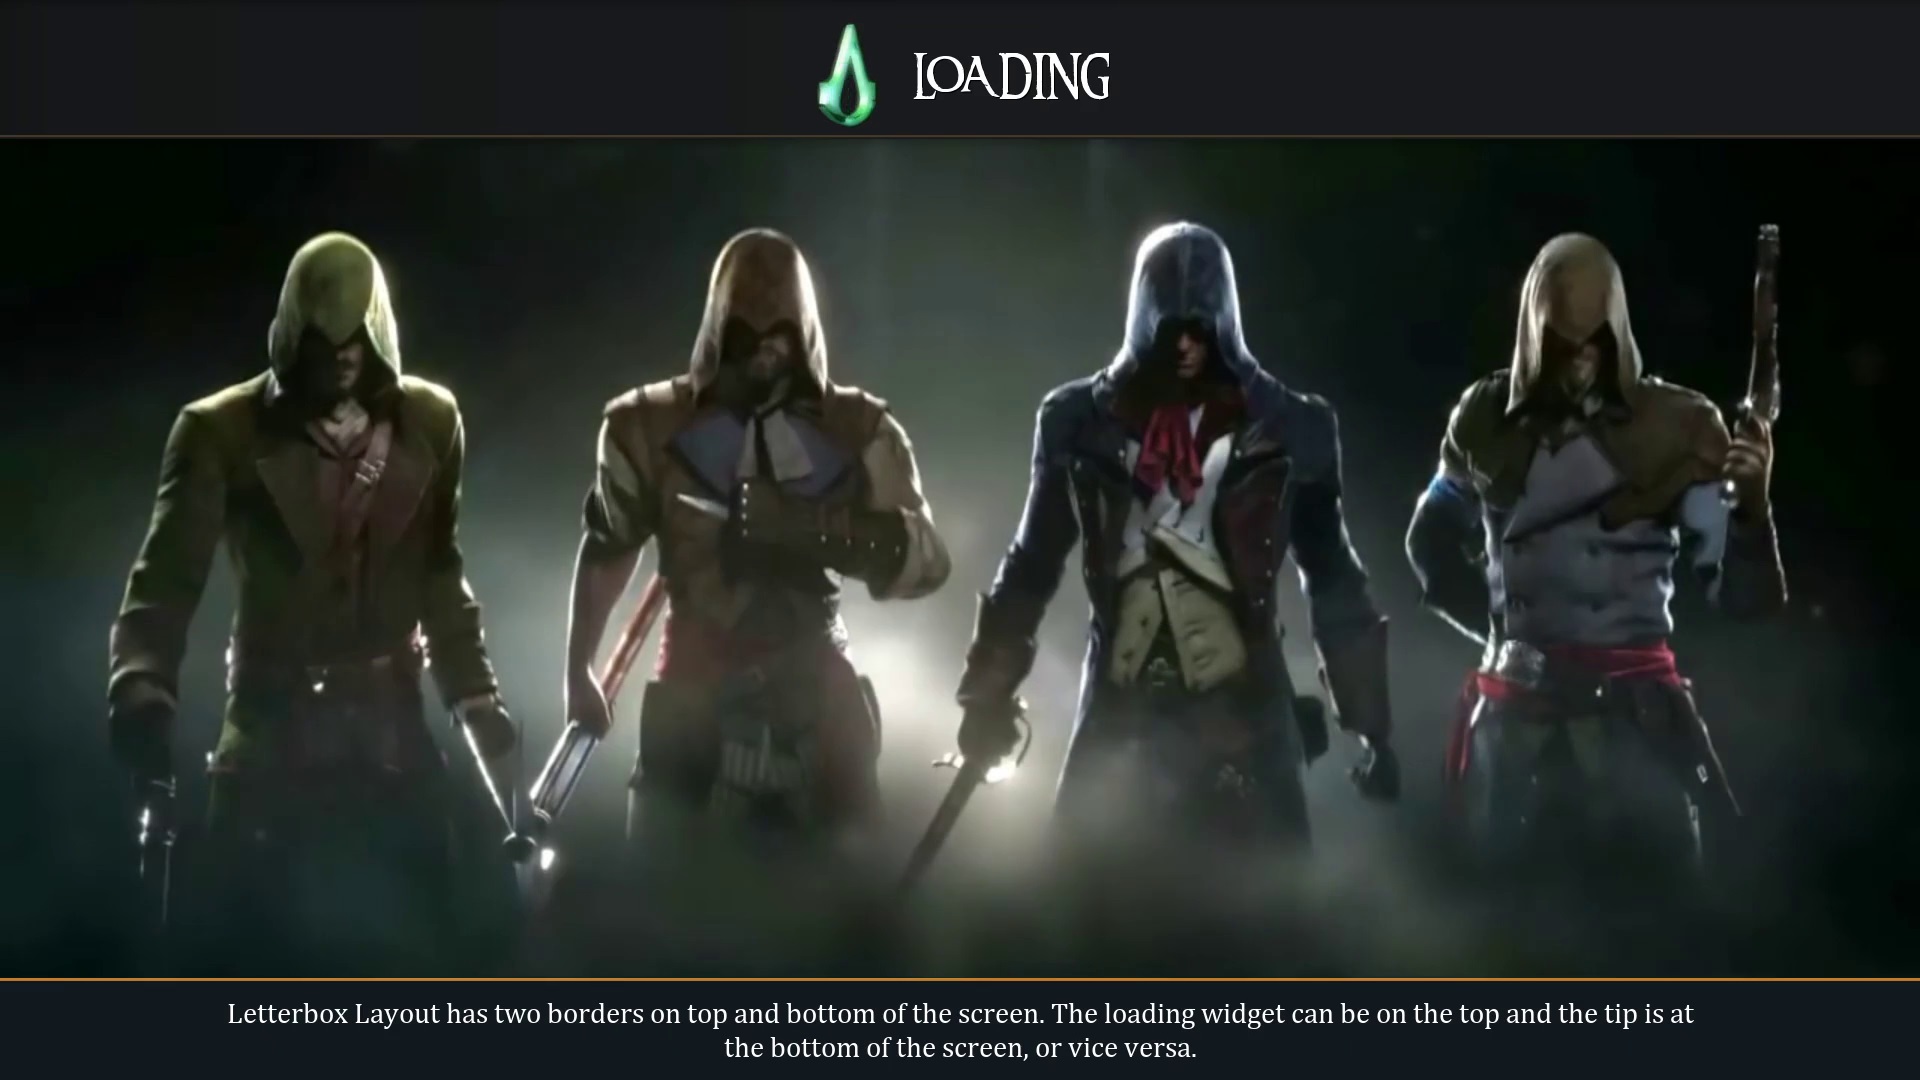
- Letterbox layout example:
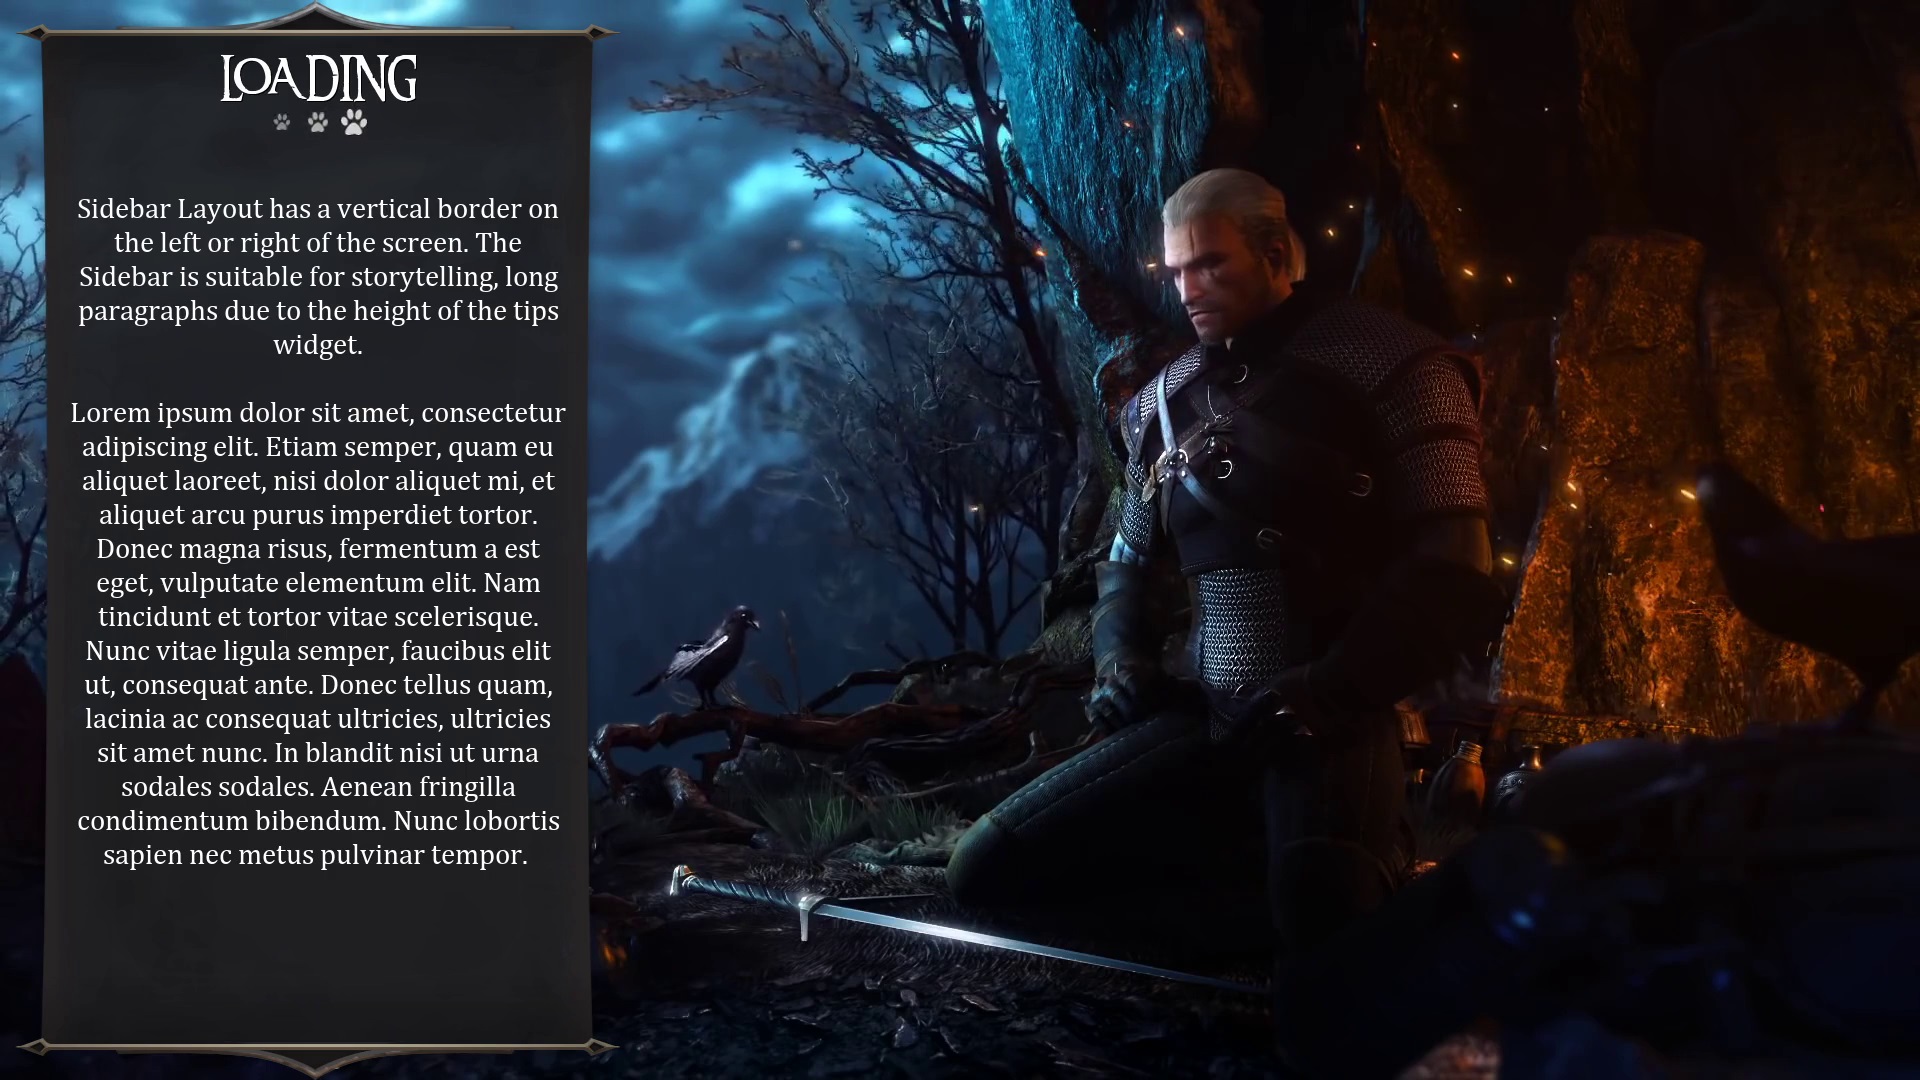
- Sidebar layout example:
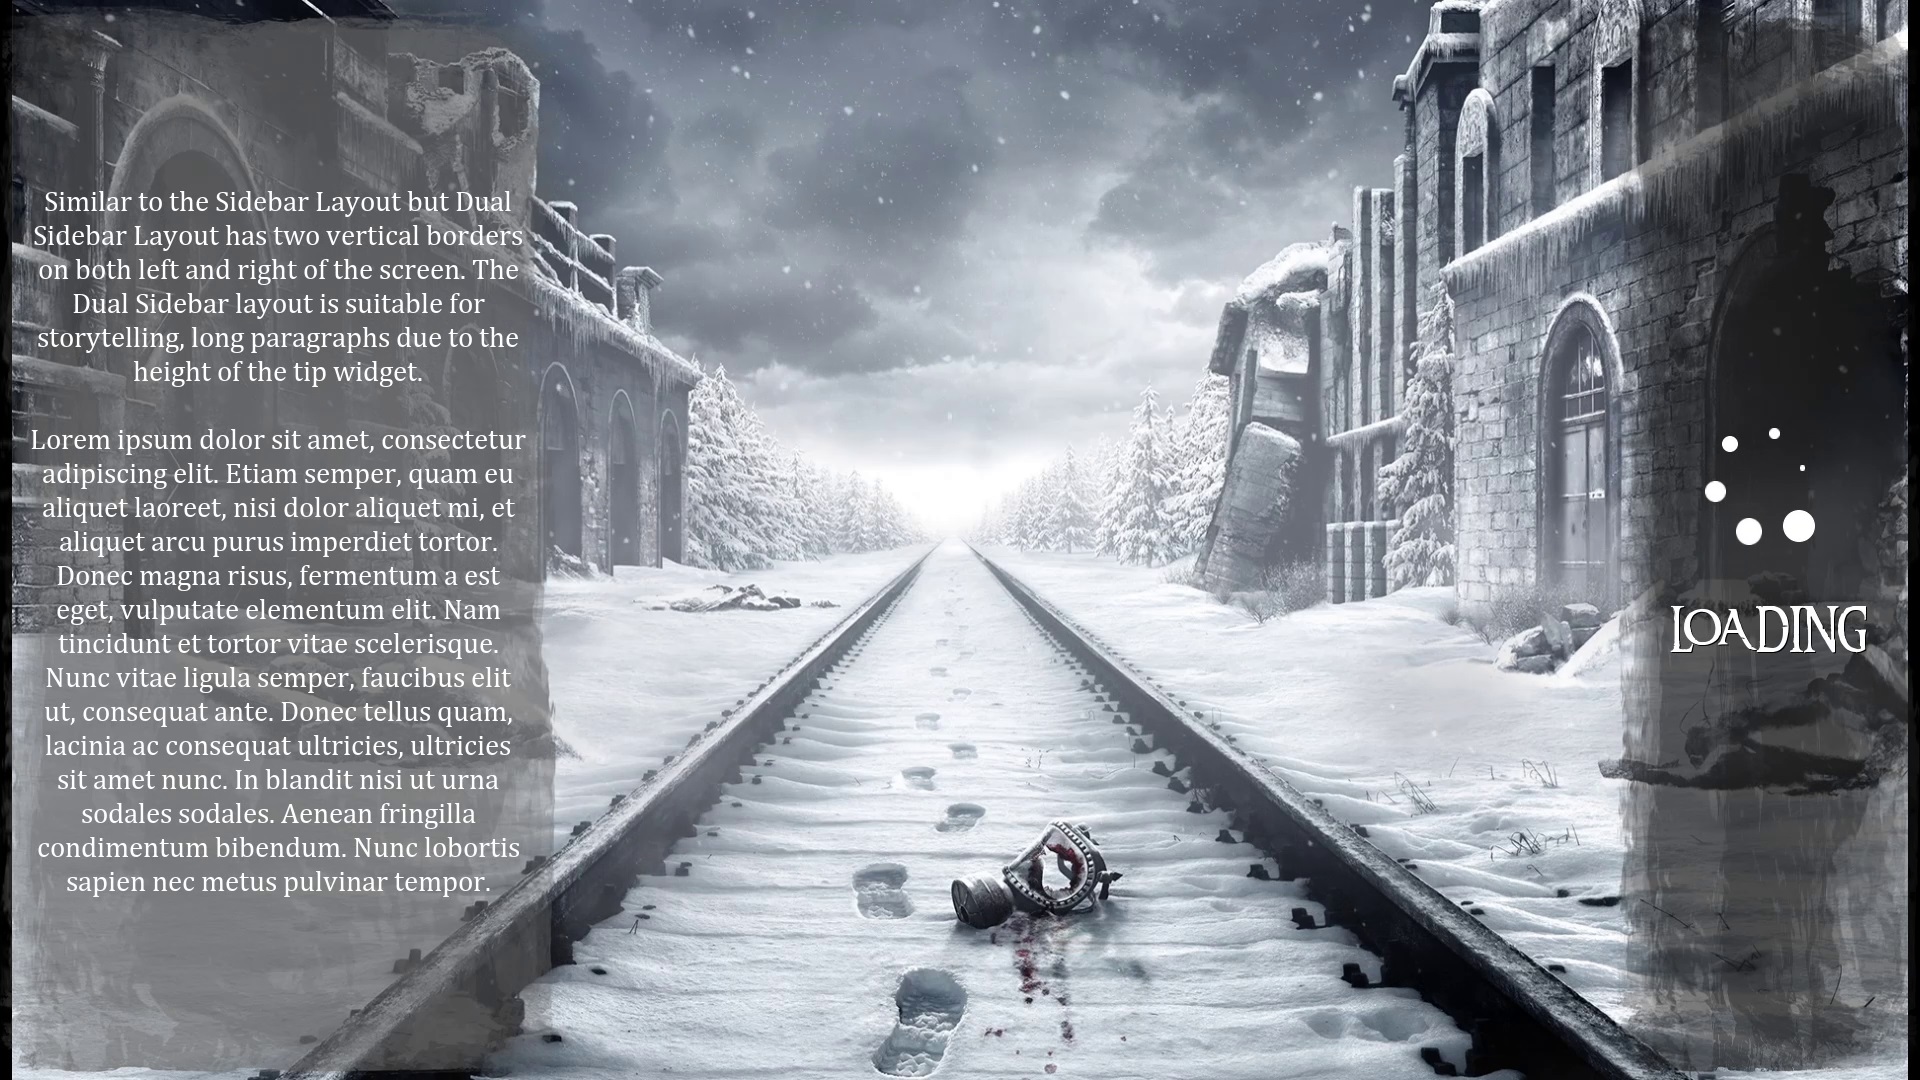
- Dual Sidebar layout example:
In this tutorial, I will use a blank C++ project with UE version 4.25. But you can freely integrate Async Loading Screen plugin into your existing projects without problems. You should install the plugin following Installation steps above.
- First, we create two empty levels named Level_1 and Level_2 for testing purposes:
- Create BP_GameMode, BP_PlayerController, and an UMG blueprint WBP_OpenLevelButton:
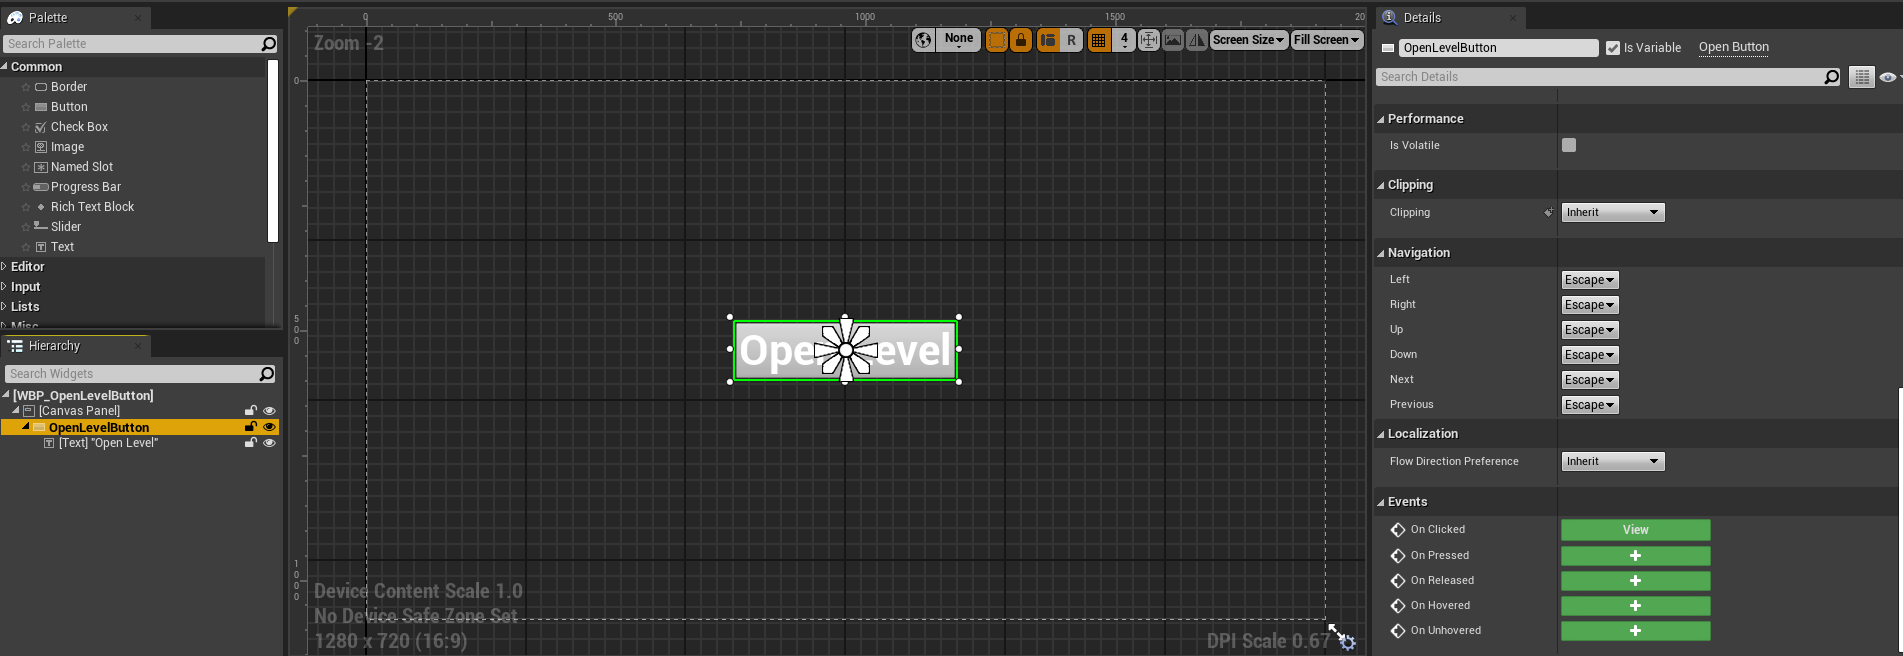
- In WBP_OpenLevelButton, create a button at the center of the screen:
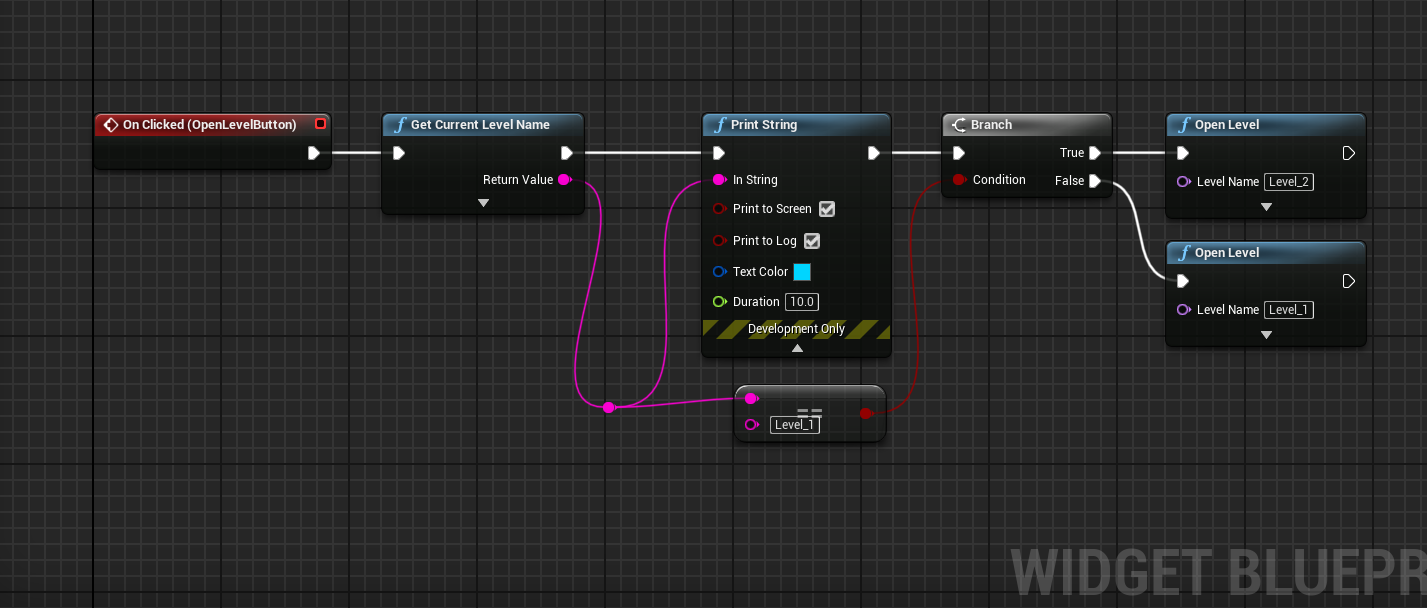
- In WBP_OpenLevelButton graph, add the following nodes in the button's OnClick event:
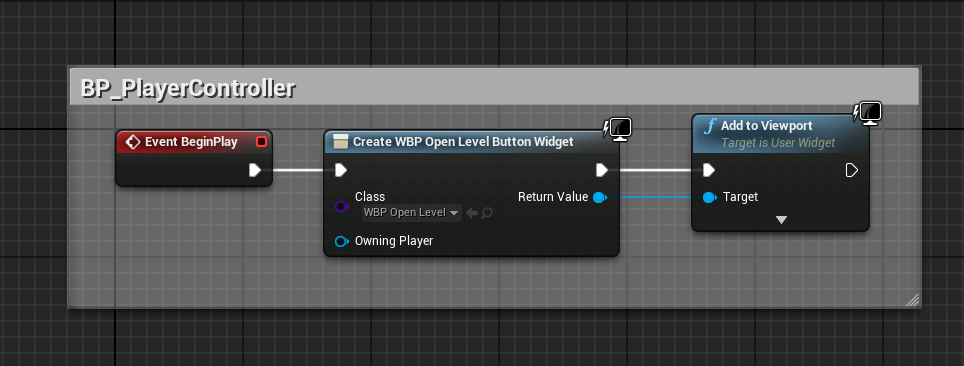
- In BP_PlayerController, create that widget and add to the viewport:
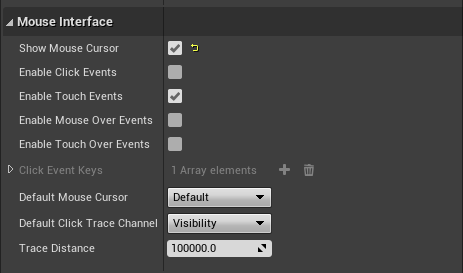
- Also enable "Show Mouse Cursor" option in BP_PlayerController:
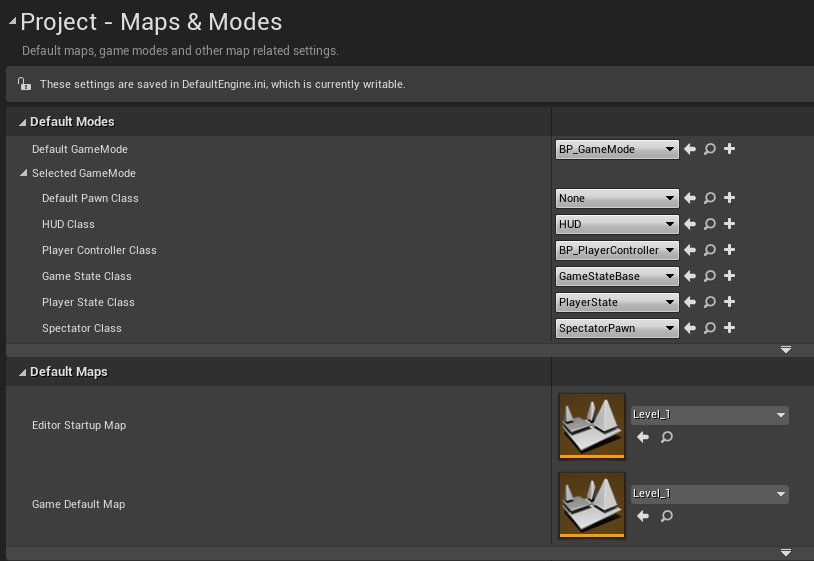
- Change default GameMode to our BP_GameMode and BP_PlayerController in "Project/Maps & Modes" setting:
- Add two maps to the included list in "Projects/Packaging" setting so you don't have to see annoying warnings when Launch:
- Note that to see the plugin is actually working, you need to play as Standalone Game or Launch button. Play in Editor will not work due to different level managing of Play in Editor and packaged game:
If you play Standalone Game or Launch the game you will see a black screen with a white panel shows up very quickly. We'll need a little setting up to make the loading screen looks better.
You can use your own assets instead but for this tutorial, I'll use Unreal Engine 5 Wallpapers Desktop from this post and UE4 Startup Video Files from this page. Here are links download for you:
-
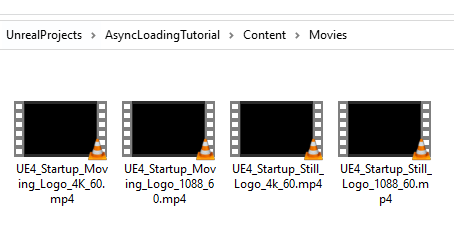
Create a "Movies" folder in the "Content" folder and copy your movie files into the "Content/Movies" folder (don't import movies into the project just copy the original movie files):
- Import your background images into the project:
Now go to "Game/Async Loading Screen" setting in the Project Settings and open "Startup Loading Screen" section. This Startup Loading Screen only shows once when the player first opens the game so usually, you don't want to show a loading screen here. Instead, you'll want to show a UE4 logo intro movie, your studio logo movie, your sponsor 1 logo movie, your sponsor 2 logo movie, or some weird shit movies, depending on you.
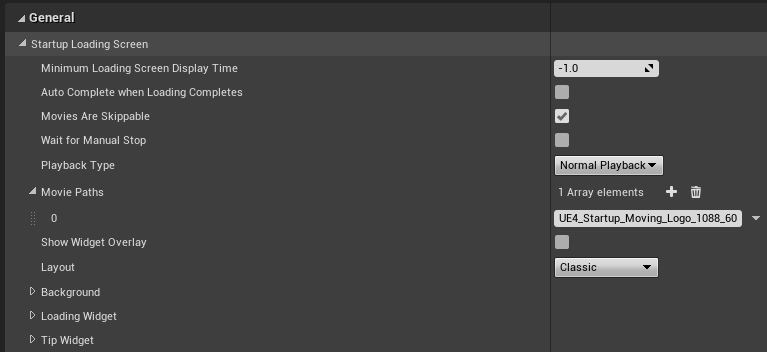
- Uncheck "Auto Complete when Loading Completes" option so we can see the movies play till end
- Add your movie path without extension in "Movie Paths" array
Here is the Startup Loading Screen setting:
Click play Standalone Game or Launch button, you will see UE4 logo movie show up here.
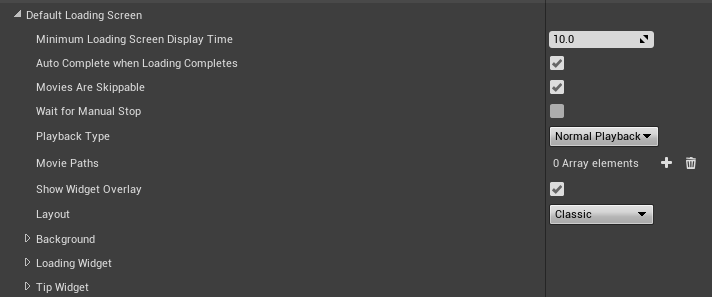
Open "Default Loading Screen" setting, here we actually set up a loading screen for our game. You can leave most of options default but for testing purpose, we'll change some options.
- Set "Minimum Loading Screen Display Time" value to 10 (I recommend setting it to -1 in packaged games)
- Set "Layout" to Classic for this tutorial.
Here is Default Loading Screen setting:
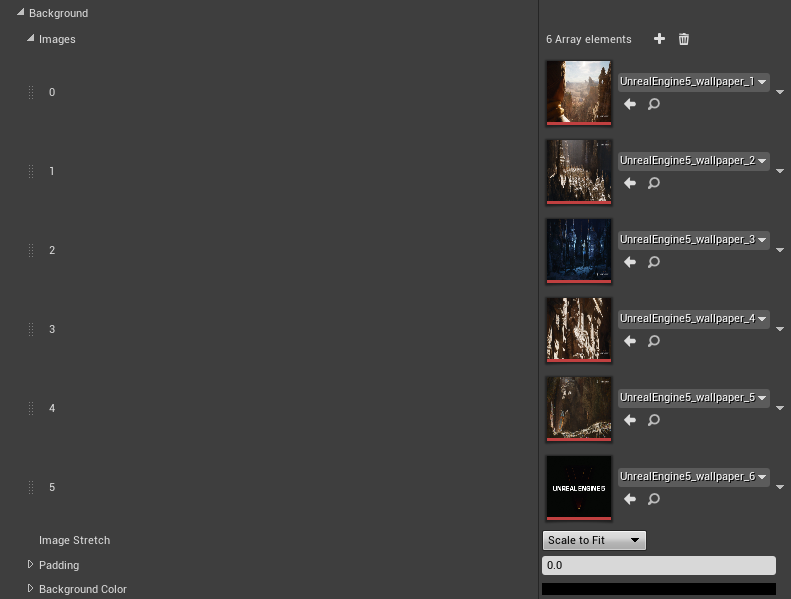
Open "Background" setting in the Default Loading Screen section. Add your background images to the Images array. You can leave other options default:
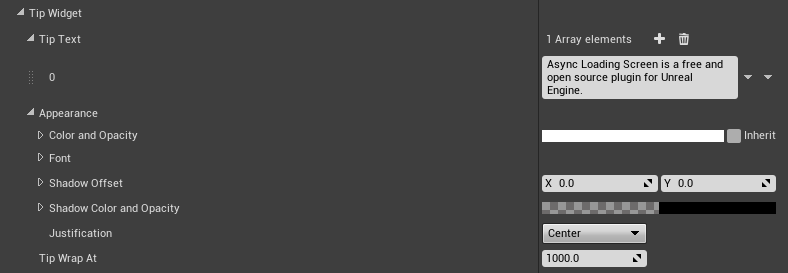
Open "Tip Widget" setting in the Default Loading Screen. Add some useful texts, you can change text's appearance like color, font, shadow effect here:
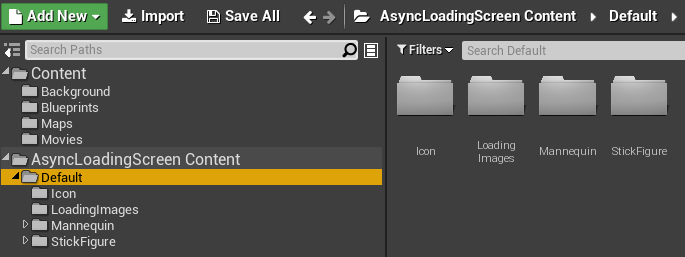
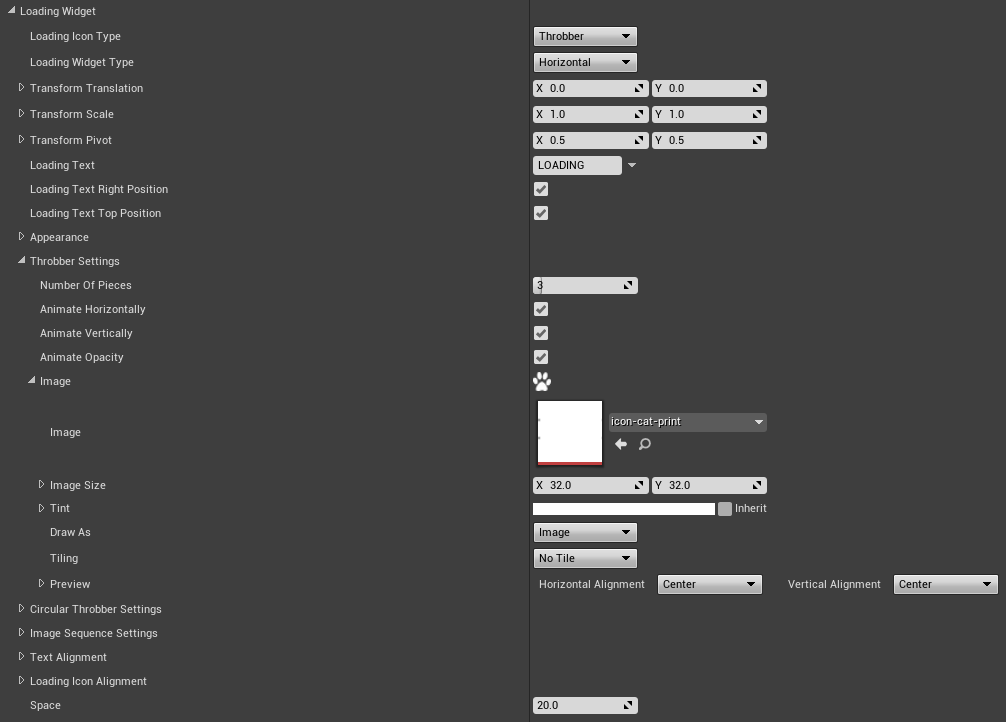
Open "Loading Widget" setting in the Default Loading Screen, here we will custom our loading icon. If you open AsyncLoadingScreen Content folder, you can see there are a lot of default loading images I had made. We'll use those default images in this tutorial.
- Set "Loading Icon Type" to "Throbber"
- Set "Loading Widget Type" to "Horizontal"
- Open "Throbber Settings" and select icon-cat-print in "Image" option
- Set "Space" value to 20
You can leave other options default.
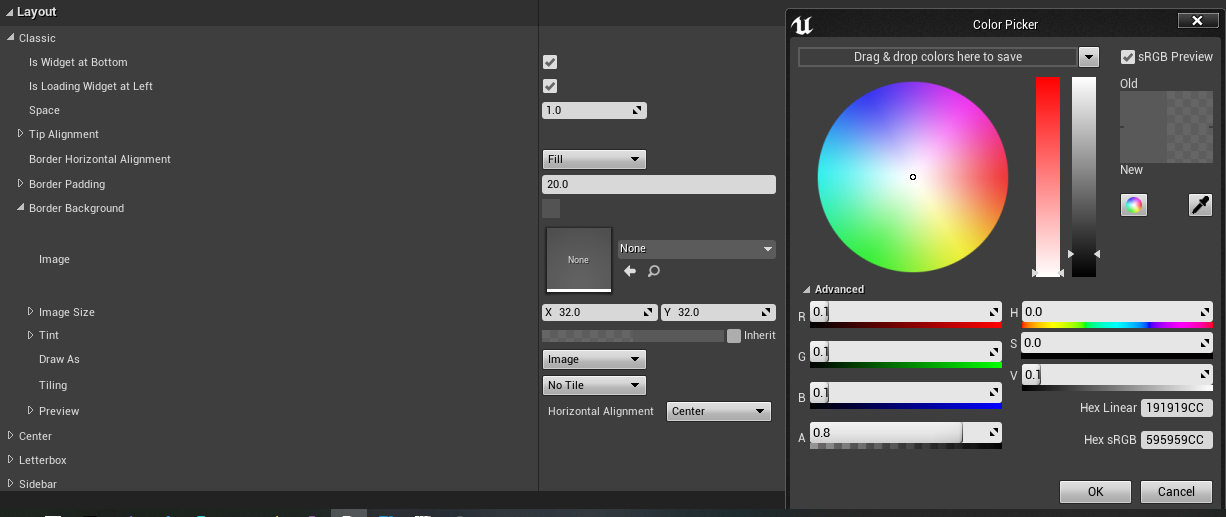
Because we already chose the Classic layout in previous step so we will configure the Classic layout and ignore other layouts. Open "Classic" setting in Layout category and change following options:
- Set "Border Padding" to 20
- Open "Border Background" option and set Tint color (R:0.1, G:0.1, B:0.1, A:0.8)
You can leave other options default.
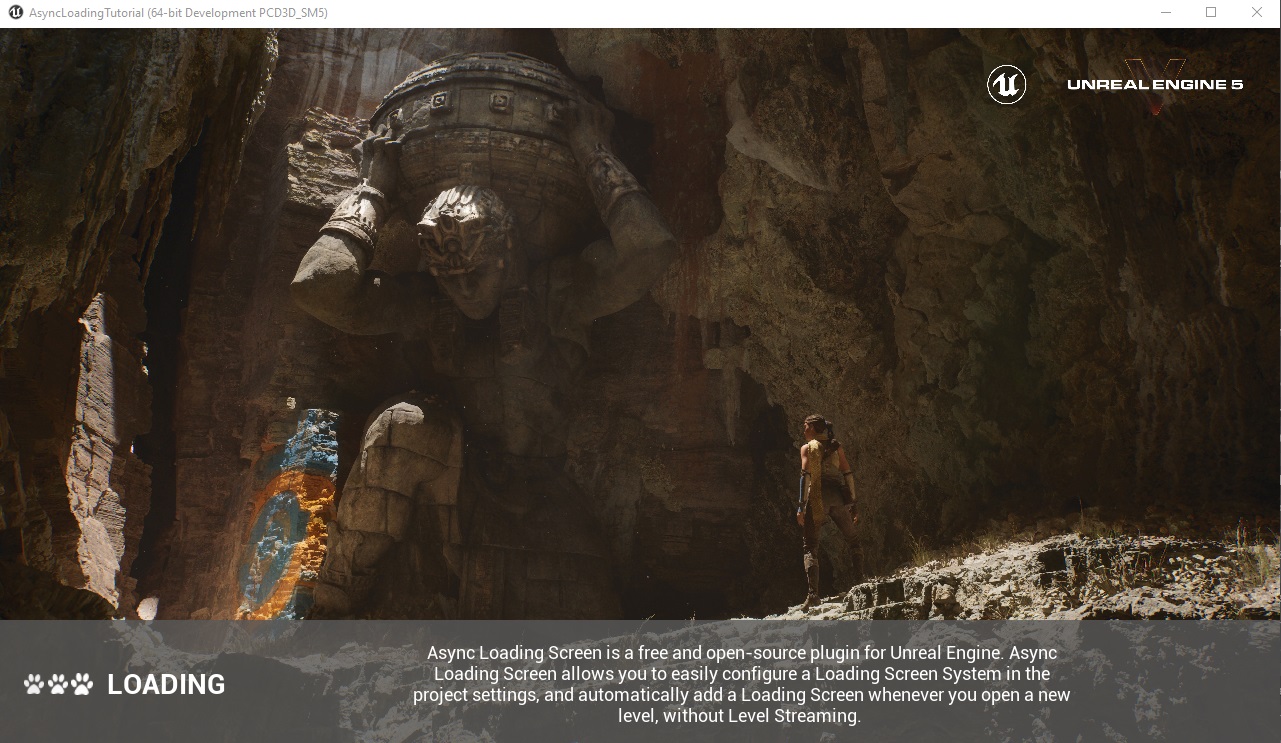
Alright! Now you can click play Standalone Game or Launch button to see your loading screen.
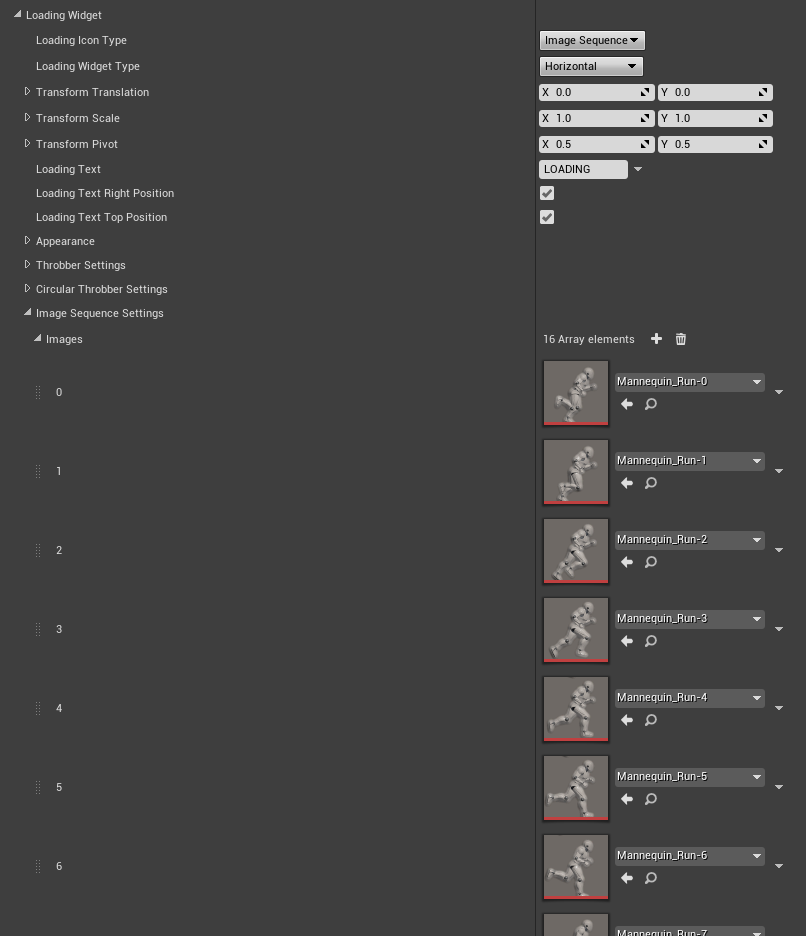
Async Loading Screen also supports custom loading icon using Image Sequence. Open "Loading Widget" and change following options:
- Set "Loading Icon Type" to "Image Sequence"
- Open "Image Sequence Settings" and add all images in folder "Default/Mannequin/RunImages" to Images array
You can leave other options default.
Click play or Launch button and you'll see the Mannequin is running as a loading icon:
In updated version 1.1, Async Loading Screen supports display specific background/tip/movie for each level as you want. In this tutorial we'll show proper background and tip for Level_1 and Level_2:
-
Open Background setting and enable Set Display Background Manually.

-
Open Tip Widget setting, enable Set Display Tip Text Manually and add 2 more following texts in TipText array:

-
Open WBP_OpenLevelButton blueprint, in On Clicked event, set Background Index=4, Tip Text Index=2 before Open Level=Level_2 and Background Index=2, Tip Text Index=1 before Open Level=Level_1:

-
Now click play Standalone Game or Launch button, you'll see Async Loading Screen always show Background index 4, TipText index 2 when loading Level_2, and Background index 2, TipText index 1 when loading Level_1.
Congratulation! We have finished the tutorial. You should try other layouts and settings to see which is fit for your game.
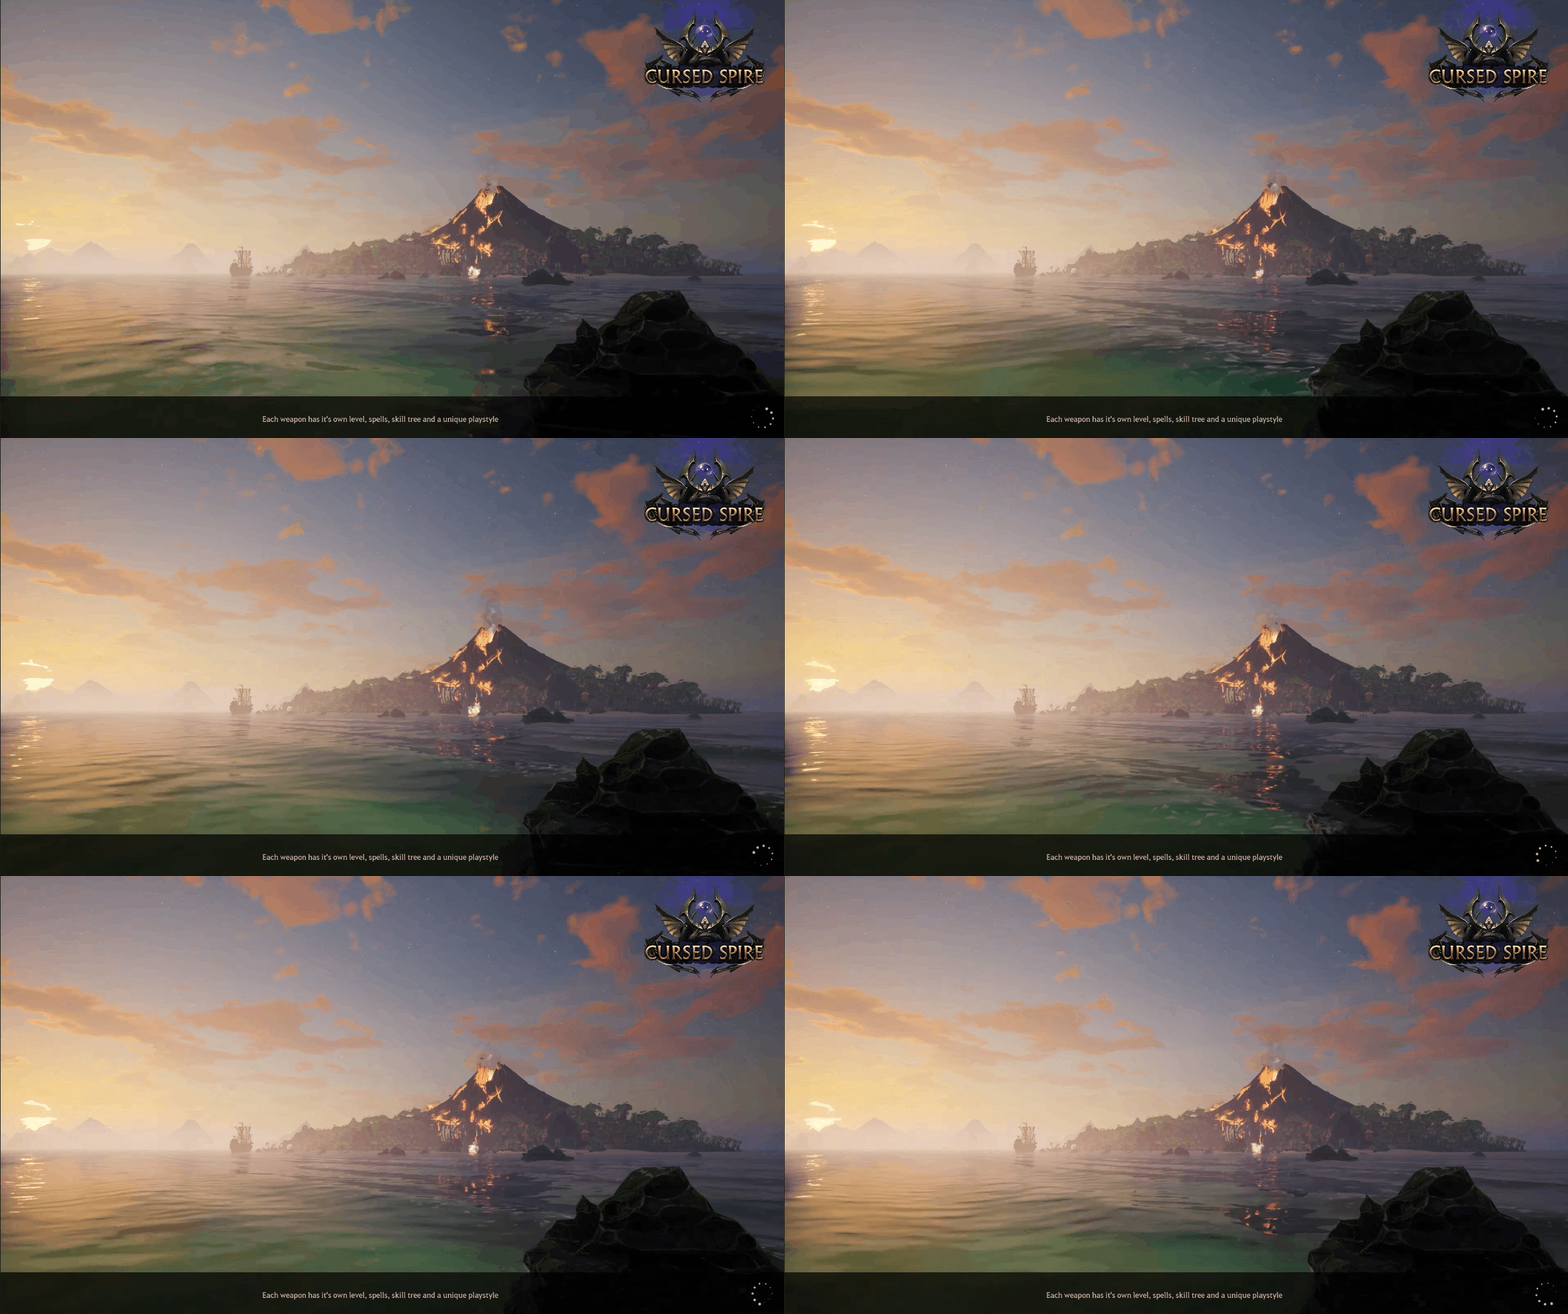
If you're using Async Loading Screen plugin in your game and would like to showcase here, shoot me an email about your game's info, including screenshots(gif/png/jpeg/video) of your in-game loading screen.
If Async Loading Screen is useful for you or your team, you can buy me a coffee to support this project.
Async Loading Screen plug-in is licensed under the MIT License.
Async Loading Screen plug-in is inspired from Loading Screen plug-in by Nick Darnell.

