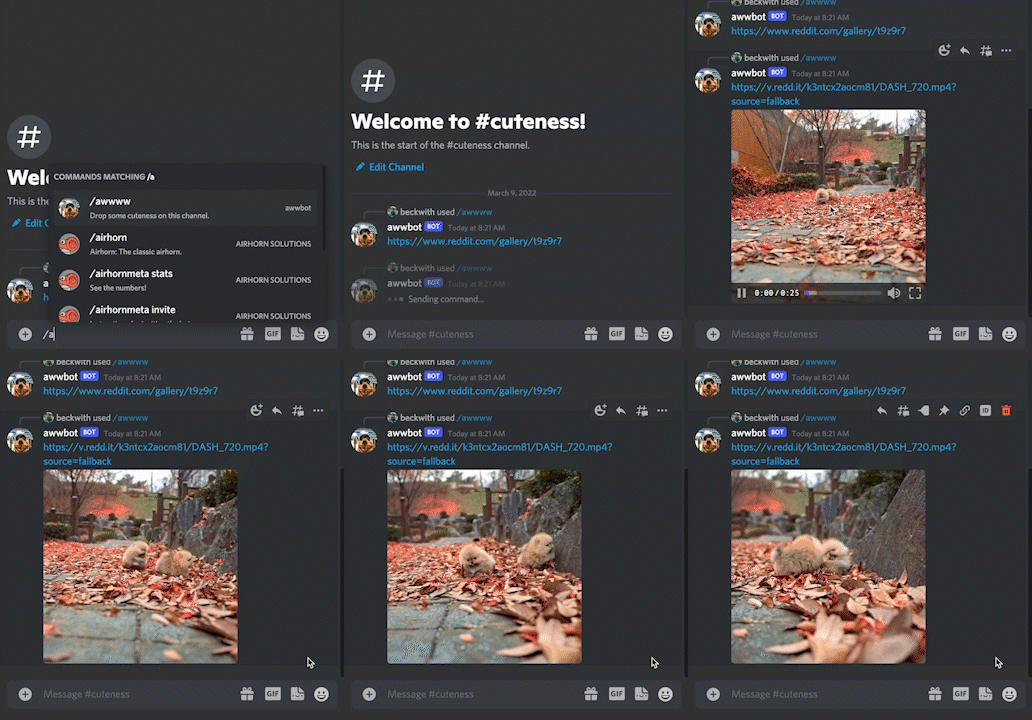
awwbot is a cute app that brings many cuteness straight to your Discord server, hosted on Cloudflare workers. Cloudflare Workers are a convenient way to host Discord bots due to the free tier, simple development model, and automatically managed environment (no VMs!).
The project is bootstrapped using the tutorial in the discord developer documentation
- Itty Router for routing
- Cloudflare Workers for hosting
Below is a basic overview of the project structure:
root
│   .dev.vars           // Configuration file for development environment variables
│   .eslintignore       // Files and folders to be ignored by ESLint
│   .eslintrc.json      // ESLint configuration file
│   .prettierignore     // Files and folders to be ignored by Prettier
│   .prettierrc.json    // Prettier configuration file
│   .gitignore          // Files and folders to be ignored by Git
│   package.json        // Node.js package configuration file
│
└───src
    │   register.js     // File responsible for registering commands
    │   server.js       // Main server file
    │
    ├───commands        // Folder containing command modules
    │       ask.js      // Command module for asking questions
    │       aww.js      // Command module for displaying cute images
    │       blep.js     // Command module for displaying images with blep
    │       canvas.js   // Command module for generating canvas images
    │       content.js  // Command module for fetching various content
    │       index.js    // Main command handler module
    │       invite.js   // Command module for generating invitation links
    │       neko.js     // Command module for fetching neko images
    │       ping.js     // Command module for testing bot latency
    │
    ├───data            // Folder containing data files
    │       catfacts.json   // JSON file containing cat facts
    │       dogfacts.json   // JSON file containing dog facts
    │       jokes.json      // JSON file containing jokes
    │
    ├───discord         // Folder containing Discord-related modules
    │       CDN.js          // Module for working with Discord's CDN
    │       Interaction.js  // Module for handling Discord interactions
    │       types.js        // Module for defining custom Discord types
    │       utils.js        // Utility functions for Discord-related tasks
    │       verifyRequest.js    // Module for verifying Discord request signatures
    │
    └───utils           // Folder containing utility modules
            reddit.js       // Module for interacting with the Reddit API
Before starting, you'll need a Discord app with the following permissions:
botwith theSend MessagesandUse Slash Commandpermissionsapplications.commandsscope
⚙️ Permissions can be configured by clicking on the
OAuth2tab and using theURL Generator. After a URL is generated, you can install the app by pasting that URL into your browser and following the installation flow.
Next, you'll need to create a Cloudflare Worker.
- Visit the Cloudflare dashboard
- Click on the
Workerstab, and create a new service using the same name as your Discord bot
First clone the project:
git clone https://github.com/LakhindarPal/awwbot.git
Then navigate to its directory and install dependencies:
cd awwbot
npm install
⚙️ The dependencies in this project require at least v20 of Node.js
💡 More information about generating and fetching credentials can be found in the tutorial
Rename example.dev.vars to .dev.vars, and make sure to set each variable.
.dev.vars contains sensitive data so make sure it does not get checked into git.
The following command only needs to be run once:
$ npm run register
Now you should be ready to start your server:
$ npm run dev
When a user types a slash command, Discord will send an HTTP request to a given endpoint. During local development this can be a little challenging, so we're going to use a tool called ngrok to create an HTTP tunnel.
$ npm run ngrok
This is going to bounce requests off of an external endpoint, and forward them to your machine. Copy the HTTPS link provided by the tool. It should look something like https://8098-24-22-245-250.ngrok.io. Now head back to the Discord Developer Dashboard, and update the "Interactions Endpoint URL" for your bot:
This is the process we'll use for local testing and development. When you've published your bot to Cloudflare, you will want to update this field to use your Cloudflare Worker URL.
This repository is set up to automatically deploy to Cloudflare Workers when new changes land on the main branch. To deploy manually, run npm run deploy, which uses the wrangler deploy command under the hood. Publishing via a GitHub Action requires obtaining an API Token and your Account ID from Cloudflare. These are stored as secrets in the GitHub repository, making them available to GitHub Actions. The following configuration in .github/workflows/ci.yaml demonstrates how to tie it all together:
release:
  if: github.ref == 'refs/heads/main'
  runs-on: ubuntu-latest
  needs: [test, lint]
  steps:
    - uses: actions/checkout@v4
    - uses: actions/setup-node@v4
      with:
        node-version: 20
    - run: npm install
    - run: npm run publish
      env:
        CLOUDFLARE_API_TOKEN: ${{ secrets.CLOUDFLARE_API_TOKEN }}
CLOUDFLARE_ACCOUNT_ID: ${{ secrets.CLOUDFLARE_ACCOUNT_ID }}The credentials in .dev.vars are only applied locally. The production service needs access to credentials from your app:
$ wrangler secret put DISCORD_TOKEN
$ wrangler secret put DISCORD_PUBLIC_KEY
$ wrangler secret put DISCORD_APPLICATION_ID


