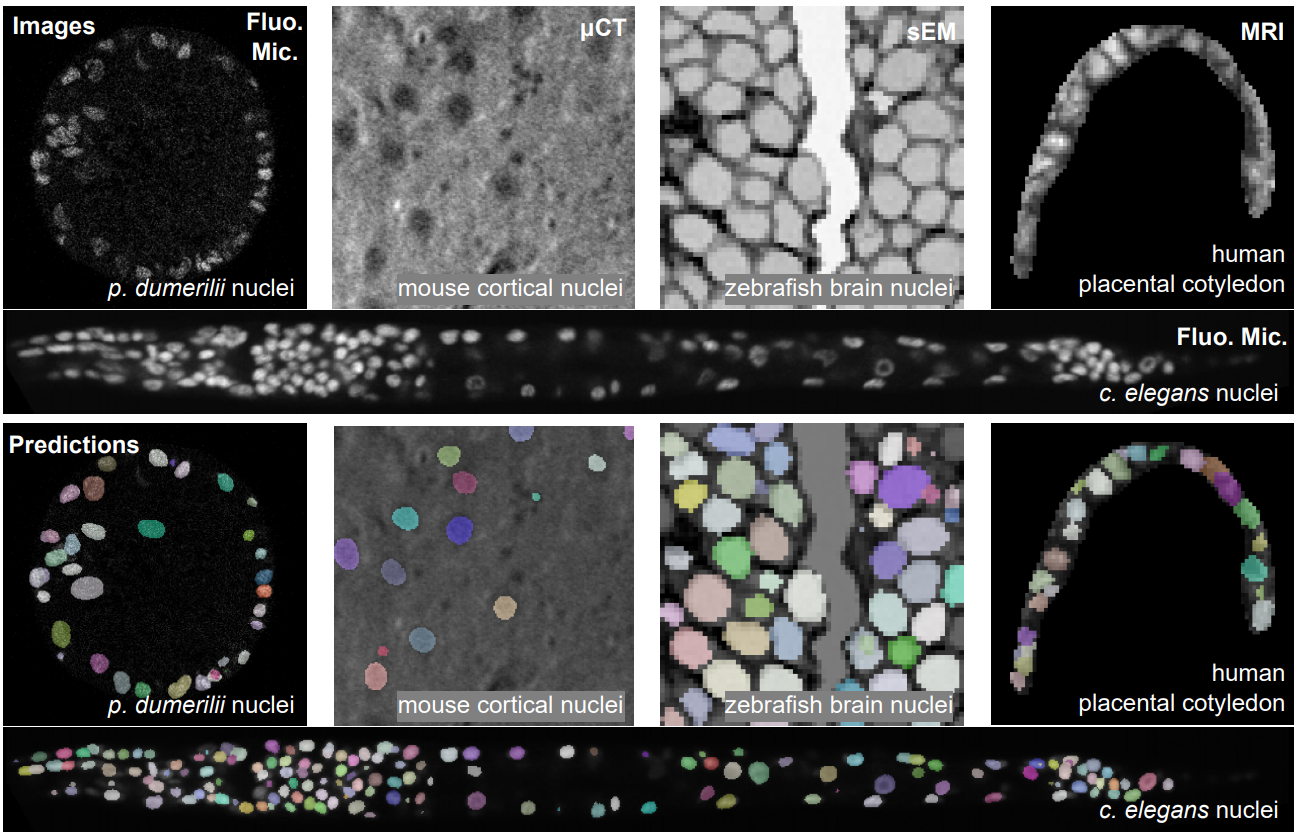
AnyStar is a zero-shot 3D instance segmentation framework trained on purely synthetic data. It is meant to segment star-convex (e.g. nuclei and nodules) instances in 3D bio-microscopy and radiology. It is generally invariant to the appearance (blur, noise, intensity, contrast) and environment of the instance and requires no retraining or adaptation for new datasets.
Please see the Colab notebook for examples of how to use the pretrained network.
This repository contains:
- Scripts (in
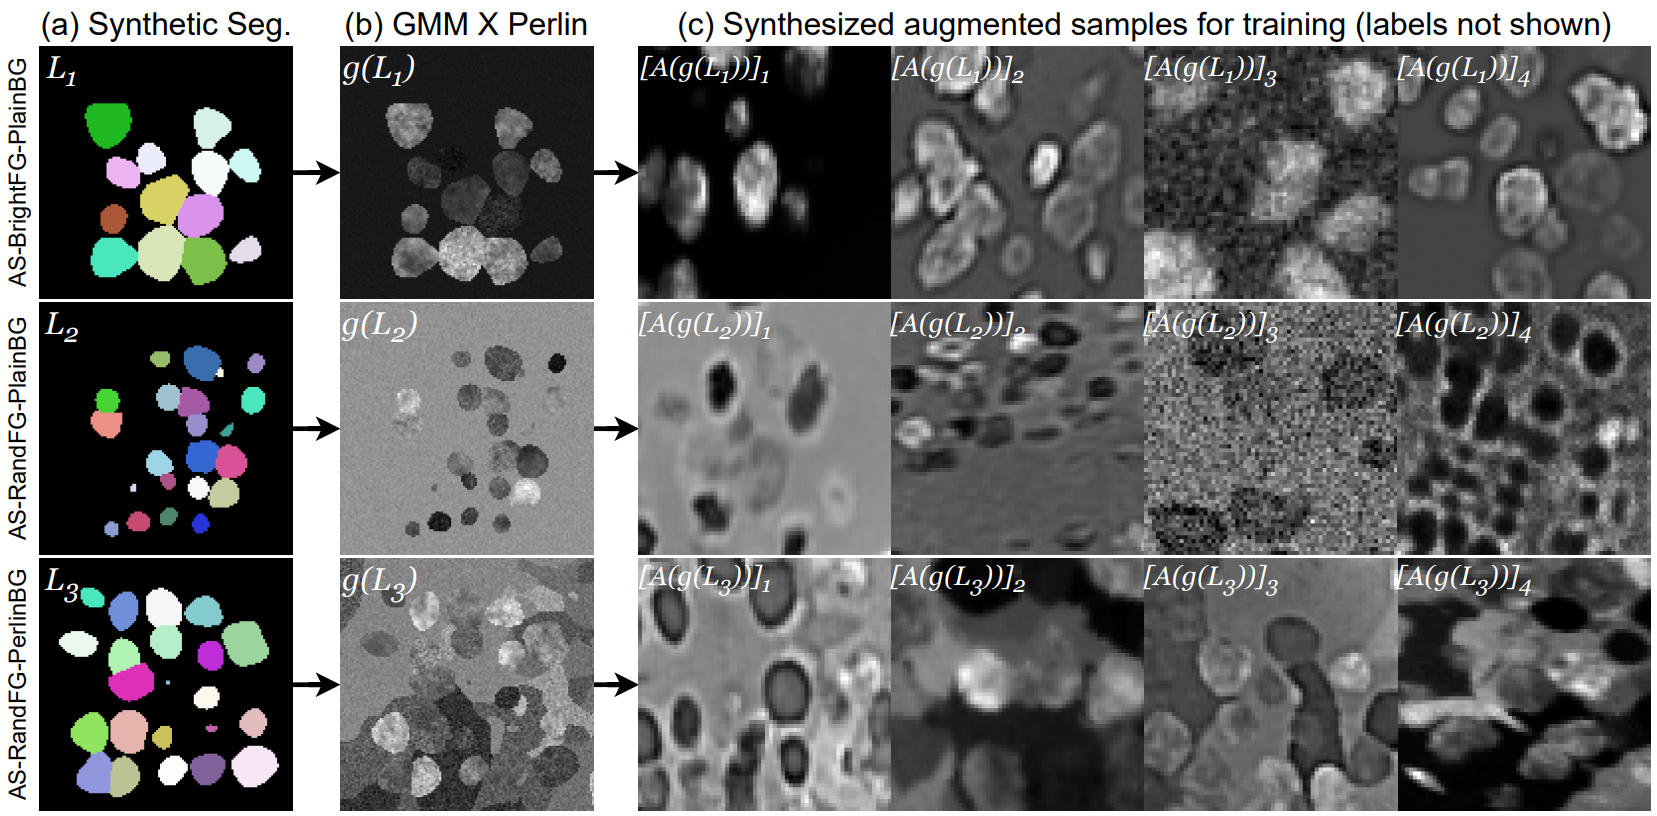
./scripts/) to generate offline samples from the AnyStar-mix generative model. While this can be run online with training, it significantly CPU-bottlenecks training. Instead we sample a ~million samples offline first and then use further fast augmentations during training. - A training script
./train.pyto train a 3D StarDist network on the synthesized data. - An inference script
./infer.pyand a pretrained model to segment your own star-convex instances :)
If you find anything in the paper or repository useful, please consider citing:
@misc{dey2023anystar,
      title={AnyStar: Domain randomized universal star-convex 3D instance segmentation},
      author={Neel Dey and S. Mazdak Abulnaga and Benjamin Billot and Esra Abaci Turk and P. Ellen Grant and Adrian V. Dalca and Polina Golland},
      year={2023},
      eprint={2307.07044},
      archivePrefix={arXiv},
      primaryClass={cs.CV}
}
- Add data generation and training code.
- Upload weights for the current paper model.
- Add example inference script.
- Add Colab notebook with best practices.
- Simplify dependencies.
We use an environment with both tensorflow (gpu) and pytorch (cpu) in it for all of the scripts in this repo.
Install from a yml file:
conda env create -f environment.ymlOr if you prefer to install everything manually:
conda create -n anystar python=3.9
conda activate anystar
pip install tensorflow==2.13.*
pip install torch torchvision torchaudio --index-url https://download.pytorch.org/whl/cpu
pip install monai==1.1.0 voxelmorph natsort nibabel stardist edt
pip install git+https://github.com/pvigier/perlin-numpyIt's highly suggested to first check out the Colab notebook.
After that, here's a script to locally run AnyStar-mix (or any StarDist network) on your own images.
The paper version of AnyStar-mix's weights are available
here.
By default,this script will look for a subfolder in ./models/ (e.g. models/anystar-mix).
Here's a sample call:
python infer.py --image_folder /path/to/folder IMPORTANT: Here are some best practices for getting optimal results:
- As AnyStar uses StarDist as its base network, the predicted centerness probability and distance maps do not require any hyperparameters. However, for the visualized instance predictions, we need to provide thresholds for non-maximum suppression and probability. These hyperparameters are dataset (and sometimes image) specific, please play with
prob_threshandnms_threshfor optimal results! Reduceprob_threshand increasenms_threshto predict more instances and vice versa. - AnyStar was trained on 64^3 synthetic 3D isotropic images and real-world images significantly vary in grid size, we use sliding window inference. Please try to make sure each window is approximately 64^3 in size. This can be controlled by
n_tilesandscale. - Rescale your image intensities to have min-max values of [0,1].
See the docstring for this function for the full arguments list.
Full CLI:
usage: infer.py [-h] [--image_folder IMAGE_FOLDER] [--image_extension IMAGE_EXTENSION]
                [--model_folder MODEL_FOLDER] [--model_name MODEL_NAME] [--prob_thresh PROB_THRESH]
                [--nms_thresh NMS_THRESH] [--scale SCALE SCALE SCALE]
                [--n_tiles N_TILES N_TILES N_TILES]

optional arguments:
  -h, --help            show this help message and exit
  --image_folder IMAGE_FOLDER
                        path containing images to segment. nii.gz or tiff imgs accepted.
  --image_extension IMAGE_EXTENSION
                        nii.gz or tiff imgs accepted.
  --model_folder MODEL_FOLDER
                        name of folder containing multiple model subfolders
  --model_name MODEL_NAME
                        name of model subfolder
  --prob_thresh PROB_THRESH
                        Softmax detection threshold. Lower detects more and vice versa.
  --nms_thresh NMS_THRESH
                        Non-max suppression threshold. Lower value suppresses more.
  --scale SCALE SCALE SCALE
                        Resizing ratios per dimension for inference
  --n_tiles N_TILES N_TILES N_TILES
                        N. tiles/dim for sliding window. Default: let StarDist decide
NOTE: Running the data synthesizer with the default settings will use a few
terabytes of storage. You may want to reduce --n_stacks in step1,
--n_imgs in step2, and --n_offline_augmentations in step3.
Run python <scriptname.py> -h to see script-specific CLIs.
cd ./scripts/
python step1_label_synthesis.py
python step2_GMM_Perlin_image_synthesis.py
python step3_augmentation_pipeline.pyIf you want to train the segmentation network from scratch, here is a sample
training run, assuming that data is in ./generative_model/outputs/.
python train.py --epochs 180 --steps 1000 --name sample_runFull CLI:
usage: train.py [-h] [--epochs EPOCHS] [--steps STEPS]
                [--batch_size BATCH_SIZE] [--parent_dir PARENT_DIR]
                [--dataset_ims DATASET_IMS] [--dataset_labs DATASET_LABS]
                [--name NAME] [--lr LR] [--losswt_1 LOSSWT_1]
                [--losswt_2 LOSSWT_2] [--nrays NRAYS]
                [--val_samples VAL_SAMPLES] [--rng_seed RNG_SEED]

optional arguments:
  -h, --help            show this help message and exit
  --epochs EPOCHS       number of training epochs
  --steps STEPS         iterations per epoch
  --batch_size BATCH_SIZE
                        Batch size per iteration
  --parent_dir PARENT_DIR
                        path to folder containing images and labels subfolders
  --dataset_ims DATASET_IMS
                        base name of training image folder
  --dataset_labs DATASET_LABS
                        base name of training label folder
  --name NAME           folder name to store run results
  --lr LR               Adam learning rate
  --losswt_1 LOSSWT_1   centerness loss weight
  --losswt_2 LOSSWT_2   distance map loss weight
  --nrays NRAYS         number of 3D rays for polyhedra
  --val_samples VAL_SAMPLES
                        number of synthetic samples to use for early stopping
--rng_seed RNG_SEED NumPy RNG seedWe make extensive use of the StarDist repository for several training and helper functions and thank its authors.

