The AutoVoucherTally (also known as TallyMain) is a comprehensive solution designed to streamline and automate the voucher creation, approval, and payment process for businesses. It comprises three interconnected applications: TallyClient, TallyMain, and TallyAccounts, each serving a specific role in the end-to-end workflow. Ideally, three different computers are required with their respective app installed.
*NOTE:- You have to be connected to the internet for this application to work.
- Overview
- MongoDB Atlas Setup
- AutoVoucherTally Setup
- Tally ERP 9 Setup
- Installation
- Packaging
- Screenshots
Let's take a brief look at the overall functionality of the entire software:
AutoVoucherTally:
- TallyClient:
- TallyClient is the front-end application that allows users to create a voucher, which includes Client name, Amount, Department and Reason for payment. The app provides an intuitive interface where users can input all the necessary details of the vouchers. Once the voucher data is filled in, TallyClient securely stores it in MongoDB, a NoSQL database, ensuring centralized and easily accessible storage for all vouchers.
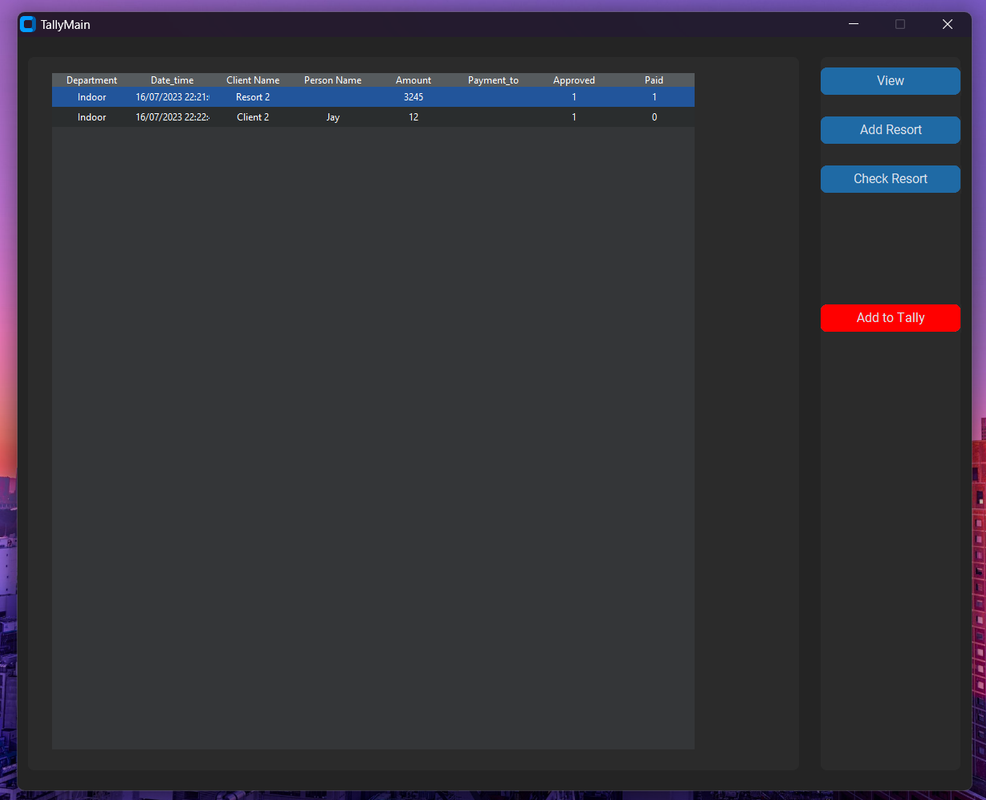
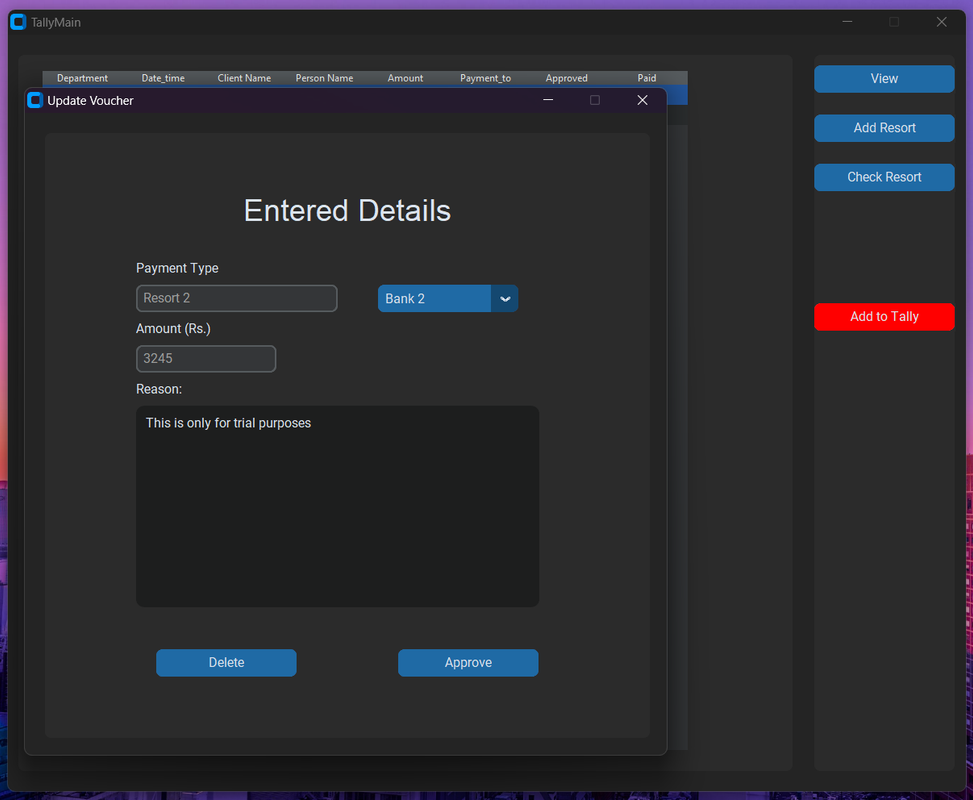
- TallyMain:
- TallyMain acts as the central processing hub of the software. It retrieves the voucher data stored in MongoDB and performs an approval process by selecting the payment method from the company's side. This approval process ensures that only valid and correctly filled vouchers proceed further for processing. TallyMain then add the entries to Tally using Tally's Server using XML. Users need not import the XML file manually to Tally.
- TallyAccounts:
- TallyAccounts is responsible for processing the vouchers that have been approved by TallyMain. It retrieves the approved voucher data from MongoDB and initiates the payment process based on the payment details provided in those vouchers. This may include online fund transfers, generating checks, or recording cash payments in Tally ERP 9. TallyAccounts updates the voucher status in MongoDB after successful payment execution, marking it as "paid".
Points to remember before use (These points a elaborated more in Setup sections):
-
Make sure you are connected to the Internet
-
Tally EPR 9 should be running in the background
-
MongoDB Atlas servers should be up (This is not a concern but just in case)
Overall, the integrated functionality of TallyClient, TallyMain, and TallyAccounts in your Voucher Automation Software streamlines the voucher creation, approval, and payment process, reducing manual efforts, eliminating errors, and ensuring accurate accounting in Tally ERP 9.
*Note: Follow this section if you are completely to MongoDB or Databases in general. I have given detailed instructions with screenshots.
This Application uses MongoDB Atlas. If you are new to MongoDB Atlas follow the steps given below:
Step 1: Make an account on MongoDB Atlas
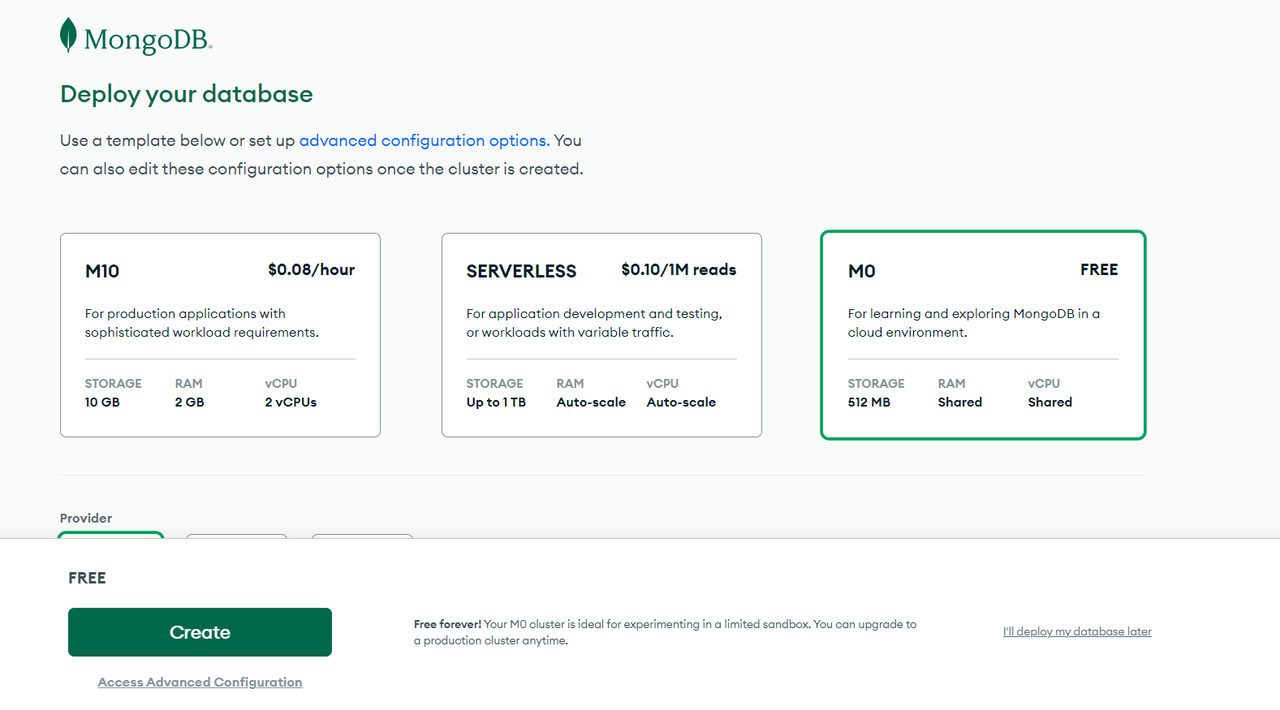
Step 2: After creating an account you will be redirected to a page where you have to select a server. I would recommed choosing free for starters.
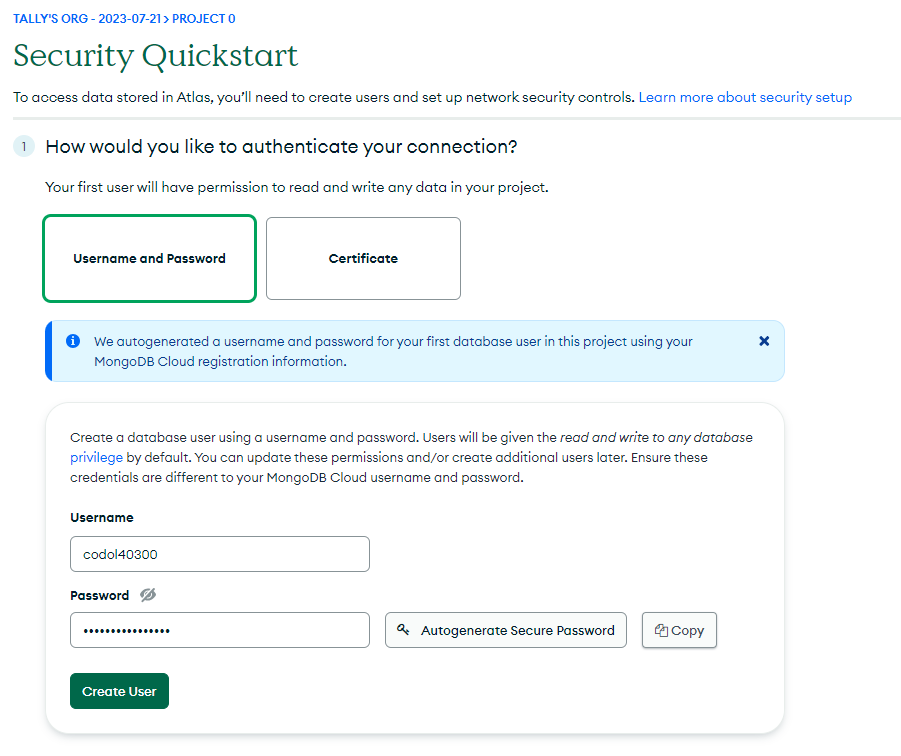
Step 3: You will then be asked to choose a username and password as a Security Check. Remember them as you will need them later.
Step 4: This part is important. You will now have to give you IP Address to MongoDB. Access to your database will only be authorized from this IP Address. This can be edited later.

Step 5: Congratulation you Databases is up and working. Now click on "Connect" button and go to Drivers.


Step 6: Select Python as driver. And you get the url that connects to you database.
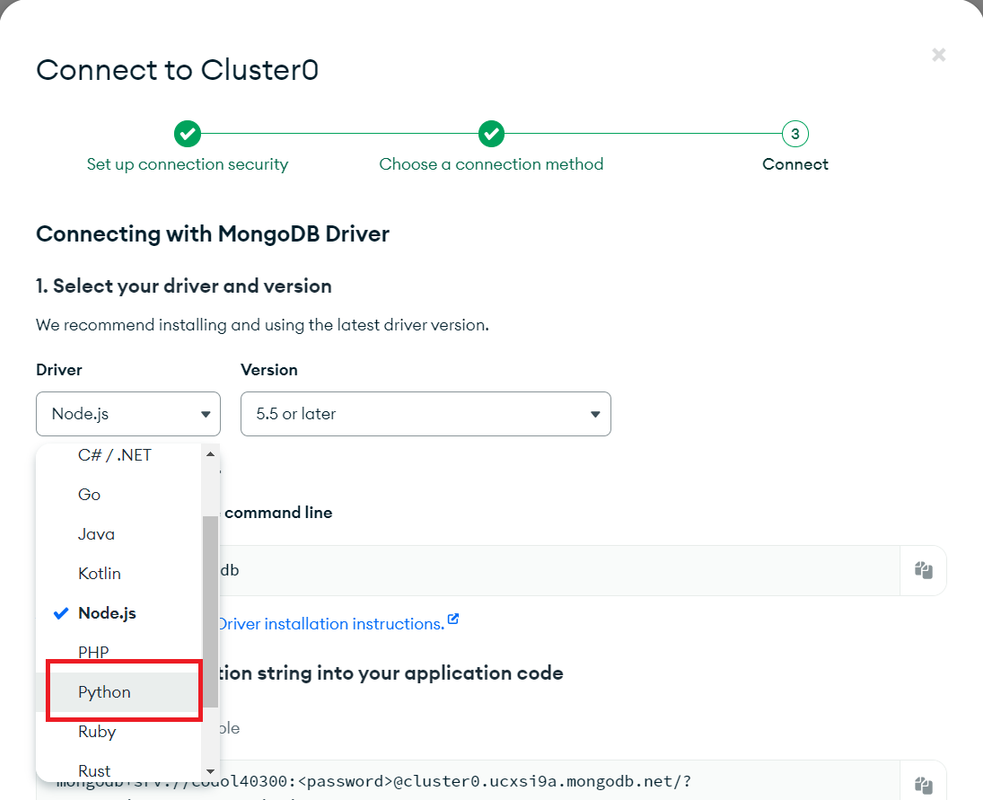
Step 7: In the link replace with the paassword you gave earlier. Your username will already be there, if not, then add it too. (Remove the angle brackets aswell in ).

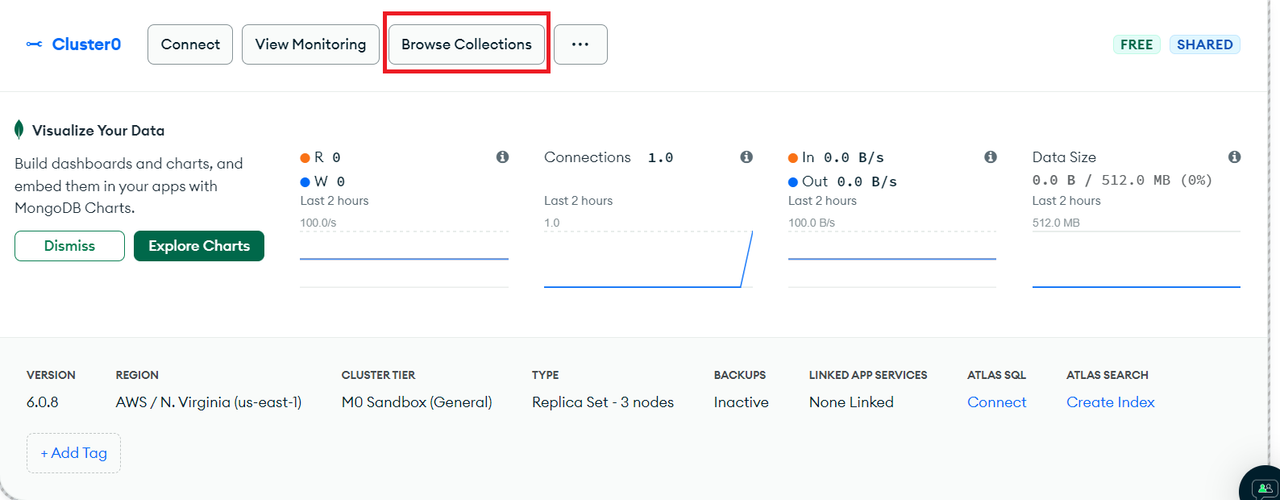
Step 8: Go to Browse Collections and you will see it is emply. There you can create a Database and Collection(remember their names as we will require it later).
Congratulation! You have you MongoDB url. Now follow the next section for further integrating it to AutoVoucherTally.
You can get all the files for the project by cloning the project repository.
git clone https://github.com/jaypunekar/AutoVoucherTally.gitGo to the project directory
cd AutoVoucherTallyYou will get all the files in AutoVoucherTally directory.
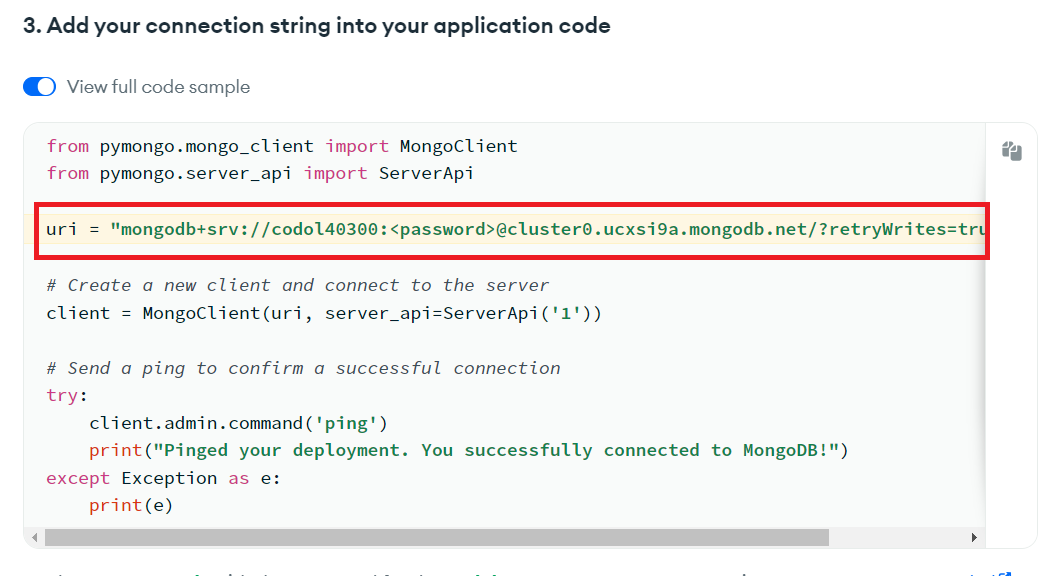
Step 1: There are two files that contains the code we are concerned with. i.e. main.py and util.py. In both the files you will find a section right after imports where the code to connect to MongoDB database is there.
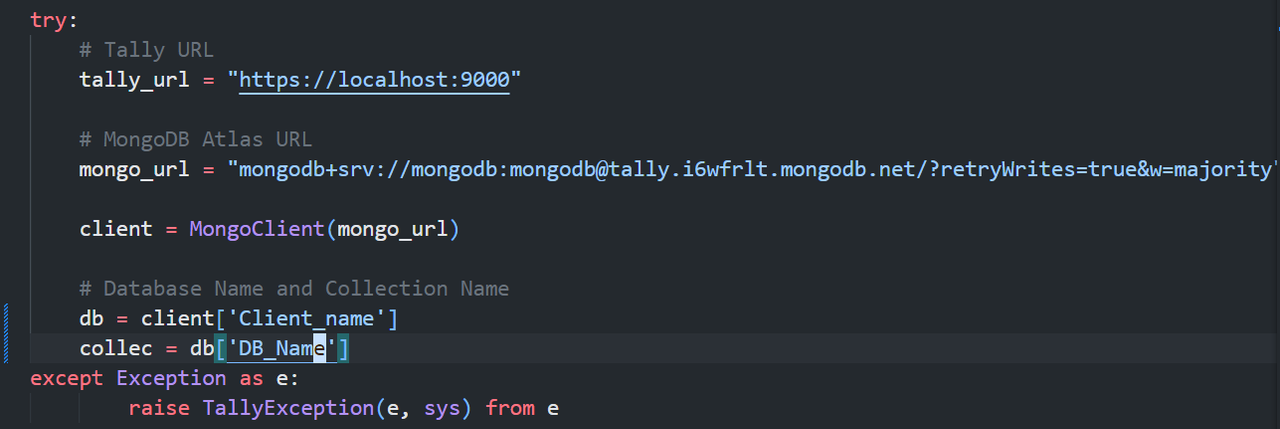
Setep 2: Change the mongo_url to the url you got earlier while setting up MongoDB Atlas. And change the database name and collection name as well (You should have all of it if you have followed the MongoDB Atlas Setup section). Change the code in both (main.py & util.py) the files.
*NOTE:- Keep localhost as it is.
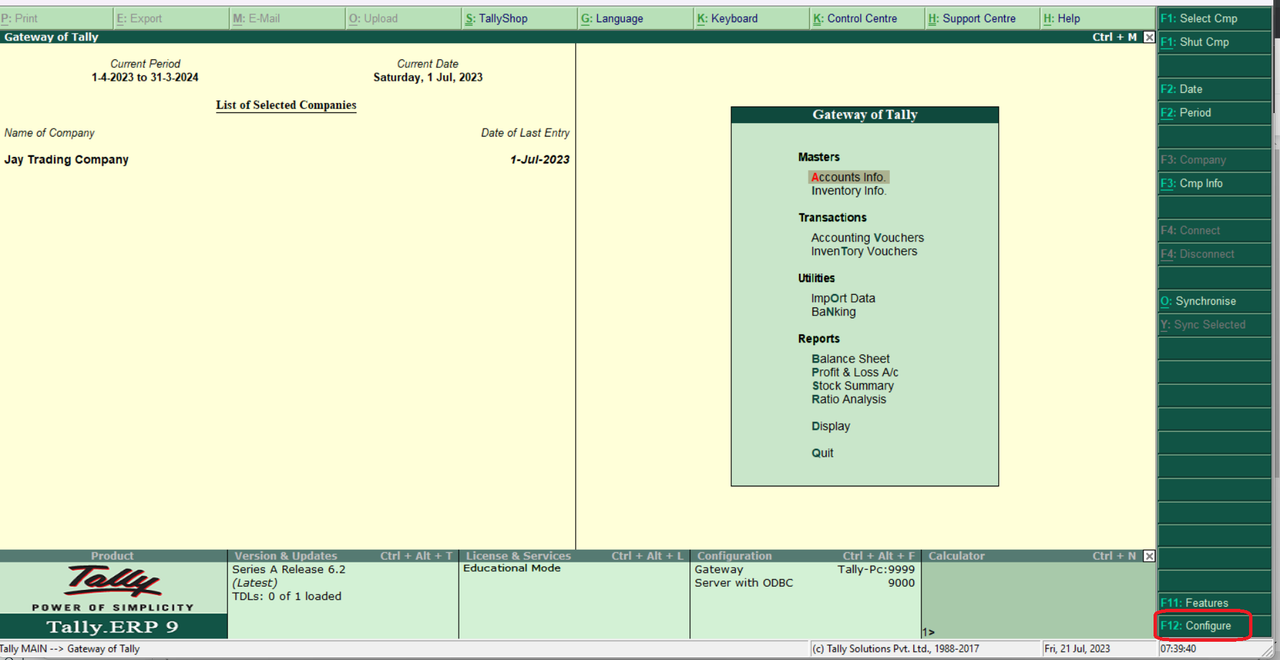
Setting up Tally ERP 9 is reletively simple. We just have to make Tally ERP 9 as a Server. By Default it acts as a Client.
To do so. Open Tally EPR 9 and press F12 it will take you to configure page. Then go to Advance configuration make Tally as a Server.


There is also a helpful youtube video on the same by Software Codecs Here.
You should have already run first two command if you followed AutoVoucherTally Setup
Clone the project:
git clone https://github.com/jaypunekar/AutoVoucherTally.gitGo to the project directory
cd AutoVoucherTallyCreate conda virtual enviornment (This step in not necessory. Also, anaconda should be installed in your syetem for this to work):
conda create -p venv python==3.7 -yconda activate venv/OR
conda activate venvInstall dependencies:
pip install -r requirements.txtTo run the program using Terminal:
python main.pyOR
python3 main.pyIn the Terminal (In AutoVoucherTally dir) run:
pyinstaller --onefile main.py Then run:
pyinstaller --name TallyMain --onefile --windowed --main.pyIf you want to add an icon run (icon.ico should be in AutoVoucherTally dir):
pyinstaller --name TallyMain --onefile --windowed --icon=icon.ico --main.py